Drawing trick for beginners
If you are still wondering how to draw a hedgehog step by step with a child, then you can resort to a little trick. Buy or print a coloring book with a hedgehog. Place a blank sheet of paper under the coloring book and trace the outline. Apply a little more pressure than usual on the pencil.
As a result, an almost invisible outline is formed on a blank sheet of paper. You don’t even have to trace it, but just start coloring it right away.
How to teach a child to draw a hedgehog
First, draw the hedgehog yourself, and then show your child how you did it. If the baby is having a hard time, then help him. You can draw the outline of the animal in advance, and then paint it together. Or make blanks with ovals, on which the child will independently apply the remaining details and draw needles. Over time, he will know how to draw a hedgehog with a pencil step by step, will add his own details, develop attention and creativity. After all, drawing is an excellent way to teach children not only painting, but also other sciences and activities. For example, during the creative process you can sing, learn poetry, multiplication tables, etc.
Now you have learned how to draw a hedgehog with pencil and paints. Teach your child this cute and simple drawing and he will be delighted. By studying with your children, you will not only teach them, but also learn a lot of new things for yourself. Your child will know how to draw a hedgehog. For children, this is not just a picture, but a whole work of art. Don't forget to praise your child at the end and tell him how well he did. Be attentive to your children, help them. Learning should take place in the form of a game, then the material will be better absorbed and retained in memory longer. Therefore, while drawing, it wouldn’t be a bad idea to tell your child about the animal you are drawing, what it eats and where it lives, and teach your child the colors of pencils and the names of the shapes.
Complexity:
(2 out of 5).
Age:
from three years old.
Materials:
a sheet of thick paper, wax crayons, a simple pencil (just in case), an eraser, watercolors, a palette with indentations for water, a large brush.
Purpose of the lesson:
we go through or consolidate knowledge about the shape - oval (hedgehog body), definition (horizon line).
Progress:
the child draws a large oval (future hedgehog), draws needles, and tints the leaf blue (sky) and green (grass).
Take a brown wax crayon and draw an oval in the middle of the sheet until you get a beautiful and more or less even figure. If the child is not confident in his abilities, let him draw with a simple pencil; an eraser will help correct mistakes.
We finish drawing the face with an eye and nose, and paws. You can immediately color them with crayons. Next, the baby must choose the color of future needles. Our hedgehog will have needles in the form of dashes.
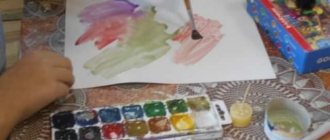
In this task we will use paint earlier than usual. Take brown paint and dilute it in the palette with plenty of water. Let's use a large brush and apply paint to the hedgehog's body. Due to the fact that we painted the needles with wax crayons, watercolor diluted in a large amount of water will roll off them and form water balls, which can be easily removed with a napkin. But don’t rub too hard, just apply a napkin so that the water is absorbed by itself.
While our hedgehog is drying, draw a horizon line. The horizon line is the line connecting sky and earth.
The more often a child hears definitions, the faster he remembers them. Place this line so that it appears that the hedgehog is walking on the grass.
We dilute blue (for the sky) and green (for grass) in a liter with plenty of water. And we begin to apply paint with a large brush from left to right and from top to bottom. We take a short break while finishing painting the sky to let the paint dry. Then we finish painting the green grass in the same way.
The hedgehog is a cute, funny animal. Slow, prickly and clumsy. Both children and adults love him. Hedgehogs belong to a special family of insectivorous mammals. These animals live alone and in pairs. The hedgehog is a small animal. The length of its oval body is about 30 cm. Hedgehogs are predominantly nocturnal. During the day they sleep in nests, which they make in bushes, holes or tree roots. At the slightest danger, the hedgehog curls up into a ball with prickly needles sticking out. He sleeps in the same position. Children often ask about how to draw a hedgehog. Knowing certain techniques, this is not difficult to do.
Let's prepare a sheet of paper, a sharp pencil and an eraser. Using short descriptions, we learn this step by step.
1. First we make the first contours of the hedgehog’s body and head. The larger oval is the body, and the smaller oval is the head. The lines should be light so that the drawing can be adjusted if necessary.
2. The second stage is the most important, since you need to draw the hedgehog in such a way that from two ovals you get a muzzle with a sharp nose and four legs. We outline the location of the eye.
3. Now we connect two ovals, outlining them with a smooth outline. We draw ears. They should be from different angles. Shade the tip of the nose and eyes. Leave a white highlight in the middle of the eye. This gives life to the image.
4. The hedgehog became like himself. We remove all unnecessary strokes, leaving only the necessary contours. We mark the boundary between the lower part of the body - the abdomen - and the upper, covered with needles.
5. How to draw a hedgehog without its spines looking like those of a porcupine? To do this, we make them not long, but in a herringbone pattern, as in the picture. Don't forget about the border of the lower body. We leave it unshaded. One more point: the porcupine’s spines stick out vertically. In a hedgehog they are located at a slight angle.
6. By following the given instructions, you will understand how to draw a hedgehog with a pencil. We used a simple graphite pencil. At the final stage, the drawing can be colored with colored pencils, gouache or watercolors. Or you can leave the black and white version. Before coloring, you need to determine the colors you will work with: white belly, brown muzzle, gray needles. Make sure that the paint does not extend beyond the outline of the drawing, otherwise it will be blurry and unclear.
Hedgehogs are often depicted in pictures in children's books. They are the main characters in cartoons and children's stories. How to draw a hedgehog in such a way as to make it a bright hero of the plot, and children of primary school or kindergarten could compose a story based on this picture? To do this, you can depict an animal in a mushroom meadow or in a country garden flowerbed, in the forest; with an apple, strawberry or autumn leaf on the back, among bright flowers.
Children can write stories about this animal and share their impressions of a real meeting with it. Greeting cards with a drawing of a funny hedgehog for a birthday, Christmas or New Year can be a wonderful gift for friends and family.
If you are trying to develop creativity and drawing ability in children, you will have to learn how to make images not only of houses and vehicles, but also of animals. In this article we will talk about how to draw a hedgehog step by step and teach it to children.
To begin, take a suitable sheet of paper and drawing supplies. It is very convenient to use a simple pencil, and then apply colored or paints to create the desired color. Using pencil shading also turns out beautifully, but not everyone knows it.
From this article you will learn
Lesson 3. Drawing a hedgehog from “Smeshariki” step by step
The topic of drawing animals in cartoons is very interesting. Each artist approaches this issue in his own way. We invite you to depict the hedgehog as the creators of the animated series “Smeshariki” see it. The heroes of this good and educational cartoon have been delighting children of several generations for years.
The step-by-step plan for drawing such a hedgehog requires a little more time. But this does not mean that such a drawing is more complicated. Drawing a Smesharik is as easy as drawing any other hedgehog.
Tools:
- paper;
- a simple pencil;
- eraser;
- You may need a compass.
Step-by-step instruction:
- Draw a circle in the center of the sheet.
- We draw horizontal and vertical lines so that they intersect in the center of our circle and divide it into four equal parts.
- Draw two smaller circles in the two upper sectors. These will be the eyes of a hedgehog. It is necessary that they are shifted to the center of the large circle.
- Next, we draw another circle around the eyes and combine them according to the principle of an inverted number “8” - these are the character’s glasses.
- A little higher above the glasses we draw two eyebrows - two small rectangles at a slight angle. This will give the expression of the muzzle a slightly surprised and good-natured look.
- We finish the eyes by drawing the pupils.
- Now we draw a small triangular nose, almost directly below it is a triangle-mouth.
- Thorns. These will be five triangles combined into one “crown”. To do this, first draw the two side triangles and the top triangle. Then between them - another triangle.
- At the bottom of the silhouette we draw two “pear-shaped” legs.
- To complete the drawing, trace the outline with a black felt-tip pen and remove all unnecessary lines with an eraser. You can color the hedgehog, or you can leave the picture in black and white.
As you can see from the lessons, drawing a hedgehog is very simple. Let the minutes spent drawing be a joy and benefit you and your child!
How to draw a hedgehog with an apple using paints
To begin, draw an oval, as in the previous version. Draw a circle on top, which will later become an apple. Draw the face and nose of the hedgehog, his paws. When the outline is drawn, you can start decorating with paints.
Start with an apple. Give it shape, add shadow and shine to the fruit. Then decorate the paws and face. Finally, take care of the needles. Don't forget to add a shadow under the hedgehog. Paint with one color first, such as brown. Let it dry well, and only then can you paint it with a different color over the first one. This must be done so that the colors do not mix and the lines remain smooth.

