How to draw a city with a pencil step by step.
Content
Drawing landscapes with mountains, rivers, lakes and forests is a pleasure. However, now we will learn how to draw a city. Let's look at the step-by-step drawing process in detail. So let's get started!
Necessary materials:
- colored pencils of yellow, brown, green tones;
- simple pencils;
- ruler;
- eraser;
- sheet of white paper.
Drawing steps:
1. We begin to develop the city, for this, first of all, we need high-rise buildings. First, let's place two such buildings. The height and width may differ from each other. To make further drawing easier, first of all we draw a horizontal line on which all the buildings in the city will be placed.
2. Let’s draw one more building on the left and right sides. In this picture there is one building that is taller than all of them; let’s draw a semicircle just above its top. But on a small building located on the left side, we will draw a pitched roof.
3. Let’s add some skyscrapers in the background. The building on the right side has an interesting upper part. Next, you should use your imagination and come up with your own building design. We will draw exactly these tops of the building. Let our city become the metropolis of the future!
4. Let's add a few more buildings and draw the top of one of them, which will house a television antenna or the office of one of the TV channels.
5. Now let's move on to a detailed drawing of the entire drawing. We will add windows to each building. Each building will have different shaped windows. Detailing the television tower. Let's add trees and other vegetation to the drawing. If you wish, you can add more cars, shops, people walking or rushing to work, etc.
6. For the brightness and saturation of our drawing, we use a simple pencil marked B8 or B9. These pencils are soft and can create dark lines. We outline the entire drawing.
7. Use a brown pencil to color the tree trunks. But let’s start greening the trees with light green.
8. Darken the trees and bushes with a dark green pencil.
9. We will decorate the windows with a blue or light blue pencil.
10. Finally, color the buildings with yellow and brown pencils.
So the drawing of a modern city is ready!
If you find an error, please select a piece of text and press Ctrl+Enter.
moy-karapuzik.ru
Materials
The selection of materials depends on the technique and image style. We recommend starting with a simple black pencil. With its help, it will be easier for you to start mastering other areas.
Subsequently, you can use different colors to apply paint. Other tools you will need are gel pens, watercolors, paper and a ruler.
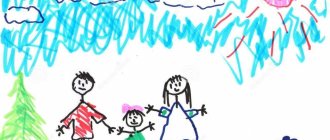
Drawing “My Home”
Today our guest is Lyubov Medvedeva , who brought us a beautiful drawing of a house .
Hello! I would love to take part in your competition.
I really like to draw; as a child I dreamed of becoming an artist. She invented different stories, tried to write elements for them, and designed any work colorfully.
But time passed. We live in a rural area and we didn’t have any drawing clubs, so I didn’t become an artist. Very disappointing….
When I saw an announcement about a competition in kindergarten, I took the plunge and this is what I came up with.
Drawing of a house
In the center I have a house, “my home, my fortress.”
1. First I draw the base (sketches with a simple pencil, barely noticeable).
2. Then I draw the roof. I want to show that it is made of tiles.
House drawing - step 1
3. Then I start drawing the front part of the house (my house is almost the same) with the attic.
4. I painted the lining with a rich crimson helmet to make the design brighter.
House drawing - step 1
5. What is a house without a garden? Without my favorite flowers? I draw a tree and flowers.
6. Then I draw the husky dog that we got in December.
7. Next to the husky, of course, I draw the booth in which it lives.
House drawing - step 3
8. And then I draw summer, the sun, a light breeze that sways the leaves of the trees and floating clouds across the sky.
Drawing of a house from Lyubov Medvedeva
And now my drawing came to life. The result is a living picture - there is a house , a dog is tied to a booth. She understands how generous and kind the owner named Fomka is to her. He feeds and waters her, cherishes her, he is the most reliable comrade. And the husky thinks how she is without him. Would definitely disappear, don’t you know?!
I painted the picture with love. At first I wanted to call the work “My Home, My Fortress,” since a man has a house and a dog has a house (I was kind of comparing), but when I wrote a short poem, my thoughts changed and I called the painting: “THE MOST TRUSTFUL FRIEND.”
Here we can also compare that a dog is a friend to a person and a person is a friend to a dog. The dog has such smart and kind eyes and she understands you, although she doesn’t talk. THE MOST TRUSTFUL FRIEND / Lyubov Medvedeva
My house is on the edge of the village,
A very friendly family lives there: Our dad, daughter, son and I seem to be all together for now.
We recently got a dog, Such a miracle is like a “bun”, We gave her a nickname - we called her Alma, We assigned her a secluded corner.
She lives with us and has become dear to us: Like a member of the family, like the most faithful friend, She lives without worries and does everything around her.
We feed and water our child, play and run after her. She reciprocates our kindness in kind and we are partly pleased with her.
You are very brave, so brave, You will come to our aid and save us, You are simply the best dog, Our faithful and reliable friend in life.
Such a creative person visited us today - LYUBOV MEDVEDEV - and draws beautiful houses and writes poems
wunderkind-blog.ru
What you need for work
Drawing is a purely creative process, but even this process requires a certain organization. The master will need a workplace. For children, this is a wide table, a comfortable chair and high-quality lighting.
For an adult with proper artistic skills, an easel will come in handy. To display slides for comics, it is better to stock up on a special table where the working platform is located at an angle of 35 degrees.
Also, depending on the chosen art technique, you may need:
- Watercolor.
- Gouache or acrylic paints.
- Brushes in several sizes.
- Pastel crayons.
- Simple pencils of various diameters and colored pencils for children.
It is better to always have an organizer on hand, in the cells of which it is convenient to store consumables and tools (brushes, bottles or tubes of paint, hand rags).
How to draw a city with a pencil step by step
The city is where you might live. The city has many streets, houses, trees and people. There are small cities on Earth, and there are large cities - megacities - with a population of several million people. City dwellers get used to the noise of the streets, to the horns of cars, to the bustle and crowds on the streets. You may have tried to draw city streets and houses. Let's learn how to correctly draw a quiet city street in pencil step by step using the rules of perspective and proportions in the drawing.
Stage 1. We will draw a piece of a city street that goes away from us into the distance. That is, in the foreground we will have large objects; as we move away from our eyes, the size of all elements will decrease. The rules of perspective in the drawing are used here. We draw two lines in the middle, they are parallel to each other. On the right we show two lines diverging in perspective. On the left is a line at the bottom and two lines forming an angle at the top.
Stage 2. Let's start drawing the walls of the houses. Ahead of us we draw two straight lines running parallel to each other. One is higher, the other is lower. From the high line we move the line to the side. This will be the wall of the building located in front of us. On the right we raise the wall and draw a door.
Stage 3. Now let's draw the roofs of the houses. On the left we make them pointed, since this house is visible to us from the side. On the right too. But the roof of the front house is positioned differently.
Stage 4. Now we will draw additional features under the roof of the left house. Below we show the line of the sidewalk. From it we build straight entry lines. On the right we draw wavy lines of the sidewalk, going forward and turning to the side.
Stage 5. Let's continue drawing the door in the left house. And near the right house, in a small protrusion of the sidewalk, we draw a spreading tree that decorates this street.
Stage 6. The entrance to the left house is a door with a small canopy. Let's draw a window under the canopy. Next to the sidewalk near this house we show elements - dining tables and chairs. Let's draw a vase with flowers on the table. There is a cafe on the lower floor of the left building. And in the right house we will complete the elements on the front door.
Stage 7. We will show a trash can near the table. There is a hanging lamp above the entrance. There is a street lamp nearby. On the right house we draw pipes on the roof.
Stage 8. Now we draw windows in all three houses. Please note that they are of different types everywhere. Rectangular, square, arched. There are a lot of windows, especially in the house in the middle of the picture.
Stage 9. Now we erase all the sketches, leaving nothing unnecessary. This is what your drawing should look like in black and white. You can, of course, make it brighter and color it. You will get a cityscape. Now you can, looking from the window of your apartment, also draw your city street if you live in the city. Do not forget the rule that objects in the foreground are larger, those in the background are smaller, and all lines must go into perspective.
SIMILAR LESSONS
vserisunki.ru
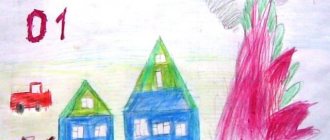
Drawing a city with children
First, the foreground is sketched.
- Schematically depict a green area with trees here.
- Next, let's start drawing houses. Take a ruler and draw elongated rectangles to indicate their locations. Make houses more realistic by adding siding, painting windows, and adding TV antennas on top.
- Color the elements with bright and colorful details: make the tree trunks brown, the crown green. The houses can be left white or painted grey.
- Hang a colored sign or clock face on some buildings.
- To make the image even more beautiful and clear, take a gel pen and trace the outlines of each element with it.
Step-by-step master class: how to draw a city
Of course, you want to master the initial skills of urban landscape, since you are on this page. Well, you're just at the right place. This is where you will find the most detailed instructions on how to draw a city. Moreover, the first part of the master class is devoted to two-dimensional drawing, and the second gives the basics of a three-dimensional image, as they say now, in 3D format.
The secret... is in geometry
Have you ever wondered why even the most inexperienced viewer is hypnotized by the sight of a painted city? There is no mysticism in this. The secret is that the human brain loves order, system, repeatability of lines. He finds it breathtakingly beautiful. This rule is fully consistent with the urban landscape: symmetry and asymmetry, strictness of lines, smoothness of circles and precision of angles. Geometry, in a word. You will do absolutely the right thing if, in addition to a pencil, an eraser and a thick sheet of paper (for drawings), you stock up on a ruler.
Lesson 1: "High-rise buildings"
To understand how to draw a city, just follow the illustrations. Repeat the details of each step. The gray lines will “suggest” new shapes that should be drawn at the moment.
Step 1
Just two rectangles of different heights (future skyscrapers) - and the beginning of the picture has been made:
Step 2
Draw a couple more skyscrapers:
Step 3
Add rectangular elements for the facades of the background buildings:
Step 4
Draw the pictures of the house furthest from the foreground:
Step 5
Pay attention to the most inconspicuous components of the architectonics of the drawing:
Step 6
Draw some small fragments, focus on the details:
Step 7
Despite the fact that the windows in the picture are the tiniest details, they are far from being of secondary importance. Carefully, under the ruler, draw each of them, and you will not regret the time spent:
Step 8
Remove all extra lines. This is what you should end up with:
Like? It's only the beginning! 3D graphics are coming!
Lesson 2: How to Draw a City with Perspective
To achieve a volumetric effect, you need to follow simple rules of perspective. In order for the drawing to become dynamic, you first need to determine the horizon line - the place where the sky meets the ground, and the vanishing point - the area in which objects shrink and disappear.
Here, take a look at the sketch of the drawing in which the perspective “runs away” into the distance:
And here is the drawing and the final version, where the perspective tends upward:
And the master class will show you how to draw a city with two vanishing points:
Step 1
Divide the sheet in half with a vertical line. Mark vanishing points on the horizon that are equidistant from the vertical on both sides. Extend vertical working lines from them to the central part, as shown in the figure:
Step 2
Using light movements, mark barely noticeable auxiliary lines. Add three parallel features, and the outline of the first, key building appears in front of you:
Step 3
Notice how the buildings are positioned, moving away from the viewer towards the horizon. Label each:
Now is the time to finish drawing doors, windows, signs and other significant details. Remember, the more elements (pillars, sidewalks, pedestrian paths, even traffic lights), the more naturalistic the picture. When finished, erase all unnecessary lines and draw the contours well. Add shadows and your drawing will come to life. Don't forget to take into account the direction of the sun's rays when shading. The most illuminated places should be the least painted.
That's how you learned how to draw a city in volume. In fact, there can be not only two points of convergence, but also more. Five, for example. Then your drawing will look as if the city was photographed with a fish-eye lens. In this case, the image takes on a convex appearance, as if the houses had the intention of jumping out of the picture.
Clue
The more unexpected the artist’s perspective and angle of view when looking at the urban landscape, the more fascinating and lively the picture turns out. No less interesting are the motifs on the theme of the future. How to draw a city of the future? There can be no clear answer on this matter. For the landscape being created is a figment of the artist’s imagination. Who can know what pictures appear before his mind's eye? But there is only one basis, and we just told you about it and showed it. Try it, create it! And who knows, maybe it will turn out to be not even fiction, but a prediction...
fb.ru
Sketching houses from the foreground
From the left side to the support point, draw several vertical lines to indicate the position of multi-story buildings. If you are an experienced enough artist, you can easily do this by hand.
For beginners, we recommend using a ruler. Be sure to ensure that the lines of the houses are perpendicular to the edges of the sheet.
Do the same manipulations on the right side. The top and bottom of the buildings should coincide at the central reference point of the vault. You shouldn’t draw a lot of buildings at once; two or three will be enough, and add the rest in the process of subsequent work. The main thing is to maintain harmony.
Didactic material on the topic Our home, our city, our country
Assignment: Read a story to your child, answer questions with him, and then play games.
“There are a lot of countries on Earth. Our country is Russia. This is our Motherland, the place where you were born, where you live with your parents and friends.
Each country has a flag, anthem and coat of arms. Our Russian flag has three stripes. White means purity and justice. Blue is a peaceful sky. Red - strength and beauty. This flag was introduced into Russia by Tsar Peter the Great. When the national anthem is played and the national flag is raised, the citizens of this country stand.
Each country also has its own coat of arms. The coat of arms of Russia is a double-headed eagle.
Our Motherland is huge, it has a lot of cities, villages, rivers, lakes, seas. The most important city in the country is called the capital. The capital of Russia is the city of Moscow. You live in a city, town or village, and this place is necessarily marked on the map.
But besides this, each person has his own home. People all over the world live in a wide variety of homes. They build them from various materials. Some houses are built of brick or stone, others of wood, clay or reeds.”
Ask your child questions:
— What is the name of our country? Name the capital of our Motherland. — What color is the flag of our country? — Who introduced this flag into Russia? — What is the name of your hometown or village? - Give me your home address. — What material can people build their house from?
1. Complete the sentence.
My country is called ... (Russia) The capital of our country is ... (Moscow city) My city (village) is called - ... My home address is ...
2. Choose as many words as possible to match the adult’s word.
Country (which?) -... (huge, beloved, beautiful, only, rich, powerful, endless) City (which?) -... (big, small, clean, green, well-groomed, dear, etc.)
3. Who lives in their native land? Circle the plants and animals that can be found in your area.
4. There is always a lot of traffic on the streets of our cities and therefore you need to be careful. Look at the pictures and tell which child is behaving incorrectly. Highlight them.
5. A red car drives to a house with a blue garage. Travel with the car: tell it what it will go past, where it will turn, where it will stop and why before it reaches the garage.
6. Name the parts of the room and the house.
Door, window, ceiling, floor, walls.
Balcony, stairs, roof, walls, windows, doors. (House)
7. Help each hero find his home. (Draw the lines). Think like this: “Carlson lives on the roof,” etc.
8. Name the rooms in the house.
Living room, bedroom, hallway, bathroom, children's room, kitchen, utility room (storage room), dining room.
9. Choose as many words as possible that will tell you what we do in different rooms of the house (apartment).
In the living room (what are they doing?) – watching TV, relaxing, receiving guests. In the bedroom (what are they doing?) - they sleep, rest, In the hallway (what are they doing?) - they dress, undress, take off their shoes, put on their shoes, greet, see off (guests). In the bathroom (what are they doing?) - they wash, shower, take a shower, bathe, brush their teeth, comb their hair, etc. In the nursery (what are they doing?) - they play, teach, study, sleep, relax, etc. In the kitchen (what are they doing?) - they cook, boil, fry, cut, wash (dishes), eat, etc. In the dining room (what are they doing?) - they have breakfast, lunch, dinner.
10. Tell us what houses are like.
The house has many floors - it is... (multi-storey) The house has one floor - it is... (single-storey) The house has many apartments - it is... (multi-apartment) The house has one entrance - it is... (single entrance) The house has many entrances - it is (multi-entrance) House built of brick - it is ... (brick) Made of wood - ... (wooden) Of blocks - ... (block)
11. Who do you think the artist forgot to draw in the empty window? Finish it.
12. Think and tell where Pinocchio is standing, using the words at, for, because of, between, right, left.
Pinocchio is standing behind the house. To the right of Buratino is a one-story house. To the left of Buratino is a multi-storey building. Buratino stands between a multi-story and a one-story building. Pinocchio is standing near the house. Pinocchio looks out from behind the house.
13. The tallest clown lives in a house, to the right of which a birch tree grows, the shortest one lives in a house, behind which a Christmas tree grows. Draw lines from the clowns to their houses.
14. Compose the story “Home Alone” from the pictures and write it down. Don't forget to put it in your story book.
Sample story:
“Vanya and his faithful friend Tuzik love to play together. But Vanya goes to school and cannot play with Tuzik all the time. Before leaving for school, Vanya strictly ordered Tuzik not to be naughty and to behave exemplarily. But after the boy left, Tuzik became bored and forgot about what Vanya was punishing him. He grabbed the tablecloth in his teeth and began to rush around the house with it. When the boy returns from school, he will have to put his house in order for a long time.”
Teacher-speech therapist Gomzyak Oksana Stepanovna
Loading...
logoportal.ru
Benefits of drawing a city
The very process of drawing a city with a pencil or other methods contributes to the rapid development of abstract thinking and plot perception, especially in young children. However, choosing a city and cityscape image has certain advantages:
- The ability to display the city (houses, streets, auxiliary elements - cafes, signs, benches) allows you to perceive and convey the perception of the surrounding world from different angles. For example, it is possible to depict a city not only at a right angle, but you can also draw a top view of the urban area. Or get a little creative and paint a fairy-tale city in the clouds. The imagination of a child or an adult allows you to recreate the most unusual scenes.
- Along with generally accepted artistic techniques, the master has the opportunity to choose original ways of depicting reality. For example, a forest city with funny inhabitants, drawn with fingers and paints. This technique is very popular among child psychologists and rehabilitation doctors.
- Using various drawing techniques, the artist can illustrate his own books, magazines, and comics. Ready-made images can be an excellent decor in a bedroom or living room.
The depiction of a city, as a rule, involves the need to draw a large number of small details.
This is a great opportunity for children to learn perseverance and discipline.
Children's drawing competition "My City" - Irkutsk - a child-friendly territory
Children's drawing competition "My City" dedicated to the 80th anniversary of the Irkutsk region
Age group 6-8 years
Voting in the “Younger Age Group” nomination
- Milana Balabanova, 6 years old 29%, 574 votes
574 votes 29%
574 votes - 29% of all votes
- Usov Dmitry, 7 years old 23%, 456 votes
456 votes 23%
456 votes - 23% of all votes
- Svetlana Varenko, 7 years old 16%, 313 votes
313 votes 16%
313 votes - 16% of all votes
- Shalashov Pavel, 7 years old 15%, 296 votes
296 votes 15%
296 votes - 15% of all votes
- Stovba Kirill, 7 years old 13%, 252 votes
252 votes 13%
252 votes - 13% of all votes
- Novopashin Fedor, 6 years old 2%, 34 votes
34 votes 2%
34 votes - 2% of all votes
- Kokonova Diana, 6 years old 1%, 26 votes
26 votes 1%
26 votes - 1% of all votes
- Senokosov Dmitry, 8 years old 1%, 25 votes
25 votes 1%
25 votes - 1% of all votes
- Mukhametshina Anfisa, 8 years old 1%, 24 votes
24 votes 1%
24 votes - 1% of all votes
Total votes: 2000
Votes: 1421
April 26, 2022 – May 10, 2017
Poll closed
Poll Options are limited because JavaScript is disabled in your browser.
Age group 9-12 years
Voting in the “Middle Age Group” nomination
- Evdokimov Valery, 11 years old 31%, 214 votes
214 votes 31%
214 votes - 31% of all votes
- Makarenko Olga, 12 years old 29%, 201 votes
201 votes 29%
201 votes - 29% of all votes
- Chernykh Arina, 12 years old 13%, 89 votes
89 votes 13%
89 votes - 13% of all votes
- Luchenkova Victoria, 11 years old 10%, 73 votes
73 votes 10%
73 votes - 10% of all votes
- Evgeniy Chekhovich, 9 years old 5%, 38 votes
38 votes 5%
38 votes - 5% of all votes
- Tishkov Ruslan, 11 years old 4%, 26 votes
26 votes 4%
26 votes - 4% of all votes
- Tyurmenko Maxim, 9 years old 4%, 25 votes
25 votes 4%
25 votes - 4% of all votes
- Gusikhin Artem, 11 years old 3%, 18 votes
18 votes 3%
18 votes - 3% of all votes
- Napolov Ivan, 11 years old 2%, 17 votes
17 votes 2%
17 votes - 2% of all votes
Total votes: 701
Votes: 460
April 26, 2022 – May 10, 2017
Poll closed
Poll Options are limited because JavaScript is disabled in your browser.
Age group 13-15 years
Voting in the category “Senior age group”
- Vanteev Grigory, 15 years old 33%, 421 votes
421 votes 33%
421 votes - 33% of all votes
- Mineev Alexander, 14 years old 30%, 377 votes
377 votes 30%
377 votes - 30% of all votes
- Banshchikova Tatyana, 13 years old 10%, 132 votes
132 votes 10%
132 votes - 10% of all votes
- Milyaeva Liya, 15 years old 10%, 122 votes
122 votes 10%
122 votes - 10% of all votes
- Prigarina Yulia, 14 years old 4%, 52 votes
52 votes 4%
52 votes - 4% of all votes
- Belomestnova Valentina, 14 years old 3%, 36 votes
36 votes 3%
36 votes - 3% of all votes
- Alexey Bogdanov, 14 years old 2%, 24 votes
24 votes 2%
24 votes - 2% of all votes
- Azakhova Valeria, 15 years old 2%, 21 votes
21 votes 2%
21 votes - 2% of all votes
- Ireskina Alina, 15 years old 2%, 19 votes
19 votes 2%
19 votes - 2% of all votes
- Smirnov Ivan, 15 years old 2%, 19 votes
19 votes 2%
19 votes - 2% of all votes
- Postnikov Anatoly, 14 years old 1%, 18 votes
18 votes 1%
18 votes - 1% of all votes
- Alexey Vasiliev, 13 years old 1%, 18 votes
18 votes 1%
18 votes - 1% of all votes
Total votes: 1259
Votes: 1058
April 26, 2022 – May 10, 2017
Poll closed
Poll Options are limited because JavaScript is disabled in your browser.
irkdetstvo.ru
City in the clouds
The image of a fairy-tale city floating in the clouds will require more painstaking and perseverance from the master. In addition, colored pencils are required to draw details. Instructions on how to depict a drawn city:
- On a sheet of paper, draw two lines emanating from one point. One line goes to the right, the second - to the left and up.
- Two vertical stripes drawn from the extreme points allow you to display the walls of buildings. The fairy-tale city will be surrounded by a high wall, at the ends of which there are towers.
- Inside the resulting basic figure, details are drawn: the central entrance to the city. To do this, draw an arch in the form of a double arc, the steps are double stripes, the size of which decreases towards the bottom.
- To depict the end towers, you need to draw three vertical stripes, the central one of which has a smaller height. The upper points of the lines are connected to each other, indicating the observation deck of the tower. The lowest points will be hidden under the clouds.
- One spire of the end tower will remain hidden under the clouds, the second is drawn in the form of a cone located on the upper platform.
The contours of the cloud curtain are drawn with a simple pencil (the shape and size depend on the wishes of the artist). It is necessary to ensure that the clouds envelop not only the lower steps and the bottom of the city walls, but also partially hide the spiers of the towers.