Fir and pine cones are useful for making interesting crafts. If you find yourself in the forest, do not forget to take with you several pine and spruce fruits. You can make very beautiful birds from the cones of different trees. Today you will learn how to create a swan, crow, ostrich and eagle owl. Crafts made from bird cones will also require additional materials.
To work you will need the following components:
- awl;
- knife;
- toothpicks;
- plasticine;
- acorns with caps;
- alder cones;
- pine and spruce cones;
- heat gun.
Swan
A swan - a bird made from cones - is quite simple to make, you just need to know the order of work. To make it, take a large semi-closed pine cone and white, black and red plasticine.
Use white plasticine to sculpt an oblong neck with a head, red for the beak, and black for the eyes.
Attach the plasticine blank to the blunt end of the pine cone.
The swan is ready!
If desired, the wings and tail can be made from dry grass or real feathers. To sculpt a black swan, you need to use black plasticine instead of white.
Salt dough bird
To work you will need water, flour, salt, a mixing container, a finished sketch of the bird, paint, brushes. Instructions on how to make a bird craft with your own hands:
- Knead the salt dough in the prepared container using the recommended proportions of ingredients.
- Knead the working mass well.
- Sculpt a bird figurine using tweezers and skewers to create subtle features (all subtleties depend on the experience and creativity of the artist).
After drying, the product should be painted at your discretion.
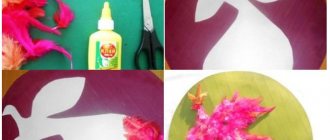
Crow
To create this bird, you need to take 2 small pine cones, acorn caps and plasticine in three shades (yellow, white and black).
Connect the cones together as shown in the photo.
Make legs from acorn caps. Natural material can be fixed using a heat gun.
Instead of hot glue, you can also try holding the pine cones together with plasticine.
Make a beak from yellow plasticine. Black and white plasticine is needed to make eyes. And pieces of black material are suitable for forming bird wings.
This is such a funny crow!
It can be placed on a branch that will imitate a tree.
Ostrich
Another version of a bird made from cones and plasticine is the ostrich. To get this big bird, you need to get a fir cone. You will also need plasticine (black and brown), toothpicks and a couple of acorns.
Using an awl, make holes in the cone and insert toothpicks into them. These will be the legs of the ostrich.
Stick the acorn to an oval blank made of brown plasticine.
Fix the neck with the acorn on the upper edge of the cone. Attach the acorn caps to the ends of the toothpicks, after making holes in them using an awl.
All that remains is to sculpt the beak and eyes from black and white plasticine.
A tuft made from a miniature alder cone, which can be attached to the acorn using a heat gun, will look very good.
This is what a finished ostrich looks like!
You can decorate the edge of the cone with feathers or inflorescences of dry plants.
Miniature owls made of clay
Polymer clay is an excellent material of choice for making souvenirs. Even without additional decorative processing, all figures have a pleasant natural color. And when decorating, the paint fits perfectly on the surface of the clay. Operating instructions:
- Knead the working mass in the prepared container.
- Make a figurine of a bird from clay.
- Using a needle and wooden skewer, give the bird relief lines for the image.
The finished product is dipped in milk for 5 minutes and then sent to the oven for firing. After drying, you can leave the natural shade of the craft or decorate it in any way.
Note!
How to make a rose from paper - the best ideas for DIY crafts + master classes on creating a rose from paper (160 photos)Craft letter - TOP 120 photo reviews of craft letter. Simple diagrams + step-by-step DIY instructions
Crafts made from nut shells: the best step-by-step master classes on creating DIY crafts with photo examples of finished works
Owl
To make it you will need a long fir cone. You also need 2 acorn caps and plasticine in black, brown and yellow.
This bird has very expressive eyes, which can be easily made from the caps of acorns. To make them even more expressive, you can stick a black pupil on a yellow background on top of each one. For this, plasticine of the appropriate color is used.
From brown material it is necessary to fashion feathers that will be located above the eyes.
The finished parts are fixed at the top of the cone.
You need to stick a yellow beak under them.
Tufts of feathers over the eyes can also be made from small alder cones. They look great too.
And if you glue pine cones on the sides, the bird will have wings.
This is such an amazing eagle owl! It looks almost like the real thing.
You can create excellent crafts from natural ingredients using plasticine. Your children will love to take part in this exciting activity. And if you put all the birds together, you will get an excellent story-driven craft that will take its rightful place at a school handicraft exhibition.
Designed from natural materials
Organization of continuous direct educational activities of children in secondary group No. 2
design from natural materials
.
Topic: “
Forest Birds
”
Author of the NNOD summary:
Ustinova Valentina Nikolaevna, teacher, Mikhailovsk MBDOU “Kindergarten No. 20”
Target:
Formation of children's design skills. Make an image of an animal from parts (natural material).
Objectives of the priority educational area:
Educational:
continue to improve constructive skills: connecting parts using plasticine, supplementing the image with details; choose your own means of expression.
Educational:
develop in children imagination, creativity, fine motor skills, interest in the beauty of birds, and the ability to enjoy created crafts.
Educational
: to cultivate an interest in living nature, a kind attitude towards objects of living nature, a desire to provide all possible assistance.
Integration of educational areas
Physical development: increase children’s motor activity in play, develop the ability to correlate words with movements.
Speech development: developing an active vocabulary, strengthening the ability to form an adjective from a noun, selecting synonymous words.
Social and communicative development: the formation of friendly relationships between children, the cultivation of emotional responsiveness.
Artistic and aesthetic development: continue to improve constructive skills and abilities: connecting parts using plasticine, supplementing the image with details; choose your own means of expression.
Cognitive development: develop attention, curiosity, form an idea of the world around you.
Methods and techniques:
gaming, verbal (conversation, posing problematic questions, assignment), visual (attributes, demonstration material).
Prerequisites for educational activities
: develop attention, the ability to listen carefully, perform a task according to a verbal explanation and show a diagram.
Vocabulary work:
We spoke adjectives about spring. Sunny, hot, warm, (selection of synonymous words), we talked about the birds in the poem. We talked about adjectives about birds. Plain, multi-colored or variegated (selection of synonymous words).
Individual work:
work with Dasha B. - help attach the wings of a bird, with Oleg S. - pronouncing words and memorizing a poem.
Preliminary work:
Looking at illustrations, learning poems, guessing riddles about birds, looking at photographs of finished crafts made from natural materials, highlighting the details of the crafts; viewing natural material and experimenting with it; making crafts according to plan in collaboration with the teacher.