Preparation for a drawing lesson on the topic “Mushrooms and Berries” in the preparatory group of a kindergarten
Drawing is one of the main forms of creative activity of a child. Classes held in kindergarten serve the harmonious and emotionally positive development of the preschooler, prepare for primary school and develop personal qualities. Working with a brush, pencils and felt-tip pens develops fine motor skills and prepares the hand for mastering an important skill for future life - writing. In drawing classes, a child gains knowledge about colors and shades, learns to see beauty in various color combinations. Spatial thinking develops, the concepts of composition and perspective are reinforced. Figurative memory and thought processes are activated.
Drawing lesson in the preparatory group
Objectives of teaching drawing in the preparatory group
- Development of aesthetic feelings: color and compositional perception of objects, sense of form, rhythm, proportion. By directing children to a specific visual perception of objects, the teacher must teach them to see the beauty of objects and the unique properties of objects.
- Development of spatial thinking, consolidation of compositional abilities. Older preschoolers should be able to create a three-plane composition.
- Learning to highlight the main or most significant properties of an object using color, image size, and location in the foreground of the picture.
- Development of drawing skills based on ideas (on themes of the surrounding reality, based on fairy tales).
- Encouragement for independent creative activity, activation of the child’s imagination.
Pupils of the preparatory group are familiar with the main types of drawing and use various techniques and techniques to realize a creative idea:
- Subject drawing.
Subject drawing from life in the preparatory groupChildren learn to realistically convey in a drawing the characteristic shape of an object or its parts, respecting proportions, color, volume, and movement. Children aged 6–7 years are actively developing analytical thinking, they learn to identify common features of objects and the features by which they differ from one another. Drawing is not carried out in classes in the senior and preparatory groups. It is possible to examine samples of finished works on a given topic, discuss execution techniques, and drawing techniques. There is no direct demonstration of actions. It is recommended that, while studying technology maps and visual instructions, together with students, build an oral plan for performing actions. Great importance is given to drawing objects from life: children learn to convey the characteristic features of structure and form using specific examples. In the preparatory group, children draw objects based on their imagination, using images from their visual memory and following their imagination.
- Subject drawing.
An example of plot drawing based on presentation in the preparatory group
Preschoolers learn to convey their impressions and sensations by drawing objects and displaying their understanding of the connection between them and interaction. In the preparatory group, children are given the opportunity to independently come up with a plot (small scene) on the topic of the lesson. The compositional abilities of young artists develop: they arrange the drawing over the entire area of the sheet, learn to determine the position of objects - foreground and background. In the graduating group of kindergarten, children master the ability to convey the characteristic movements of objects, overcome the conventionality and static nature of the image.
- Decorative drawing.
Painting with a pattern of berries and leaves in the preparatory groupLearning to decorate a paper blank or papier-mâché figurine fulfills the requirement of developing aesthetic taste in art classes. Preschoolers get acquainted with the folk crafts of our country, learn to see beauty in the products of craftsmen from the people. The children use the acquired knowledge about the features of Gzhel, Khokhloma, and Gorodets paintings in creating their own patterns based on folk painting.
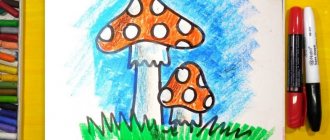
For the topic “Mushrooms and Berries” in the preparatory group, the most relevant is subject drawing from life or from an idea: “Spruce branches”, “Bunch of rowan berries”, “Fly agaric”, “Mushrooms in the forest”, “Family of honey mushrooms”, etc. Guys They practice the skills of creating a composition, arranging objects on a sheet of paper, learning to fill the entire sheet with a drawing, and creating an unusual background. Drawing from life will be the main method in school. In the preparatory group, students are not tasked with depicting the volume of an object or creating light and shade. The goal in teaching children 6–7 years old is to learn to identify the features of an object in front of them and display them in a drawing: the shape of the object, its parts, the relationship of parts with the main figure. Analyzing an object and conveying its details is successfully carried out by children 6–7 years old when the object is close to each other. Classes that have a game element at their core are effective. For example, in front of each student, a sprig of rowan is placed on the table, which, according to the assignment, must be drawn from life. Each person studies only his own branch, identifies and depicts its features (one or two clusters of berries, a forked branch, the number of leaves, fresh or withered foliage). At the end of the lesson, the teacher collects the twigs and places them on the common table, inviting the children to find from the drawings who drew which branch.
Work on this topic is often carried out using the method of plot drawing: “Bullfinches pecking a rowan tree”, “A squirrel jumped onto a branch”, “Mushroom hedgehog”, “Who hid under the fungus”, etc. Pupils of the preparatory group learn to depict the characteristic movements of birds and animals, think through small story scenes. In decorative painting, mushrooms and berries are also used to create floral patterns on the workpiece.
As a basis for the drawings, sets of white and colored paper, special for watercolor and gouache, and Whatman paper are used (usually for creating collective works or implementing creative projects). Tinted paper is rarely used for work, mainly to create a decorative pattern based on folk painting. In subject and subject drawing classes, children learn to create a background on their own (plain or with smooth transitions).
Drawing techniques and techniques
Let's consider in the form of a table what techniques senior schoolchildren should master as part of learning drawing in the preparatory group:
| How a drawing is created | Techniques and drawing techniques |
| Pencils, felt-tip pens | Creating a sketch: using a light line, without pressing on a sheet of paper, the contours of the object are transferred. Pencil pressure adjustment. Creating hatching with varying degrees of pressure and scope without going beyond the contours of the image. Using colored markers to draw outlines and details of objects. |
| Paints: watercolor, gouache | Mixing paints on a palette. Blurring paint on a large surface. Applying strokes and strokes to the shape of an object. Baking (overlaying vertical strokes). Drawing with the tip of a brush (overlaying lines or pokes). Drawing on a wet background. |
| Dry pastel | Mastering graphic drawing techniques (pastels of one color). Creating the main tone by shading using a hard brush. Drawing smooth lines. Developing accuracy when drawing with pastels: holding a sheet of paper while drawing, shaking off dust on a napkin. |
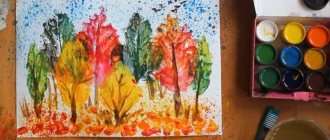
On the topic “Mushrooms and Berries,” classes are held on non-traditional drawing techniques: wax crayons with sketching with watercolor paint, cotton swabs, chalk on sandpaper, scratch paper techniques, monotype, etc.
Examples of drawings of mushrooms, branches and berries made using non-traditional techniques
Drawing with prints Scratchboard Blotography Finger painting
Monotype
Blotography
Finger painting
Drawing with wax and watercolor Dot painting Drawing with crayons on sandpaper “Poke” method
In the process of educational activities, a person-oriented approach should be implemented. When preparing to conduct drawing classes in a preparatory group, the teacher must take into account the individual characteristics of each child. This is the degree of proficiency in specific drawing techniques, the ability to work in mixed media, the degree of involvement in collective activities. All students must achieve the goal set at the beginning of the lesson. For those who have difficulties in the process of creating a drawing, the teacher uses a form of individual demonstration. Successful students are additionally given tasks to decorate a finished drawing or design a general composition in a subgroup (creating a panel on a sheet of Whatman paper).
The personal approach is implemented through the freedom of choice by students of drawing materials. Children should be given access to sets of paper, pencils and markers, paints and crayons. Older preschoolers, based on an assessment of their capabilities, have the right to independently choose a drawing technique to complete the task.
The main thing in implementing a student-centered learning concept is allowing freedom of design. The child is given a topic that involves activating the imagination. Drawing with a plot is especially conducive to imagination: the child comes up with images for the drawing, a situation, the relationship of objects.
Options for individual and collective compositions on the theme “Berries and Mushrooms”
| Lesson topic | Class organization form | Training and development tasks | Techniques and drawing techniques |
| "Rowan Branch" | Individual. | Formation of the ability to draw from life, analyze an object and identify its characteristic features. Development of compositional skills. | Drawing with watercolors. Honing the techniques of painting with a brush (all lint/bristles and tip). |
| "Mushroom hedgehog" | Individual. | Formation of artistic thinking, development of imagination. Development of visual perception. | Creating a preliminary sketch with a simple pencil. Creating a background. Elaboration of details (shading, lines, strokes, pokes). |
| "Mushroom Glade" | Collective. | Development of compositional skills. Formation of the concept of perspective (foreground and background). Consolidating the skill of object drawing with the transfer of characteristic features of objects. | Drawing on a common sheet of Whatman paper in subgroups. Dipping technique with a brush (mushrooms). Method of drawing with crumpled paper (grass). |
| "Amanita" | Individual. | Consolidating the skill of object drawing. Development of visual perception. | As a rule, in the preparatory group a lesson on this topic is conducted using the finger painting technique: Drawing vertical lines - long and short. Drawing dots. |
| "Mushrooms in the Forest" | Collective. | Activation of memory and attention processes. Consolidating the skill of object drawing. | Drawing in subgroups. Drawing with pencils: Hatching within the contours of a sketch with varying degrees of pressure. Creating outlines with colored felt-tip pens. |
| "Who hid under the fungus" | Individual. | Development of plot drawing skills. Activation of memory and imagination. | Drawing in mixed media - watercolor and gouache. Preparation of the background. Drawing on a wet background. Drawing with strokes of different directions. Working on small details with a thin brush. |
| "Bullfinches on a Rowan Branch" | Individual. | Development of plot drawing skills. Activation of figurative memory, development of the ability to analyze and predict. | Drawing with gouache: Preparing the background. Drawing with strokes. Drawing details with a thin brush. |
| "Fairy Mushroom" | Individual. | Development of drawing skills based on ideas. Activating the imagination. | Drawing with colored pencils: Creating a sketch. Thinking through the background. Hatching with varying degrees of pressure. Drawing details (possibly with a felt-tip pen). |
Motivating start to a lesson on “Berries and Mushrooms”
A mandatory stage of a visual arts lesson in a preparatory group is a motivating beginning. It creates an emotionally positive atmosphere, activates the pupils’ figurative memory, expands children’s knowledge about the surrounding reality, and sets them up for the subsequent creative process. The following are used as motivating material at the beginning of a drawing lesson:
- Visual material: thematic posters, cards, illustrations in books, toys and figurines.
- Reading poems, fairy tales, proverbs and sayings, excerpts from prose works of art on the topic of the lesson.
- Conducting a conversation.
- Creation of problem and game situations, surprise moments.
- Use of technical means: listening to audio recordings, showing slides on a projector.
Examples of using motivating materials at the beginning of a lesson on the topic “Mushrooms and Berries”
| Lesson topic | Motivating start |
| "Fairy Mushroom" | Listening to proverbs about mushrooms: Mushrooms grow in the village, but they are known in the city. Spring is red with flowers, and autumn is red with mushrooms. Berries love day, mushrooms love night and shade. etc. Conversation with the pupils: how they understand this or that proverb, where mushrooms grow, what kind of weather they like, etc. Learning tongue twisters about mushrooms with the pupils. |
| "Rowan Branch" | Creating a surprise moment : A squirrel (bear cub, hare, hedgehog or other forest animal) comes to visit the children. She brought the children a bouquet of rowan branches as a gift. Squirrel hands out a branch to the guys and notices that they have sheets of paper, brushes and paints on their tables, but will the guys be able to draw rowan branches? After completing the task, the squirrel promises to play the game “Find your twig in the bouquet” with the guys. |
| "Mushroom clearing" | At the beginning of the lesson, the teacher asks the children riddles about mushrooms and attaches pictures depicting the answers to the board (or places figures of the guessed mushrooms on the table). Conducting a conversation about mushrooms: where they grow, what places certain mushrooms like, which mushrooms are inedible. Children are given the task of dividing the images of mushrooms into two groups - edible and poisonous. Physical education session “For mushrooms”. |
Drawing up notes for a drawing lesson on the topic “Mushrooms and Berries”
Temporary plan for a drawing lesson in the preparatory group
The duration of a drawing lesson for pupils aged 6–7 years is no more than 30 minutes.
- Organizational moment 1–2 minutes.
- Motivating start 6-7 minutes.
- Practical work 15–17 minutes.
- Demonstration and discussion of finished works for 2–3 minutes.
- Summing up 1 minute.
The teacher analyzes each lesson conducted according to the following criteria:
- Achieving the goal of the lesson.
- Fulfillment of educational and educational tasks.
- The emotional mood of the pupils at each stage of the lesson (what caused this or that state of the children).
- The presence of delays at any stage of the lesson: identifying the causes and ways of correction in subsequent educational activities.
- Analysis of students’ work: which drawing techniques require additional reinforcement.
- Self-analysis of the teacher’s work: which teaching methods and techniques were effective in conducting the lesson, which were not.
Outline of a drawing lesson (preparatory group) on the topic “Rowan Branch”. Author: Bondarenko Natalia Evgenievna
| Target | Creating a drawing using various techniques (dipping, poking, drawing with the end of a brush, elements of finger painting). |
| Tasks | Create comfortable conditions for positive creative activity. Improving watercolor painting skills. Strengthening the skill of mixing paints on a plastic palette or sheet of paper. Developing a sense of beauty through observing natural objects. |
| Progress of the lesson | The teacher reads a poem about the beautiful mountain ash. Tells the children about the structural features of this tree and how the color of its leaves changes with the onset of autumn. Study and discussion of visual material - pictures depicting rowan trees in different seasons. Practical part: Tinting a sheet of paper using paint and a piece of foam rubber. While the paper is drying, the teacher once again examines the image of a rowan branch with the children, discussing the structural features, shapes of berries and leaves, and color qualities. Drawing branches and leaves with a brush, rowan berries with fingertips. Drawing small details with the tip of a brush: leaf veins with strokes, berry centers with dots. Demonstration and analysis of finished works. Gratitude to the students for the work done. |
How to draw a basket step by step
Content
When going for mushrooms, people take with them containers in which they will collect mushrooms. Previously, a wicker basket or basket was very popular. It held a lot, and this basket was also very light.
You can draw a basket with your child, introducing him to different types of baskets, and also touch on the topic of dangerous mushrooms. When you are going to pick mushrooms, the baby will be able to choose a container for himself, and he will definitely not put a fly agaric in it.
1
The basis
Draw the base or hole of the basket in the center so that there is space for the rest of the details.
2
Outlines
The outline is depicted in the form of a circle, since this is the shape that the basket resembles. The base should be slightly above the center of the circle.
3
Top of the circle
Carefully erase the top of the circle so as not to touch the base.
4
Bottom part
In our basket the bottom is not rounded, but slightly straightened. Adjust it, but don't make it perfectly straight.
6
Horizontal weaving
The first part of the weaving is horizontal. Notice that the lines are uneven, they are slightly rounded. This gives the basket volume.
8
Adjustment
Erase the weaving lines on the headband, as it is made in a slightly different way.
9
Pen
Draw the handle in the form of two semi-ovals. They connect on opposite sides.
Correct the lines and erase unnecessary details.
10
Handle weaving
To prevent the handle from separating from the basket, it is made a little wider at the bottom.
The edges of the handle also end in weave, which is much finer than on the basket, but very durable.
11
Headband weaving
The headband is woven from a vine that twists in a spiral. Draw this weave as short, curved lines.
12
Coloring
Since the baskets are woven from wicker, paint them in different shades of brown. You can alternate shades in a checkerboard pattern to make the basket beautiful and more realistic. You can add mushrooms inside, asking your child which ones he would like to collect in the basket. This way you can introduce your baby to edible and inedible mushrooms.
13
Collage with stages of drawing a basket
14
Try drawing online:
Choose how you want to paint.
If you see an error, please select a piece of text and press Ctrl+Enter.
evrikak.ru
The order of drawings on the theme “Mushrooms and berries”
Pupils of the preparatory group actively develop the ability to follow the teacher’s oral instructions. Therefore, before the children complete the practical part of the task, the teacher should discuss with them in what ways and in what sequence they will draw the landscape, and through leading questions and tips, lead them to the recommended order of actions. You can look at examples of finished works on a given topic and invite the children to determine the techniques used to create these drawings. For those children who have difficulty completing the task, cards with schematic instructions for drawing objects can be offered. The teacher performs a direct demonstration of actions for pupils of the preparatory group only in the case of performing a particularly difficult element or individually in a situation of extreme difficulty for the pupil.
"Rowan Branch"
Creating a Sketch
Sketching Coloring with shading
Leaf hatching drawing
Hatching process Painting the contours of berries
Painted brush
The process of tracing the contours of a branch
Drawing contours Drawing veins of leaves Tracing the contours of berries Brush with outlined berries Drawing cores of berries (crosses or stars) Brush with traced cores Drawing cores with dots
Finished work
"Rowan Branch"
Drawing a sketch with a simple pencil
Outlining a branch Coloring a branch Outlining and coloring leaves Coloring a branch and leaves
Outlining the berries
Coloring berries Painted rowan branch and bunches Drawing veins Drawing berry cores (crosses)
Intermediate stage of drawing Drawing small details
Finished work
"Mushroom hedgehog"
Creating a watercolor background
While the background is drying, draw the body of the hedgehog. Draw the grass with strokes. Draw the legs of the hedgehog. Draw the face and nose. Apply brown strokes - needles.
Apply strokes of black paint
We draw mushroom stems with gouache We draw mushroom caps
Let the gouache dry. Use the tip of the brush to outline the stems of the mushrooms. On the hedgehog, we also outline the mushrooms
Finished work
"Who hid under the fungus"
We draw the background of the sky with watercolor paint. We draw grass in a smooth transition. We draw clouds in the sky on the wet background.
We draw drops with strokes on a wet watercolor background. We draw grass and leaves with strokes on a wet watercolor background.
Using gouache we draw a mushroom stem
Draw a hat with gouache
We draw the bodies and heads of the bugs. We use the tip of the brush to draw in the antennae and legs of the beetles. We draw the details with the tip of the brush.
Finished work
Picture “Family honey mushrooms”
Sketching the outline of a tree stump
Drawing a sketch of honey mushrooms
Coloring with shading honey mushrooms
Coloring the stump with shading Coloring the cut of the stump Drawing rings on the cut
Drawing the contours of mushrooms
Drawing grass (horizontal shading) Drawing plot elements with a felt-tip pen Finished work
Samples of drawings on the theme “Mushrooms and berries”
Examples of work by pupils of the preparatory group Subject drawing in watercolors Work of a pupil of the preparatory group Subject drawing Subject drawing based on presentation Works by pupils of the preparatory group Sample work
The work of a preparatory group student
Object drawing Drawing by representation
Drawing by View
Honey mushroom family
Small mushrooms with round caps are always arranged in groups. They grow on green meadows and stumps. Every mushroom picker loves these fragrant babies. When starting to depict these beauties, it is better to look at them in person. After all, it is so unusual for them to gather in friendly companies. But, if this is not possible, you can look at the photo and make our step-by-step lesson.
- Let's draw a cylinder - this is the future stump. We mark the location of the mushrooms with thin lines. Two will be at the bottom left, and a group of five will be at the top right on the edge of the stump.
- We thicken the legs. We draw semi-oval caps.
- Now we color the work with colored felt-tip pens. The mushrooms themselves will be light brown. Don't forget to show the skirt under the hat and on the leg. The stump is dark brown in color. The top of the cut is yellow.
- We add a little yellow to the mushroom itself, showing the transition from dark to light areas. We darken the bottom of the stem of each honey mushroom.
- Draw the roots of the stump and the grass.
You can make a drawing unique by adding just a little bit of your vision. Even following our general step-by-step master classes, each person’s paintings will be different. And that's great. After all, every video world is different.


