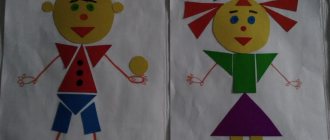
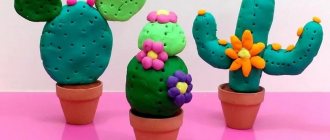
Step by step crafts for kids for kids of all ages. The works are grouped based on popular techniques and materials used.
For crafts, you can use a variety of materials (from familiar and popular to unusual). In addition to paper, plasticine, chenille wire, you can create from foam plastic, cocktail tubes, beads and even pasta. In this case, they use their own fantasies, modern techniques, and the best practices of teachers.
At the bottom of each photo there is a link to step-by-step work. All master classes are located within the site and do not lead to third-party resources.
Multi-colored rainbow craft - a simple craft made from colored paper
You need colored paper, 2 cotton pads, 2 pieces of cardboard, glue and scissors. Production time is 20-30 minutes.
This simple but colorful craft can be done while studying weather, precipitation, spring, rainbows, English, mathematics and counting. And also when repeating colors with children of an earlier age - 3-4 years old.
Let's start with Santa Claus
Santa Claus is the most popular New Year's character, and therefore you need to start with him. There is simply an innumerable variety of Santa Claus crafts. Let's talk about a few of the simplest ones that any kindergarten child can do.
Santa Claus made of cardboard and cotton pads
It is done like this:
- Cut out a circle from thick cardboard. This is the face of the future Santa Claus;
- Cut out a hat for Grandfather from red paper;
- decorate it with snowflakes, stars, pompoms, etc.;
- glue the cut out hat on top of the circle (head);
- Glue purchased eyes and a nose cut out of paper onto the circle. It turns out a face;
- We take cotton pads and stick them on the bottom of the face in a semicircle. It turns out to be a beard;
- We cut another cotton pad in half and stick it under Santa Claus’s nose. This is a mustache;
- We glue several cotton pads onto the bottom of the hat (that is, at the place where the hat connects to the face). In this way we close the joint formed by gluing the hat and face. And in general it turns out beautifully;
- Or you can simply stick a white strip of paper onto the ugly joint.
The result is a cute New Year's card with a picture of Santa Claus. The photo below shows a few examples.
Santa Claus made of colored cardboard and a disposable plate
It's easy to do:
- Cut out an isosceles triangle from colored cardboard. Any color, at the child’s discretion. This is the body of Santa Claus, dressed in a fur coat;
- take a disposable plate and cut it in half;
- Glue store-bought eyes and a nose cut out from colored paper onto its bottom. The face of Santa Claus is ready;
- cut out a small circle from white paper, cut it in half, glue both semicircles under Grandfather’s nose. This is a mustache;
- glue half of the plate approximately in the middle of the triangle. You need to glue with the cut part up and, accordingly, in a semicircle down. The result is a complete figure of Santa Claus with a face, a beard and a fur coat;
- cut out another small circle from paper and glue it to the very top of the triangle. This is the pompom on Santa Claus's hat;
- Finally, cut out a small strip of white paper and glue it on top of the glued half of the plate. This is the lower part of Santa Claus's hat, which will separate the hat itself and the face.
To make it completely clear, look at the photo of what this Santa Claus looks like in its finished form.
For more information about Santa Claus's children's crafts, watch this video.
A simple plasticine craft - a willow in a vase
In this lesson, children will learn how to sculpt thin sausages from plasticine and make beautiful applications from them. They will decorate a vase with willow and make branches from cotton swabs.
The craft can be done with children 5 years old when studying nature, preparing for the Easter holiday, as well as when preparing a gift for mother and grandmother. Grandmothers will especially be happy with such a homemade gift!
Preparatory group. Senior preschool age. Children 6-7 years old
Greeting card for dads using plasticine printing technique “Tank” for children of senior preschool age 5–6 years old
Greeting card for dads using the technique (plasticineography)
“Tank”
for children of senior preschool age (5-6 years old. Goal: development of artistic and creative abilities in children through an unconventional drawing technique - plasticineography. Objectives: - Expand ideas...
Master class on three-dimensional appliqué for the preparatory group “Ship”
Purpose: Such an idea can become not only an original craft , but also a real gift for February 23rd. Objectives: 1. Transfer of experience through a commented demonstration of the sequence of actions, methods, techniques and forms of pedagogical activity. 2 Unlocking your creative potential...
Workplace organization
To create crafts for kindergarten and any creative activity, you will need a well-organized workplace.
Main components of the work area:
- A fairly wide table. An excellent option would be to install a corner table with the tabletop divided into sectors: work and clean areas.
- Comfortable chair in compliance with anatomical parameters. From a young age, a child must be taught to develop correct posture.
- Sufficient level of lighting above the work area.
If all the specified requirements are met, the child will be comfortable working on creating crafts, and joint creative activity will bring joy and vivid impressions.
What you need for creativity
With paper and cardboard everything is almost clear. We create from what we find at home. A wide variety of paper products are suitable:
- white office paper;
- tracing paper;
- wrapping paper;
- old newspapers, magazines;
- old tattered books, scraps of wallpaper, scribbled school and music notebooks;
- paper for scrapbooking, designer and speckled;
- any colored paper, including corrugated and metallized paper;
- cardboard packaging for cereals, cereals, dairy products, sweets, disposable cardboard plates;
- large parcel boxes and shoe or clothing boxes;
- regular student cardboard is white or colored with different textures - from velvety to corrugated.
In addition, other auxiliary tools should always be at hand:
- cutting and piercing: scissors, stationery knife, awl, stapler (if available, then a special one - figured);
- ruler and compass;
- PVA glue or glue stick and glue gun;
- paints (gouache or watercolor), colored and simple pencils, felt-tip pens, colored gel pens, markers, brushes;
- plasticine, salt dough or other modeling mass;
- various materials for decorating products: sequins, beads, beads, braid, lace, scraps of fabric and fur, woolen threads... in general, everything you can find at home.
And for some crafts you will need stencils. If you know how to draw, you can make them yourself or print them from the Internet and then cut them out.
There's no point in starting a project to make something exciting and interesting if you don't have the essentials on hand. Of course, it is possible to postpone creativity until the next evening, but when it comes, this next moment is unknown and the child will be disappointed.
Interesting ideas
Light children's paper crafts are pleasing to the eye and can be a good gift for a loved one. There are several simple options that are most popular with both children and adults.
Cereals and other products
Also, a 4-5 year old child will be interested in making crafts from cereals. This is useful for the development of fine motor skills, creative thinking and perseverance. You can ask the child what he would like to depict and draw him outlines on cardboard. You can mix PVA glue with paint, apply it to the base, and the children will choose cereal of the appropriate color and pour it onto the base. The main thing is to ensure that the glue and paint mixture does not dry out and to tint the base in time.
Pasta in the shape of butterflies, I can become “real” butterflies on the applique. It is better to attach them to a plasticine base. The kid will be happy to color them and make an image, for example, a field with flowers and butterflies. You can also make a lily of the valley from this pasta and give it to your mother on March 8th.
Symbol of 2022 DIY felt tiger
For the New Year, you definitely need to make a craft in the shape of a Tiger. This is a wonderful talisman. You can leave it at home or give it to friends and acquaintances, and the manufacturing process will cause a lot of delight.
Materials:
- felt in several colors;
- needle;
- threads;
- narrow tape;
- filler;
- eyes;
- scissors;
- glue;
- black outline on fabric;
- patterns.
Step-by-step production:
- Transfer the patterns to felt. You can pre-draw them on paper yourself. You will need 2 oval parts (width about 6 cm, height about 5 cm), 2 orange parts for ears (height about 3 cm), 2 white parts for the inside of the ears, a black nose, muzzle, and a pink tongue.
- Cut the ribbon to the required length and make a loop out of it.
- Attach the ears to one of the large parts, glue the white parts of the ears inside.
- Glue a ribbon loop in the center.
- Cover the central piece from above with exactly the same one and stitch around the perimeter, leaving a little space for stuffing the craft.
- Glue the muzzle, tongue, and eyes onto the tiger's head.
- Stuff the toy with stuffing and sew up the part that remains unsewn.
- Draw stripes with acrylic paint or a black outline. It is very convenient to use paint in a tube.
On a note!
Stripes on the tiger's head can also be made from black ribbons. But first they need to be cut into narrow strips and their edges melted.
