How to choose the right plasticine
Plasticine is different from plasticine. In order for the work process to bring only pleasure, you need to choose the right plasticine. If you will be modeling with children, it is better to choose a plasticine substitute. This is a special mass for modeling that does not need to be kneaded before use. It also has pleasant fruity scents. This mass is completely incapable of harming a child, even if he decides to chew it.
Its only drawback is that it dries quickly when exposed to air. For older children, you can completely use regular plasticine. It comes in soft, hard and medium soft. Soft plasticine does not hold its shape for long and collapses under the influence of its own weight, while hard plasticine is practically impossible for a child to knead. It follows from this that medium-soft plasticine is best suited for modeling. It is better not to use hard plasticine when working with children.
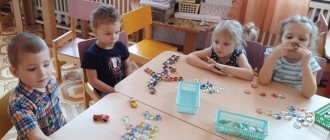
Summary of a lesson with children of the second junior group on modeling “Vitamins for animals”
Modeling lesson for children of the second junior group “Vitamins for animals”
Description:
This material will be useful and interesting to teachers of younger groups and parents.
The lesson requires preliminary preparation. Goals:
- developing children's interest in modeling;
— familiarization with the properties of plasticine; - introduction to a new toy; — consolidating children’s knowledge about vitamins and their benefits. Objectives:
- continue to develop skills in working with plasticine;
- continue to develop knowledge about primary colors; - promote the development of aesthetic perception; - develop the ability to listen carefully to the teacher; - develop gross and fine motor skills; - strengthen children’s ability to tear small pieces from a large lump, roll balls and flatten them; - cultivate accuracy in work; — cultivate sympathy for someone else’s misfortune and a desire to help. Preliminary work:
reading K. Chukovsky “Doctor Aibolit”, a printed board game “Vegetables and Fruits”, looking at illustrations for the work of K. Chukovsky “Doctor Aibolit”, talking with children about a healthy lifestyle.
Equipment:
plasticine, board, napkins, paper blanks for a doctor’s suitcase, soft toy fox, printed board game “Vegetables and Fruits.
Assemble the puzzle”, a treat for children - apples. Progress of the lesson:
Children sit on chairs.
A knock is heard on the door. The teacher opens the door, and there is a fox. Chanterelle:
Guys, Doctor Aibolit sent me to you!
We're in trouble! Aibolit has run out of vitamins. Children:
What are vitamins for?
Educator:
Vitamins help children and adults to be strong and healthy.
Some vitamins are needed for growth, others - for the eyes - to see well, others - for the head - to think well, to be smart. And there are vitamins that protect us from diseases. If a child does not receive enough of these vitamins, he begins to get sick often. What do you think, at what time of year do we get the most vitamins? Children:
In summer and autumn, because there are a lot of fruits and vegetables at this time.
Chanterelle:
Well done guys!
You know a lot. And I know the game. Do you want to play? Children:
Yes.
The fox and the guys are playing the game “Put the puzzle together.” They collect various vegetables and fruits, and the teacher helps. Educator:
Guys, do you know that at other times of the year, so that people do not lack vitamins, vitamin tablets are sold in pharmacies.
And Doctor Aibolit ran out of such vitamins. Well guys, let's help Aibolit? Children:
Of course, we will help!
Educator:
Let's make some vitamins and put them in these suitcases.
And the fox will give it to Aibolit. The suitcase has compartments for vitamins, they are of different colors. What color vitamins will we make? Children name the colors drawn on the blank. The teacher shows the procedure. Children look carefully and show movements in the air. Educator:
We pinch off a small one from a large lump of plasticine, roll it into a ball in a circular motion and flatten it.
It turned out to be a vitamin. This is how I do the rest of my vitamins. (pronunciation and execution) Children look at the prepared material in front of them and begin to work at the prompting of the teacher. The teacher helps the children. In the middle of the lesson, the teacher conducts gymnastics for the eyes: We close our eyes tightly, count together to five, open them, blink and continue to work. Educator:
Our eyes rested a little.
Let's finish the job. Children finish modeling. The teacher and the fox conduct physical exercise. Our hands can clap - clap, clap. Our hands can slap - slap, slap. You can raise your arms up, you can shake them, knock with your fists, wave your wings, you can put your hands on your belt and make them dance with lanterns. You can shake hands with everyone and gather a big circle. Educator:
Well, guys, let's play.
Let's look at our vitamin cases. (look at the suitcases and discuss the work done) Educator:
we will show our suitcases with vitamins to our parents, and then send them by mail to Doctor Aibolit.
We exhibit our works at the stand. Chanterelle:
Guys, I really liked your place, can I stay?
Children:
Yes! The fox treats everyone with apples.
Funny animals from the zoo: monkey, snake, sloth
You can create your own zoo from ordinary plasticine. A variety of forest, wild and domestic animals will happily settle in it. Modeling will bring a lot of fun, and the made figures will be excellent toys for kids.
How to make a monkey: step-by-step instructions
An unusual monkey is made from brown and yellow plasticine mass.
It is molded according to the following scheme:
- Prepare a part for the head from a brown mass and a couple of small yellow elements to form the face.
- Attach yellow cakes to the head, placing them as closely as possible to each other.
- Draw eyes, mouth, nose and wrinkles in a stack.
- Make ears.
- Make a body in the shape of an egg and stick a yellow cake to it.
- Using a match, connect the body to the head.
- Make four long tubes from the brown mass.
- Attach yellow circles to each of the tubes and make cuts on them in a stack.
- Attach the monkey's limbs to the main part.
Monkeys come in different colors
Finally, attach a long tail to the animal.
Snake: sculpting in stages
A very realistic snake is made according to the following instructions:
- Roll the plasticine mass into a sausage of the required length.
- Select the head, giving more volume in this place.
- Draw the eyes and nostrils.
- Make slits along the entire back in a stack - you get scales.
- Attach a long red tongue to the front of the head.
- Bend the snake's body.
You can apply an additional pattern to the snake's body
Tip: to make the snake's body flexible, you need to lay wire inside.
How to make a sloth from plasticine
Sculpting a sloth comes down to the following steps:
- Form the head and body of the animal.
- Sculpt the paws and claws.
- For the future face and tummy, roll into balls and flatten them into flat cakes.
- Make eyebrows in the shape of droplets.
- Make eyes and a nose from small pieces.
- Assemble all the design details together.
- Draw a mouth in a stack.
Preparing for sculpting
Before you start learning how to make animals from plasticine, you should take care of preparing your workplace. The surface of the table at which modeling will be done should be well lit. In addition, you should protect your workplace from plasticine. It is for such purposes that special boards are used. But if you don’t have one, you can simply cover the table with a piece of oilcloth so as not to get it dirty. For kids, you can stock up on various shaped molds, and then sculpting animals from plasticine will become an even more exciting activity. You can also purchase special gloves for handles so that the plasticine does not rub into the skin during work.
Modeling from plasticine. "Forest animals"
Modeling from plasticine.
“Forest Animals” Goal:
To teach how to sculpt an animal from one piece of plasticine, round objects.
Objectives: Educational:
To develop the ability to sculpt animals, to highlight the main parts of the depicted object.
Developmental:
Develop the ability to divide plasticine into the required number of parts, determine their size and shape, and work according to the diagram.
Educational:
To cultivate interest in working with plasticine, to evoke positive emotions from the work process and its result.
Methods and techniques:
Conversation with children, looking at pictures, working with a diagram, didactic game, practical activities for children.
Materials and equipment:
Wall magnetic board, geometric shapes and three-dimensional bodies, a fox and a wolf sculpted from plasticine as a model.
Lesson structure
1. Introductory part. 2. Main part. 3. Final part.
Progress of the lesson:
1. Introductory part.
- Children, guess the riddles... He looks like a shepherd dog, every bit as sharp as a knife, he runs, grinning his mouth, ready to attack a sheep.
(children's answers). That's right, wolf. The second riddle... They say she is cunning and takes chickens out of the yard. But she’s a beauty - all the guys like her. (children's answers). Yes, it's a fox. (I attach a picture of a fox and a wolf to the board). – Children, now you and I will learn to sculpt a fox and a wolf in a new way. – You have sets of plasticine on your tables. Whoever has orange in the set will sculpt a fox. Whoever has gray is a wolf. Raise your hands, who's orange? ….(list the children) You are sculpting a fox. Raise your hands, who's gray? ... (list the children) you are sculpting a wolf. 2. Main part.
Look carefully at the animals that I made... (demonstrating).
Tell me, how many parts do you see on a fox? (children's answers) That's right, three. Name these parts. (children's answers - head, torso, tail). How many parts do you see on a wolf? (children's answers) Three. Name them. (children's answers - head, torso, tail). What do you see in common between a fox and a wolf? (children's answers - they both have a head, a torso and a tail). How are animals different? (children's answers - the fox's tail is long and bushy, but the wolf's tail is shorter and not so bushy). Fine. How many main parts does a wolf have? (three) The fox? (three) So how many parts will we divide the block of plasticine into? (in three parts). The largest part is the body, then the head and tail. Look, what do we need to mold to make the body? (children's answers). That's right, we'll roll out a thin cylinder and flatten it. How do we get the head? (children's answers). That's right, we'll roll a ball and stretch out one side. How do we make a tail? (children's answers). That's right, a small flagellum. Let's take a little rest before work. Physical education minute.
Like our animals (Clap your hands.) Paws merrily knock: Top-top-top, top-top-top.
(Stamping feet.) And the legs are tired, They clap their palms: Clap-clap-clap, clap-clap-clap. (Clap your hands.) And then squat down (Squats.) The animals dance side by side. (Jumping in place.) And when they start running - (Running in place.) No one can catch them. Let's get to work.
(Children are working, the teacher shows with parallel commentary).
We divide the plasticine according to the scheme... First in half. We divide one part in half again. (After each action, the teacher looks at the children’s progress and the quality of their work). Take most of it and knead it well. Rolled into a cylinder (sausage). They put it on the board and pressed it, flattening it. Using a stack, we make cuts on the right and left on the workpiece. The cuts should be the same. We smoothed the cut areas with our fingertips and rounded the entire part to create a rainbow shape. Take part 2. Roll into a ball. Use your fingers to stretch out one side and sharpen it. This will be the head. At the top of the head we draw out two ears, they look like triangles. Take part 3. What will it be? (children's answers - tail). Right. Let's play the game "Where is whose tail?" (The teacher places images of animals without tails on a magnetic board: a hare, a wolf, a fox, a squirrel. Children explain in words where whose tail is. For example, the first one on the left is a squirrel’s tail, etc. Children repeat which tail is the fox’s, which is the wolf.) Rolled up a flagellum. We sharpen at the ends. We attach the details. What can we do to prevent the parts from falling later? (children's answers: smooth the joints with your fingers). We make eyes, but they should not be big. And the nose. Decorate the tail and paws of the fox. Show me what you got? 3. Final part.
- Guys, what did we do today? (children's answers - they sculpted a wolf and a fox) - Have you learned something new? (children's answers - sculpt the body and legs from one part) - You tried hard today. Place your forest dwellers on plates. We are cleaning the workplace.
