January
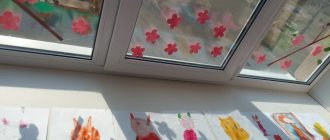
Lesson 41. Drawing “New Year tree with lights and balls”
Program content.
Teach children to convey the image of an elegant Christmas tree in a drawing; draw a Christmas tree large, on the entire sheet; decorate it using techniques of dipping, drawing round shapes and lines. Develop aesthetic perception, form imaginative ideas. Introduce pink and blue flowers. Induce a feeling of joy from beautiful drawings.
Lesson 42. Drawing “Let’s decorate the house mitten”
(Integrated lesson based on theatrical performance)
Program content.
Teach children to draw based on the fairy tale “The Mitten”, to create a fairy-tale image. Develop imagination and creativity. Develop the ability to decorate an object. Strengthen the ability to use paints of different colors in the process of drawing; Rinse the brush clean and dry it on a cloth before using another paint.
Lesson 43. Modeling “Tangerines and Oranges”
Program content.
Strengthen children's ability to sculpt round objects by rolling the clay in a circular motion between their palms. Learn to sculpt objects of different sizes.
Lesson 44. Drawing “Let's decorate the Dymkovo duck”
Program content.
Continue to introduce children to the Dymkovo toy. Learn to highlight painting elements and apply them to a duck cut out of paper. Cause joy from the resulting result; from the brightness and beauty of Dymkovo painting.
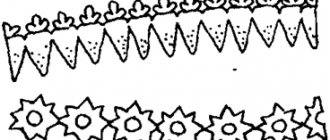
Lesson 45. Application “Beautiful napkin”
Program content.
Teach children to make a pattern on square paper, placing large circles of the same color in the corners and in the middle, and small circles of a different color in the middle of each
side
. Develop compositional skills, color perception, aesthetic feelings.
Lesson 46. Drawing by design
Program content.
Teach children to think about the content of the drawing and use learned drawing techniques. Learn to fill the entire sheet with images. Create a desire to look at the drawings and discuss them; enjoy colorful images and their diversity.
Lesson 47. Modeling “Delicious gifts for Mishka’s birthday”
Program content.
Develop imagination and creativity. Teach children to use familiar sculpting techniques to create different images. Reinforce sculpting techniques; Ability to handle materials and equipment carefully.
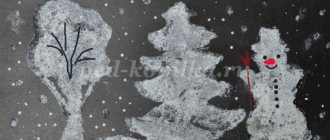
Lesson 48. Application “Snowman”
Program content.
To consolidate children's knowledge about round shapes and the differences in size of objects. Learn to compose an image from parts, arranging them correctly in size. Practice careful gluing.
Lesson 49. Modeling “Little dolls walking in a snowy meadow”
Program content.
Learn to create the image of a doll in modeling. Learn to sculpt an object consisting of two parts: a column (fur coat) and a round shape (head). Strengthen the ability to roll clay between the palms with straight and circular movements, connect two parts of an object using pressing techniques.
Lesson 50. Modeling “Make your favorite toy”
Program content.
Teach children to independently choose the content of modeling and use previously learned modeling techniques. Strengthen the ability to sculpt objects consisting of one or several parts, conveying their shape and size. Invoke joy from the created image.
Progress of the Lesson:
Q. Guys, the holiday “Defender of the Fatherland Day” is coming soon. Why is it called that? Who can we call defenders of the fatherland?
Q. But to defend the Motherland you need special equipment. Guess the riddle:
it looks like an all-terrain vehicle,
will pass through mud easily,
hill, ditch is not a barrier,
will instantly rush as it should. (tank)
The bird flies across the sky, but does not move its wing.
makes a wonderful flight ( plane )
Guys, look at the plane (showing a toy plane )
.
An airplane has a body , wings, and a tail.
Let's try to make a plane out of magic pebbles.
We'll build the plane ourselves,
let's fly over the forests,
let's fly over the forests,
and then we’ll go back to mom.
Now look at how to draw an airplane . You need to take a pencil and hold it with three fingers. Like this. First we draw the body of the aircraft . Like this, in a straight line (I show)
Now we draw the wings.
I draw straight lines on the sides of the aircraft . Like this (I show)
at a slight angle.
Draw the tail from the end of the airplane body upwards , to the side. Like this (I draw on an easel)
.
Now let’s show in the air with our finger the order in which to draw the plane . (Together with the children I show with a gesture, and we say with the children again: body, wings, tail of the plane ).
Admire your planes , how beautiful they turned out. How beautifully they fly in the sky . Well done!
Summary of the integrated lesson “Hello, autumn!” (second junior group) Summary of the integrated lesson 2nd junior group “Hello autumn!” Objectives: Expand children's understanding of seasonal natural phenomena. Summary of the integrated lesson “Geese-swans” (second junior group) Purpose. Consolidating children's knowledge of the material covered on FEMP and speech development. Objectives: Educational: 1. Strengthen the ability to determine. Summary of the final lesson on FEMP “Journey to the Fairytale Forest” (second junior group) Purpose: to consolidate the concepts of many, one; train the ability to compare the number of objects: “more”, “less”, “the same”; secure.
Summary of the music lesson “Acquaintance with musical instruments” (second junior group) Synopsis of the musical lesson “Acquaintance with musical instruments” Second junior group Program content • Learning objectives:.
"Maple twig." Notes on non-traditional drawing using the technique of “imprint, imprint with leaves” (second junior group) Notes on the lesson “Maple Twig” using the method of unconventional drawing Technique “Imprint. Imprint with leaves" Educational.
Source
On the topic: methodological developments, presentations and notes
Date: February 21, 2012 Participants: children of the preparatory group Conducted by: educational psychologist Panova M.M. Purpose: to promote formation.
Introduce children to number and figure 6. Improve counting skills and comparison of subject aggregates. Form children’s ability to distinguish between the concepts of yesterday, today, tomorrow. Consolidate knowledge about geome.
The lesson “An exciting trip on a traffic police helicopter” is aimed at strengthening children’s knowledge of familiar traffic rules.
Goal: - To develop practical skills in working with a variety of natural materials. - When making a toy, to teach how to measure its parts. - To develop children’s imagination and desire to make toys.
Summary of a lesson on artistic and aesthetic education for children of senior preschool age on the topic: “Drawing a military helicopter.”
Source
March
Lesson 61. Application “Flags”
Program content.
Strengthen the ability to create in an application an image of a rectangular object consisting of two parts; correctly position an object on a sheet of paper, distinguish and correctly name colors; Use the glue carefully and spread it all over the mold. Develop the ability to enjoy the overall result of the lesson.
Lesson 62. Drawing “Beautiful flags on a string”
(Option “Spatulas for dolls”)
Program content.
Teach children to draw rectangular objects using separate vertical and horizontal lines. Introduce the rectangular shape. Continue to practice drawing and coloring techniques with colored pencils.
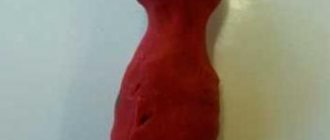
63. Modeling “Tumbler”
Program content.
Teach children to sculpt an object consisting of several parts of the same shape, but of different sizes, pressing the parts tightly against each other. Create a desire to decorate an object with small details (a pompom on a hat, buttons on a dress). Clarify children's ideas about the size of objects. Strengthen the ability to sculpt accurately. Create a feeling of joy from what you have created.
Lesson 64. Modeling “Little Masha”
(Based on a nursery rhyme)
Program content.
Teach children to sculpt a small doll: the fur coat is a thick column, the head is a ball, the hands are sticks. Strengthen the ability to roll out clay with straight movements (column - coat, sticks - sleeves) and circular movements (head). Learn to compose an image from parts. Invoke a feeling of joy from the resulting image.
Lesson 65. Drawing “Draw someone who wants something beautiful”
Program content.
Develop aesthetic perception. Learn to see and highlight beautiful objects and phenomena. Strengthen children's ability to draw with different materials, choosing them as they wish.
Lesson 66. Modeling “Treats for dolls, bears, bunnies”
Program content.
To develop children’s ability to choose the content of their modeling from the named objects. Foster independence. Reinforce sculpting techniques. Create a desire to sculpt something needed for the game. Develop imagination.
Lesson 67. Drawing “Baby Books”
Program content.
Teach form-building movements of drawing quadrangular shapes with a continuous movement of the hand from left to right, from top to bottom, etc. (you can start the movement from any side). Clarify the technique of painting by moving your hand from top to bottom or from left to right. Develop imagination.
Lesson 68. Application “Napkin”
Program content.
Learn to make a pattern of circles and squares on a square-shaped paper napkin, placing the circles in the corners of the square and in the middle, and the squares
between
them. Develop a sense of rhythm. Strengthen the ability to glue parts carefully.
Lesson 69. Drawing “Draw something rectangular in shape”
Program content.
Teach children to independently think about the content of the drawing, to apply the acquired skills in depicting various rectangular objects. Learn to select pencils of the right colors for drawing. Practice drawing and painting rectangular objects. Develop a sense of color and imagination.
Lesson 70. Modeling “Tumbler Bear”
Program content.
Exercise children in depicting objects consisting of round parts of different sizes. Practice the ability to fasten parts of an object, pressing them tightly against each other.
Preview:
Summary of drawing lessons for young children
"Road for Cars"
1. Exercise children in the ability to draw a straight line without lifting the brush from the sheet.
2. Develop fine motor skills of the hands.
3. Cultivate accuracy when working with gouache.
Materials: brushes, jars of paint, jars of water, napkins for each child; three toy cars, a finished sample drawn; pattern with one stripe, pattern with two stripes.
Educator: Guys, cars came to visit us today, they are magical and came to us from a magical land. (shows three small cars).
Guys, look at the cars and tell me what kind of cars they are? (cars) and this? (freight)
-What color are they?
- What does the car have? (wheels, body, headlights, doors, windows, steering wheel, windshield, mirrors)
Let's show our cars how we can do (physical education minute):
To drive a car, we need to pump up the tires (simulation of movement with the sound shhhhh)
Pour gasoline into the gas tank (simulation of movement)
And let's go to the store (“travel” around the room)
Educator: Guys, do you know that our cars are very sad and upset! Do you know why? Yes, because they were driving towards us along a bad road. The road was full of holes, ditches and mounds! They almost broke down, and they still had to return home, so they were sad. Let us draw the cars a new smooth, smooth and colorful road.
Educator: Now, we sit down at our tables, but no one takes anything, you need to listen carefully to how we are going to draw so that it turns out correctly and only after I say loudly: DRAW, you will start drawing. Agreed?
— You have brushes, paints, jars of water and napkins on your tables. Now each of you will draw a part of the road, evenly and neatly, then we will let the drawing dry and collect our drawings into one long and beautiful road and show it to the cars, imagine how happy they will be. Look how I drew my path. To draw yours, you need to draw one line from top to bottom, then a second one and paint over the middle.
- Now, let’s pick up the brushes correctly (the teacher shows how to do it and looks at how the children are holding it; if it’s wrong, he corrects it). DRAW (speaks loudly) The children begin to draw, and the teacher draws with them again from the very beginning and says: first, from top to bottom, one line (sees how the children do it, then not far away the second line (looks at the children) and paint over (the teacher goes in rows to control the children's process, directing or correcting, or praising the children who are correct).
As the drawings are completed, the teacher takes the children's work to dry, praises each child and thanks them for their help on behalf of the machines.
- Well done guys, you tried very hard, the cars are happy and happy.
Source of the article: https://nsportal.ru/detskiy-sad/risovanie/2020/09/22/konspekt-zanyatiya-po-risovaniyu-s-detmi-rannego-vozrasta-doroga