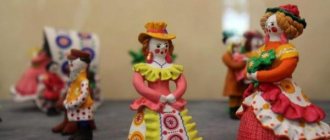
Play Dough: UGC Modeling is fun activity that little love . Children are ready to spend hours doing needlework, creating a variety of intricate figures. Material for developing children's imagination is easy to create from familiar ingredients. How to make salt dough, read the article.
How to make salt dough?
You will need: a glass of wheat flour, a glass of extra salt, half a glass of cold water, a bowl.
Recipe
- Take a bowl.
- Pour in a glass of flour.
- Add a glass of extra salt.
- Fill with cold water.
- Knead the dough.
The finished salted dough should not stick to your hands or crumble. It should be cool and easy to sculpt. I recommend watching the video master class!
SALT DOUGH | How to make your own salted play dough | A simple salt dough recipe.
How to make salt dough for crafts using a simple method
It's time to look at proven recipes. Let's start with the simplest thing. For it they use:
- salt and flour (use 200 grams each);
- a quarter glass of water;
- If desired, prepare dye for coloring.
In addition to “Extra” salt, it is important to use high-grade flour so that the result is white. Be sure to cool the water in the refrigerator. The cooking process will look like this:
- Add salt to flour. Gradually pour in the liquid.
- Knead the dough. You should have a base. If the composition turns out to be liquid, add flour and salt; on the contrary, if it becomes stiff, you can add a little water.
Please note that when making salted dough for modeling according to this recipe, you can change the proportions of the components.
Dyes can be added for color. They can be mixed with water and a ready-made consistency. The second method is more convenient, since there will be no unclaimed pieces left.
How to dry salt dough?
There are two most common ways to dry salt dough. The first method: the finished craft will dry on its own. The main thing is that it should not be exposed to direct sunlight, otherwise it will crack. The craft can be placed on a flat surface and wait a few days. Second method: dry the finished craft in the oven for 3 to 6 hours (depending on the size of the craft). Drying occurs in batches with breaks. One approach is 1-2 hours. For quick drying in one go, set the oven to 75-100 degrees, and then the craft will dry in an hour. At a temperature of 120 degrees, the craft will dry in 30 minutes, but it is better to dry it naturally.
How to dry dough crafts
Each finished craft needs to be dried. How long it takes depends on the drying method. There are several drying options, choose the one that is convenient based on the size of the product or the availability of time.
Choosing a method for drying products:
- Air dry on a flat surface. It will take a long time to wait for the result; it takes a day for 1 mm of the thickness of the craft. Indentations may appear where the dough comes into contact with the surface, and sometimes you cannot turn the craft over. This option is suitable for small flat products.
- Drying on a radiator. This method is only possible during the heating season. Drying on a radiator takes less time than drying in air. The process takes from 1 to 2 days, depending on the thickness of the product.
- Baking in the oven is a relatively quick method, suitable for large products. You need to dry the craft on a baking sheet.
If there are sudden changes in temperature in the oven, the product may crack, so you need to start drying with the door open, gradually increasing the temperature:
- at 50 degrees - 1 hour with the door open;
- then at 75 degrees - 1 hour, the door is closed until drying is complete;
- then at 100-120 degrees - 1 hour;
- complete drying at 150 degrees – 30 minutes;
- open the door and leave the product to cool.
Combined drying is also possible. First, the craft is dried in the open air or in a radiator, and then in the oven. Suitable for large products.
The time and temperature for baking the craft in the oven depends on the color of the baking sheet and the thickness of the product. The article indicates the temperature for a light baking sheet; on a black one, make an adjustment - 20 degrees lower. The drying time is indicated for products up to 2 cm thick; if the craft is thicker, the time increases by about 1.5 times.
After drying, you need to lightly tap the product: if the sound is loud, the craft has dried. A dull sound indicates that the dough inside is wet, it needs to be dried, otherwise the craft will begin to collapse.
How to color salt dough?
There are two most common ways to color salt dough. The first method: after drying, paint the finished craft with acrylic paints or gouache using a brush. Second method: food coloring is diluted in water, then added while preparing the dough. When the craft is completely painted and dried, it must be coated with transparent manicure or furniture varnish in 2-3 layers. Each layer must dry before applying the next. This way the craft will last for a long time.
Salt dough recipes
There can be many recipes, let's look at a few of them. You need to choose the simplest flour, without additives, and the water should be very cold.
3.1. Regular salt dough
Compound:
- Wheat flour – 1 tbsp;
- Salt – 1 tbsp;
- Water – 0.5 tbsp.
How to make modeling material from these ingredients?
- You need to mix flour and salt, then add water little by little, quickly mixing everything with your hands.
- You don’t need to knead the dough for long; if it turns out too tight, add a little more water.
- If the dough is sticky, add a little flour. It all depends on the flour, so sometimes more water may be needed, sometimes less.
3.2. Salted dough with rye flour
Compound:
- Rye flour – 1 tbsp;
- Wheat flour – 1 tbsp;
- Water – 0.5 tbsp;
- Salt – 1 tbsp;
- Oil – 1 tbsp.
Rye flour will give the product a soft brown color, especially if you dry it in the oven. Rye flour alone is not used, as the dough will be very tight and difficult to mold into something. The oil will give the dough elasticity and will not stick to your hands.
3.3. Salt dough with glue
Compound:
- Flour – 2 tbsp;
- Salt – 1 tbsp;
- Dry wallpaper glue – 2 tbsp;
- Oil or glycerin – 4 tbsp;
- Water – 125 ml.
- First you need to combine flour and salt, then add glue diluted in water.
- Mix everything and add oil.
- If the mixture is sticky, add a little flour. In addition to wallpaper glue, PVA glue is used, this is done for the strength of the material.
How to make colored dough?
To tint the dough, you can add food coloring or natural juice, adding drop by drop and mixing with the finished mass. In addition, you can paint the finished craft after it has dried using art paints.
Salt dough star
You will need: colored salt dough, glass, clear manicure polish, toothpick.
Master Class
- Roll into a ball.
- Make a flatbread out of it.
- Cut out a star using a stack.
- Brush the corners of the sprocket with a wet finger to make them smooth.
- Make dots with a toothpick.
- Make a smile with your eyes.
- Attach small flat balls of a different color using water to decorate the star.
- Dry the craft.
- Apply varnish and wait until completely dry.
The salt dough star is ready!
Why salt dough?
Many people are surprised to hear that the dough must be salted in order to make something out of it. The fact is that you can sculpt something from any dough, because it is always plastic, but not from any dough you can make crafts that will be stored for a very long time without losing their appearance.
The secret material - salt - cements the dough, so the products hold up after drying. The main ingredients of this test:
- Flour;
- Salt;
- Water.
In addition, you can add other components, depending on what you want to get. This can be glue, oil or paint and can be added to any recipe. But the main thing here is salt, which should be finely ground and without impurities (iodine).
Salt dough caterpillar
You will need: colored dough, knife, PVA glue, toothpick, pendant, clear manicure polish.
Master Class
- Roll out the sausage.
- Cut it into 6 equal parts.
- Roll into balls.
- Glue 5 balls together.
- Glue the head.
- Make a nose and eyes, then glue them on.
- Poke a toothpick into the hanging area.
- Dry the craft.
- Apply varnish and wait until completely dry.
- Attach the pendant.
The salt dough caterpillar is ready!
Salt dough apple
You will need: colored salt dough, PVA glue, clear manicure polish.
Master Class
- Make half an apple, make the inside flat, pressing it onto a flat surface.
- Make a thin flat center and glue it to the main part.
- Roll 6 seeds and a stick, then glue to the apple.
- Blind the leaves, then glue them.
- Dry the craft.
- Apply varnish and wait until completely dry.
The salted dough apple is ready!
Salt dough elephant
You will need: colored salt dough, PVA glue, clear manicure polish.
Master Class
- Make the elephant's body by rolling an elongated ball.
- Make 4 legs in the shape of plump sausages.
- Make a proboscis.
- Make the elephant's ears in this way: roll out 2 flat cakes, glue flat cakes of the same shape of a smaller size and a different color to them.
- Make a small ponytail.
- Blind your eyes.
- Assemble the elephant in the following sequence: glue the legs to the body, then glue the proboscis, then the ears, eyes and tail.
- Dry the craft.
- Apply varnish and wait until completely dry.
The salt dough elephant is ready!
Salt dough roses
You will need: salt dough, foil, a candy vase or similar plastic container, gouache, a brush, clear manicure polish, a modeling board, a knife or a stack.
Master Class
- Fill the vase with foil.
- Roll into balls. For one rose you will need 5 balls, for a leaf - 1 ball.
- Make leaves and draw stripes in a stack.
- Make cakes from the balls and form a rose. Roll one cake into a tube, then attach it to different sides of the cake, forming petals.
- Attach roses and leaves to the foil.
- Dry the craft.
- Paint the craft and wait until it dries completely.
- Cover the craft with varnish and wait until it dries completely.
Salt dough roses are ready! I recommend watching the video master class on how to make a rose!
Master class: Modeling a rose with thin petals from salt dough. Master class for modeling rose.
Hedgehog made from salt dough
You will need: salt dough, nail scissors, PVA glue, acrylic paints or gouache, brush, manicure polish.
Master Class
- Make an oval-shaped hedgehog body.
- Make an elongated tip.
- Make 2 small balls and glue them in place of the eyes.
- Roll the ball a little larger and glue it as a nose.
- Make needles by cutting the dough. The cuts should be made in rows, the needles should be placed in a checkerboard pattern.
- Dry the craft.
- Paint and wait until completely dry.
- Apply varnish and wait until completely dry.
Salt dough hedgehog is ready!
Owl (eagle owl) made from salt dough
You will need: salt dough, pva glue, nail file, manicure scissors, acrylic paints or gouache, brush, wooden board with a pendant, transparent manicure varnish.
Master Class
- Make an oval shaped body of the owl.
- Blind the eye in this way: make a round cake and glue it on, then take a piece of dough, form a small strip, wrap it in a tube and glue it as a pupil.
- Blind the second eye in the same way.
- Using a nail file, make small stripes from the pupil to the outer shell.
- Make rays around the eye by pressing the nail file onto the dough.
- Take scissors and make cuts to form the owl's feathers. This process is painstaking, the main thing is not to rush.
- Place the cuts in rows. The feathers should be staggered.
- Glue the craft to the board.
- Make the owl's paws and glue them on.
- Make the owl's wings, use scissors to make feathers and glue them on.
- Using the same principle, attach the “hairstyle”.
- Dry the craft.
- Paint the owl and wait until it dries completely.
- Cover the craft with varnish and wait until it dries completely.
The salt dough owl is ready!
Salted dough fruit basket
You will need: salted dough, a base on which the craft will be attached, such as a board or plate, a glass or a knife, a sheet of paper, a simple pencil, a garlic press, a rolling pin, PVA glue, acrylic paints or gouache, a brush, clear manicure polish, cloves.
Master Class
- Draw a basket on a piece of paper or print out a template.
- Roll out the dough into a thin layer.
- Glue the central part of the layer onto the board.
- Attach a paper template.
- Cut out the basket with the tip of a knife.
- Pass the dough through a garlic press to create stripes, then twist into ribbons.
- Lubricate the handle of the basket with glue and place the flagella on it.
- Glue the flagella onto the rim.
- Using the tip of a knife, draw a mesh on the basket, making it look wicker.
- Roll out the layer and cut out 9 leaves with a knife.
- Using the tip of a knife, draw stripes on the leaves.
- Glue 3 leaves on the sides and top center of the basket.
- Make 4 large circles and glue them on as apples.
- Make a small indentation with a stack in the center of each apple and glue a clove.
- Make 3 small circles and glue them on as plums.
- Make about 20 small balls and glue them like a bunch of grapes.
- Dry the craft.
- Paint and wait until completely dry.
- Apply varnish and wait until completely dry.
Salted dough fruit basket is ready! I recommend watching the video master class!
#Salt dough/ Basket with vegetables.
Dough with a beautiful shine
Do you want to get beautiful, shiny dough? Use glycerin. You can buy it at the pharmacy, and the final craft will look shiny, as if it had been varnished. What you will need:
- two glasses of boiling water;
- a few drops of glycerin;
- half a kilo of flour;
- oil;
- one hundred grams of salt;
- dye.
Do you have all the ingredients? Then let's prepare:
- Pour all dry ingredients into a container.
Add oil to the base. This is the base mixture. - Boil water in a separate container and add glycerin. Pour into the mixture obtained earlier. Place the resulting mixture on the fire and stir until a homogeneous mass is obtained.
- Remove from heat and leave until cool. Mix the consistency with your hands. If the mass turns out liquid, add flour.
Ready. Use the base to create sparkly figures.
You can also make polymer clay at home
What to use as additional ingredients
In addition to the main ingredients, such a test may include a number of additional components:
- Unnatural ingredients. This includes PVA glue, bustilate and even wallpaper glue. To obtain an environmentally friendly craft, adding such components is not recommended.
- Food flavorings: vanilla, cinnamon or cloves. The base will turn out very fragrant and will emit a scent for several weeks after drying.
Any recipe for how to make salt dough for modeling and crafts with your own hands involves the use of dyes. The following dye options are suitable for testoplasty:
- food (they can be powder and gel);
- watercolor or gouache;
- spices;
- instant coffee;
- juice from berries, fruits or vegetables.
The dye can give a specific result. And to avoid surprises, you need to know what exactly is best to use:
- turmeric, carrot juice for yellow;
- paprika for orange;
- blueberry juice for blue;
- ground coffee or cocoa for brown;
- pomegranate juice for burgundy;
- use spinach or spirulina juice for green;
- juice from raspberries or cranberries for pink.
These are all natural dyes. But in the case of other components, it is better not to give the dough to children.
Modeling from plasticine is good for children
Salt dough cat
You will need: salt dough, a knife, a rolling pin, a simple pencil, a sheet of paper, sandpaper, acrylic paints or gouache, a brush, transparent manicure varnish, a glue gun or pva, a base for crafts, for example: a board with a frame, transparent manicure varnish.
Master Class
- Draw a cat or print a template.
- Roll out the dough into a thin layer.
- Attach the template and cut out the cat.
- Dry the craft.
- Sand the craft with sandpaper, removing any unevenness.
- Using a simple pencil, transfer the desired design onto the cat’s body.
- Paint with paints and wait until completely dry.
- Cover the craft with varnish and wait until it dries completely.
- Glue the cat onto the base with the frame.
The salt dough cat is ready! I recommend watching the video master class!
Cat souvenir (Laskutok) | Salt dough modeling part 1
Dough exercises for young children
originalnie-podarki.com
Kids love working with dough! Their hands are drawn to this material to squeeze it, tear off a piece, and stick it back. This material is simply ideal for children to understand, because it easily lends itself to any transformations that a child can think of!
Kids can easily work with the dough on their own - to do this, just push them by showing them what they can do with it. And you can do the following:
- Pinch off pieces of dough with two fingers, and then stick them back to the common lump.
- Clap the dough with your whole palm, the edge of your palm, roll the sausages with your fingers or with your whole palm.
- Leave fingerprints or palm marks on a piece of dough, make marks with different objects - a stick, a fork, etc.
- Make bagels and invite the child to put them on a string, make small candies and wrap them in paper or foil.
- Roll into balls for future beads or make pendants, and then bake in the oven. It is not recommended for either a child or an adult to wear such jewelry, but they can be painted at their discretion - and this is a separate type of joint creativity.
busi.su
- Invite your child to cover the jar, glass, lid, and walnuts with dough.
- Roll out the dough into a layer and cut out different figures from it with a glass, shot glass, or cookie cutters, which, after drying, can be painted with watercolors or gouache. And if you make holes in the figures before drying, then you can later use them as decorations for the Christmas tree. If this is too difficult for the baby, just roll balls with it, dry it and then decorate with interesting patterns - this will make wonderful homemade Christmas tree balls.
- You can make letters out of salt dough, and when they dry, play with words.
- Invite your child to cover a pre-prepared cardboard base with dough - it will be a kind of pie), and then let him decorate the “holiday dish” with various cereals, peas, beans or other natural materials (pebbles, shells, twine, etc.). Excellent decorations and excellent helpers in the development of fine motor skills of a child’s hands are pine cones, dry grass, shaped pasta, beads and other small things.
originalnie-podarki.com
- Cut out a template from cardboard in advance (for example, a house, an apple, a mushroom) and invite the child to cover it with dough and decorate it.
- Take a small cardboard or plastic plate as a basis, fill it with a large amount of dough and invite the child to stick various dried plants, leaves, and fir cones into the “clearing.” The resulting “forest” can be decorated with live leaves, pieces of cotton wool, chestnuts, and nut shells (depending on the time of year).
- You can make figures of different animals from salt dough and show your child fairy tales. Or you can simply show, with the help of molded figures of animals, how they stomp and where the animals live, who they are friends with, who they go to visit.
Salt dough pencil
You will need: water, flour, extra salt, a cardboard jar for the frame, PVA glue, scissors, a piece of decorative rope or corrugated paper, gouache, a brush, a button, stacks, acrylic varnish for crafts, a toothbrush.
Master Class
- Knead the salted dough in this way: add a glass of flour, a glass of salt, add water, then knead until the desired consistency of the dough. Separate part of the dough, add beige gouache, then knead.
- Roll out the cake to a thickness of 10-15 mm.
- Apply PVA glue to the outer rim of the jar and wrap it with dough. Cut off the excess with a stack and smooth the joints with a damp brush.
- Create a small dotted texture with a toothbrush on the surface of the dough.
- Knead the brown dough, roll it into a flat cake 10-15mm thick.
- Cut a 5cm wide strip of brown pastry and glue it to the bottom of the jar.
- Make 2 large owl eye bases from white dough, then glue them on.
- Make a beak out of brown dough and glue it on.
- Make eyes from turquoise dough and glue them on.
- Roll out 8 strips of pink dough, twist them into 4 flagella and make a bow, then leave it to dry for 2 hours.
- Make droplet-shaped owl wings using brown dough, then glue them on.
- Weave ropes of beige dough and glue them onto the neck of the jar.
- Roll out a sausage from white dough, draw the texture of the lace with a stack and glue it as a collar under the beak.
- Place the craft in a warm place for a day.
- Paint the bottom and wings with brown gouache and decorate with white dots.
- Draw the pupils and eyelashes with black gouache, wait until the paint dries, then paint white highlights on the eyes.
- Glue a pink bow above the wing.
- Glue a button with a bow from a corrugated strip onto the lace.
- Cover the craft with varnish and wait until it dries completely.
The salt dough pencil is ready!
How to make salted play dough with your own hands: recipe
www.livemaster.ru
You can find a huge variety of recipes for making salted play dough online, but the base always remains the same.
The basic recipe for making salt dough is incredibly simple - to do this, mix ¾ cup salt, 1 cup flour, 5 tablespoons vegetable oil and add a little warm water. If you want the dough to be more flexible, replace the warm water with starch jelly.
Before cooking, the salt must be dissolved in warm water, and then you can add all the other ingredients.
If you want to paint the dough in different colors, then when working with older children, you can safely add gouache. If you are planning to do handicrafts with a very young child, use carrot juice, beet juice or even coffee.
We wrote about how to make colored salt dough HERE.
To prevent the dough from drying out, simply cover it with a glass. If you make a very large quantity that you cannot use with your child at one time, the dough can be stored in the refrigerator. To do this, simply place it in a bag or in a closed jar so that the moisture does not evaporate from the mass.
www.google.by
When you have finished working with the dough and want to save the result of your joint creativity with your child, simply put the figures in a cold oven, turn on the heating to a low temperature, and open the oven door slightly. This is necessary so that when the temperature in the oven increases, the dough does not crack.
Once the figurine has cooled, it can be varnished or painted in different colors.
Salt dough dachshund
You will need: salt dough, a simple pencil, scissors, cardboard, paints, a brush, rope, toothpick, foam sponge, clear varnish, PVA glue.
Master Class
- Draw a dachshund on the cardboard as shown in the image.
- Cut out the template.
- Roll out the dough to a thickness of 5 mm and cut out the dachshund according to the template.
- Roll out the oblong eyes, then glue them on.
- Blind the eyelids and glue them onto the eyes.
- Use a toothpick to outline the paws, nose, mouth, ear and body contours.
- Roll out an oval, then glue it onto the ear and smooth the seam with a wet finger. Use the same method to add volume to the dachshund's back and tail.
- Mark stripes in different directions around the entire perimeter of the dachshund, so that the stripes resemble wool.
- Dry the figurine.
- Paint the figurine, then leave to dry.
- Glue a piece of rope to the back of the craft for further hanging.
- Cover the craft with varnish and wait until it dries.
The salt dough dachshund is ready!
Boletus mushroom made from salt dough
You will need: salt dough, light bulb, paints, brush, foil, cardboard, masking tape, superglue, PVA glue, paper napkins, clear varnish, stack.
Master Class
- Cover the light bulb with tape, then cover it with dough and dry the workpiece.
- Cut a ring out of cardboard and place it on the light bulb as a base for the hat.
- Form a hat from crumpled napkins, then secure with tape.
- Wrap the hat with foil.
- Roll out the dough to a thickness of 5 mm and stick around the cap.
- Remove the cap from the stem, cover the bottom with dough and make stripes in a stack.
- Glue the hat onto the leg.
- Mold the mushroom's arms, legs and nose, then glue them on PVA.
- Make a caterpillar and glue it to the hat.
- Dry the figurine.
- Paint the figurine, then leave to dry.
- Cover the craft with varnish and wait until it dries.
Boletus mushroom made from salt dough is ready! I recommend watching this video!
Modeling from salt dough: Basket with mushrooms. Master class for adults and children.
Methodological development: modeling from salt dough.
Olga Tarasova
Methodological development: modeling from salt dough.
Introduction
Man by nature is a creator. For this he has everything: imagination, thoughts, ideas and a body that brings all this to life. How interesting it is to see your ideas expressed in dance, sound, drawing or crafts! The dance of the fingers gives matter the shape given by our imagination, and the name of this “dance” of the hands is modeling . There is a huge amount of materials for modeling : clay, plasticine, plaster, dough , snow, sand, bread, wax.
From all kinds of materials, I chose dough , which I began to use in my work with children.
Salt dough is a simple and accessible material in a kindergarten, which, without much hassle and without firing, ensures sufficient preservation of finished crafts.
Testoplasty as a type of artistic activity has great developmental potential. In the process of modeling from salt dough, children's sensory sensitivity increases (the ability to finely perceive shape, texture, color, weight, plasticity, proportions); General manual skill and fine motor skills develop, and the work of both hands is synchronized. Working with the test contributes to the development of children's speech. Preschoolers develop the ability to plan work to implement a plan, anticipate the result and achieve it, making adjustments to the original plan if necessary.
In the process of modeling, children get the opportunity to establish physical patterns and master ideas about the changes in substances. Experimenting with salt dough , tools and additional materials enriches the child’s knowledge about their properties and possibilities of use, stimulates the search for new actions and promotes courage and flexibility of thinking.
Products made from salt dough have ceased to be popular due to the fact that a lot of different materials have appeared for making souvenirs,
traditions have changed. However, products made from salt dough
used in kindergarten as one of the materials for modeling . This work was called testoplasty .
Compared to plasticine, salt dough has a great advantage. It does not stain your hands, is more plastic, and is easy to mold. Products made from salt dough are more durable and can be easily painted with felt-tip pens, paints and gouache.
Products made from salt dough are made both flat and three-dimensional; they can easily be glued to paper, drywall, chipboard and many other hard materials, which allows you to create beautiful compositions of wall panels. And what is very important is that salt dough is an environmentally friendly product.
It is clear that we can make decorative and applied arts products salt dough
Working with salt dough gives children great pleasure, especially making jewelry and gifts.
There are many options for testoplasty that can be offered to children: making a photo frame, decorations for the New Year tree, making gifts for mothers and grandmothers for International Women’s Day and painting them, etc.
products made from salt dough with gouache, as its colors are more durable and bright. When completing the work, it is advisable to coat the product with varnish - this will protect the product from moisture and give it shine.
A necessary condition for successfully taking the test is adequate preparation. The working surface must be clean and level.
play dough is not at all difficult. You need to mix together two parts flour, one part fine salt and part water, knead the dough until ready and you can create! store the dough in a bag or jar, closed. If the dough has become weathered and a crust has formed on it, grease it with oil and the crust can be easily removed.
dry salt dough products in the oven , either on an electric stove (at a temperature of - 75 C for one hour, or in the oven on a gas stove (it will take twice as long)
. The most convenient and safest way is air drying (you can dry it on a windowsill - in this case, the products are laid on a durable, thin, smooth surface, such as veneer). This drying option is the most economical, but takes longer. It is better to use this method in the summer.
dry salt dough products on a radiator !
Testoplasty is a fun and amazing activity for children and adults!
To begin with, I studied methodological literature on testoplasty , selected fiction, finger exercises, templates, and sketches for sculpting . I tried to make products from salt dough , and selected a dough and a technology for making crafts that would be suitable for working with children.
The dough was kneaded in the presence of children. They were given the opportunity to work with the dough : touch, smell, knead, express their impression of the dough : hard, white, cold, you can make holes, roll sausages, tear off a piece, etc. First, the children learned to sculpt and decorate flat figures, hearts and etc. There was so much joy, the children did not get tired, were not distracted, everyone was interested.
Rolling pins were used for rolling, and cookie cutters and bottle caps were used for cutting. Then they learned to sculpt three-dimensional forms.
During activities, children often encountered situations that required special psychological support for the child (praise, compliments, approval, admiration)
and support is needed that guides children to rethink and experience.
Therefore, the purpose of my work is:
Formation of children's skills in modeling from salt dough and development of their creative abilities, fantasy, and imagination.
To achieve the goal, the following tasks are defined:
1. To promote the development of children’s creative abilities, the cultivation of artistic and aesthetic taste through exercises in modeling from salt dough ;
2. Develop fine motor skills of the hands, stimulating the development of speech;
3. Promote the development of children’s interest in artistic creativity;
4. Enrich the subject-developmental environment of the group, conducive to the manifestation of children’s creative activity.
Chapter 1 “Features of organizing and conducting classes
modeling from salt dough»
Creating a material environment that stimulates and enables children to work with salt dough does not require certain physical and material costs.
So, to make figures from salt dough you will need (for each child)
: a plastic knife (a stack, a small rolling pin for rolling out
dough , a toothpick, a garlic press for decorating “hairstyles”
,
“fur”
and various decorative textures. You will also need cookie cutters.
As tools, you can use parts from a regular ballpoint pen, the pen itself, or bottle caps. Old markers with images of different colors, hearts or birds on the cap will come in handy, which can be used to make imprints on the product. Tools can be buttons of different sizes, ordinary forks, children's scissors, a pocket comb and much more that is at hand. To glue the products you will need a brush and cold water.
Let us immediately note that to work with salt dough you need a certain temperature regime in the room. The optimal air temperature is 20 C. If the temperature is higher, the dough dries out quickly , making it difficult to process and join parts.
During the sculpting you need to use stacks. They can be wooden or metal. Wooden ones are easy to make yourself. The simplest forms of stack are a stick, pointed on one side and rounded on the other, a spatula-shaped stack, and a loop stack. The stack is used to work out details in cases where it is difficult to do by hand; The stack removes excess clay from the mold and makes cuts.
The quality of a child’s work largely depends on how his workplace is organized. For successful work, it is good to have small boards (square or round, which are placed on the table. The size of the board is determined by the size of the sculpt . If the figure is 15x10 cm in size, then the board can be 22x35 cm in size. If the figure is larger, then the board should be larger . Basically, the teacher and the attendants prepare a workplace for each child, distributing dough and equipment . Children sculpt while sitting at regular tables, on a board or on rotary machines. If sculpting involves painting with paints, then the lesson is divided into two parts: the first part of the lesson is sculpting objects , and the second part is painting them.
There are several points that need to be taken into account when working with children when teaching the “ Testoplasty ”
.
Firstly, due to their age characteristics, they cannot and should not perform exercises to master one or another technological technique. Therefore, to consolidate a technological technique, it is necessary to select 2-3 products of approximately equal complexity.
Secondly, when preparing for a lesson, it is especially necessary to take into account this important circumstance: due to their psychological characteristics, children strive to receive the finished product right away; it is difficult for them to wait for several days. Therefore, it is necessary to select the product and the size of the material in such a way that in 1, maximum 2 lessons, all children would have it ready.
Thirdly, it is necessary to take into account that for children play is the main driving force of mental and psychological development. Products that can be used in games resonate with children. As a result, children's understanding of technological techniques occurs faster.
Fourthly, taking into account the psychological characteristics of preschoolers and knowing what they can already do and what techniques they know, it is possible to select more complex products for them.
A positive educational aspect is the fact that the teacher sculpts together with the children; they are guided by it as an exemplary one. the method of demonstrating personal creativity as often as possible.
In front of children or at the request of children, I often sculpt, draw, glue, cut out, make various crafts for decorating a group, for games, thereby giving the opportunity to examine, admire, be surprised, encourage conversation, and explain. Sometimes I consult with them, show them how to combine individual images into a single plot, etc.
How else can you introduce a child to creative activities, help him fall in love with sculpting, drawing, making things?
It is necessary to start by creating conditions in the group - a small corner of creativity (a center for children's artistic activities, where ideally there should be: paints (watercolors, gouache, colored pencils, felt-tip pens, crayons, wax candles, various brushes, pieces of foam rubber, scissors, colored and velvet paper.Natural material: cones, seeds and fruits of various plants, pebbles, nutshells, twigs, dried flowers. Cotton wool, sticks, fabric, pieces of cellophane, remnants of woolen threads, plot pictures, postcards, glue, cardboard, buttons, beads, beads and other waste material.
My main task is to teach children to use this diversity wisely. It is safe to say that every child will find what he needs to realize his idea. Or, on the contrary, an unusually shaped object will inspire a child to create a wonderful homemade product.
When working with children, I take into account their desires, mood, capabilities, interests. Classes are held in a calm atmosphere, often accompanied by pleasant music, which promotes relaxation and relieving fatigue.
Testoplasty is as natural and organic a child’s need as play. Children sculpt a lot and willingly, which is why the age of 5-7 years is considered the “golden age” of children's creativity. The child brings his sincere interest, surprise or admiration into his work; he not only reflects the world, but also gets to know it.
Chapter 2 “ Methods and techniques used in modeling salt dough ”
Depending on the assigned tasks, various teaching methods . As a rule, verbal (conversation, story, explanation, questions, visual (examination of visual aids - paintings, drawings, sculptures, demonstration of work completion - partial or complete) and practical methods of work .
Each lesson includes a theoretical part and practical implementation of the task. Theoretical information is an explanation of new material, educational information on the topic being performed. The practical task is explained in an accessible manner, and the purpose and objectives of the lesson are clearly formulated. The explanation is reinforced by showing visual material.
Theoretical material is given at the beginning of the lesson in the form of a conversation and is accompanied by questions for the children. The technological process is explained
production of the work, its features. In the practical part of the lesson, children prepare material for work. Practice is a natural continuation and consolidation of the theoretical information received by preschoolers. Reliance on practical actions makes the child want to complete the task, promotes the formation of appropriate skills and abilities, as well as self-control based on the rules of the task.
To help children overcome difficulties in the process of work, the teacher provides different types of assistance depending on the intellectual and emotional capabilities of the children. These are:
- stimulating assistance (the influence of an adult is aimed at activating the child’s own capabilities to overcome difficulties);
- emotional-regulatory assistance (evaluative judgments of an adult, approving or disapproving of the child’s actions);
- guiding assistance (organization of the child’s mental activity, in which all its components are carried out by him independently, the adult only directs the child’s actions).
At the end of the work, the child receives a certain material result. A favorable environment is created to teach children to evaluate their own work and compare the result obtained with a given sample or the work of other children.
When working with salt dough , the same techniques are used as when working with plasticine and clay. These are:
- Kneading - pressing with hands and fingers on a piece of dough .
- Pinch-off - separating small pieces from a large piece of plasticine or dough using the thumb and index finger. To do this, first pinch a small piece of plasticine or dough , and then tear it off.
- “Spanking” - vigorously patting the dough with a tense palm and straight fingers. The range of movements can be varied.
- Flattening - squeezing a piece of dough to give it a flat shape. A small piece of plastic material can be flattened using your fingers.
However, when working with salt dough, you need to take into account the tenderness and plasticity of the material. Therefore, to connect the parts to each other, you need to pass a brush dipped in water over the joints and, having stuck the parts, press them together for a while. If you need to glue small parts together, it is best to do this with half a toothpick.
In my work, I always knead the dough in the presence of children . I give the children the opportunity to take part: touch, smell, knead, express their impression of the dough (hard, white, cold, you can make holes, roll sausages, tear off a piece, etc.) .
In order to interest children, at the beginning of the lesson you can read a quatrain and ask a riddle. This is done in order to create a good mood in children and direct their attention from the beginning of the lesson to thinking about the image in a very brief, concise form and noting only those features that relate to the shape of the parts and details of the object.
At the first stages, I introduced children to testoplasty as a type of folk applied art, its history, features, tools that are necessary for working with dough , and the simplest technological techniques for working with dough .
At first, children learned to sculpt and decorate flat figures - decorative plates, hearts. Rolling pins were used for rolling, and cookie cutters, dumplings, bottle caps were used for cutting. Then they learned to sculpt three-dimensional shapes: using a wooden rod (match or toothpick)
.And then characteristic features were added to the base: ears, nose, eyes, tail.
One of the stages of making crafts is coloring. For this purpose, gouache paints, watercolors, and felt-tip pens are used. Gradually, the children got used to and learned to use a palette in their work, for mixing paints, brushes of different sizes and hardness. The works began to turn out interesting and expressive.
I would like to note that the peculiarity of testoplasty is its complexity: all games, exercises and techniques are subordinated to a single topic, mastered at this stage. For example, if we sculpt cats, cats and kittens, then we play “Cat and Mouse”
, listen to the audio training
“Kitten”
, take part in the
“Cat Quiz”
, imagine yourself as a cat and speak on behalf of the cat, i.e. the general theme is maintained.
To increase children's interest in the results of their work, I use game motivation. And at the end of the lesson I invite the children to play with their craft. The use of dialogic speech in the game allows not only to develop the child’s speech, but also to facilitate communication with each other, promotes the development of communicative and creative abilities.
Conclusion
Modeling from salt dough is not only a means of developing a child’s creativity, forming his moral and aesthetic principles. Sometimes it’s enough to see the happy face of a child, his delight in the image he created, and you understand how much you could do for him. The best reward for a teacher is the achievements of his students. And often, you can see how important it is for a child to be understood, to see the enthusiastic face of the teacher, from a positive assessment of his activities. Such a positive attitude has a beneficial effect on the emotional development of the child. Well, positive emotions are the key to ensuring creative interest and achieving your goals and objectives. Modeling from salt dough allows you to create a favorable social environment rich in material, which contributes to the development of the child’s emotional world and pushes him to a variety of creative activities.
I noticed that all children are talented, and therefore I searched and continue to search for methods of teaching and upbringing that develop children’s creative abilities, aesthetic and moral responsiveness. The child discovers the magical powers of art and strives to express them in his own “creative product”
through
sculpting . At the same time, he reveals himself, comprehends his own capabilities. In salt dough modeling , a child has the opportunity more than ever to realize his creativity and imagination; the teacher’s task, in this case, is to offer the most accessible means and materials to achieve a positive result, as well as to give an invisible impetus to the development of creative flight.
After all, only being in an atmosphere of mutual understanding between a child and an adult can you look into the child’s soul, understand and feel what he wants to achieve. The adult takes a position next to, not above. It helps children realize and express their individuality, observing the principle of transformation of cognitive content into emotional content, the humanistic principle and the principle of developmental education, and focuses on the zone of proximal development of each child. If we consider modeling as a means of developing children's creativity, then we can say that the main point in achieving positive dynamics will be the child's interest in the work being started. A child, satisfied with the result obtained, will strive to prove himself again and again, to show how widely he can
think. Sometimes what a person cannot convey in words can be expressed in his creativity. To convey all the beauty, aesthetics and, of course, your vision of this or that object, which will be a creative product, which means this will be a manifestation of the child’s creativity. The unusual nature of the material in this case will contribute to the greatest interest in modeling . I am more and more convinced that man is a creator by nature. It is very important for me that a child can depict or compose something that has independent value. Children still have little life experience and have not developed a personal approach to art, so I try to see the abilities of each child - the embryo of his aesthetic position. Fine art has enormous emotional impact and is a good basis for the formation of a child’s spiritual world.
Thus, we come to the conclusion that modeling is a means of developing a child’s creative abilities.
I really want to believe that the ancient tradition of testoplasty will not disappear and, moreover, will become a favorite pastime for those who want to drive away bad mood and sadness, who have retained the fairy-tale world and the desire to pass it on to their children.
Bibliography:
1. Vainerman S. M., Bolshev A. S., Silkin Yu. R. “Sensorimotor development of preschool children in fine arts classes,” M., 2002.
2. Vygotsky L. S. Imagination and creativity in childhood. M., 1986.
3. Grigorieva G. G. Development of a preschooler in visual activities. M., 1999.
4. Grigorva G. G. Visual activities of preschoolers. M, 2005
5. Grigorieva G. G. Development of a preschooler in visual activities. M. 2000
6. Dubrovskaya N.V. Invitation to creativity. St. Petersburg, 2002.
7. Dyachenko O. M. Imagination of a preschooler. M., 1986.
8. Isolde Kiscalt “Salt dough : fascinating modeling”
, profizdat, 2002.
9. Kazakova T. G. Theory and methods of development of children's fine art. M.: Vlados, 2006
10. Kazakova T. G. Children's fine art. M.: Karapuz Didactics, 2006
11. Komarova T. S. “Children in the world of creativity”
, M., 1995.
12. Komarova T. S., Savenkova A. I. “Collective creativity of children”
, M., 2000.
13. Komarova T. S. Children's artistic creativity. M, 2005
14. Lykova I. A. Visual activities in kindergarten Karapuz-didactika, M., 2009.
Funny salt dough pigs
You will need: salt dough, paints, brush, foam sponge, stack, thin rope, toothpick, black helium pen, PVA glue.
Master Class
- Roll 2 balls for the snout and use a toothpick to make the nostrils.
- Make a muzzle, glue a snout and eyes above it.
- Make triangular ears, glue them, then mark stripes with a stack at the junction of the ears and head.
- Make a heart and glue it to the bottom side.
- Make indentations along the edge of the entire circle.
- Using a toothpick, make 2 holes on the top for attaching the rope and 2 holes on the bottom for the legs.
- Roll up the arms and glue them in such a way that they hold the heart.
- Make the hooves and make holes in them for the rope.
- Dry the workpieces.
- Paint the blanks with black paint and let them dry.
- Wash off the paint from the convex parts of the workpiece under running water with a sponge and wait until it dries.
- Prime the figures with a sponge and white paint.
- Color the piglets.
- Draw small details with a black gel pen.
- Cover the craft with varnish and wait until it dries.
- Glue wool threads as hair.
- Make a pendant out of rope.
Funny salt dough pigs are ready! I recommend watching this video!
Salt dough cat
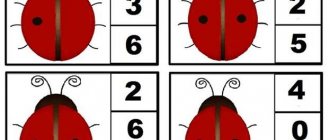
Ladybug on a flower
The next craft can be done together with your baby because it uses simple details, but the result will be very beautiful. You will need:
- salted dough of different colors;
- modeling board;
- toothpick.
If you are ready to make, then let's start:
- Let's use yellow.
Roll it into a round ball and press it gently. We make small notches on one side with a toothpick so that the figure becomes embossed. This will be the central part of the flower. - Now let's make the petals. We create a flat cake again, stretching out one of the sides. Attach to the middle. We will need about six of these petals.
- Let's add two leaves.
We use green color and make a large cake. We give one of the sides a pointed look. Using a toothpick, create a design on the leaf. We make another leaf in a similar way. We place them under the flower. - All that remains is to place the ladybug on our flower. Roll out the red circle and flatten it at the bottom.
Divide the top in half with a strip using a toothpick. Let's make a head from a black semicircle, and use small black cakes to create dots on the ladybug.
Almost done. All that remains are the eyes, which will be white and black. You can easily make such original crafts from salt dough with your own hands with your child, because the activity is very interesting. But this is not the last interesting product.
Salt dough fish
You will need: salt dough, baking sheet, rolling pin, knife, sheet of paper, acrylic paints, brush, ribbon, water, shoehorn, pencil, sandpaper, clear manicure polish.
Master Class
- Draw a fish or print a template.
- Sprinkle a baking sheet with flour.
- Roll out a sheet of dough on a baking sheet.
- Place the paper fish template on the rolled out dough.
- Cut the fish along the contour with a knife, remove the excess dough to the side.
- Make a thin strip and attach it with water in a semicircle, separating the face and body.
- Make a heart and attach it with water as the lips of the fish.
- Blind the eyes and attach with water.
- Form the pupils by pressing the back of a pencil into the dough.
- Make 2 holes using a suitable round object on the fin of the fish.
- Shape the scales of the fish using a shoe spoon.
- Make eyelashes and stripes on the fins with the tip of a knife.
- Dry the craft.
- Smooth out any imperfections in the craft using sandpaper.
- Paint the craft and wait until it dries completely (about a day).
- Cover the craft with varnish and wait until it dries completely.
- Attach ribbon for further hanging.
Salt dough fish is ready! I recommend watching the video master class!
Dough fish.wmv
I recommend viewing a photo gallery of ideas for creating crafts from salt dough!
Crafts made from salt dough are perfect as a gift for any occasion. Think about what your relatives and friends love most, then make it and make a pleasant surprise for your loved ones with your own hands.
Panel with Cheburashka
Let's continue to look at our favorite children's heroes and in the next sculpting, we suggest remembering Cheburashka. It is with this character that we will make a picture from salt dough. For the upcoming work we will need:
- base for the picture (ours is a wicker frame);
- gouache;
- stack;;
- brush;
- PVA glue (you can make it yourself)
Let's move on to making the picture:
- Let's sculpt the body first. We need to roll out the cake, give it a pear shape.
We attach it to the frame; if the body does not fit in size, we remove the excess or, conversely, add it. - First we roll the ball, then give it the shape of a drop. Squeeze it slightly and try it on again. If the size is appropriate, glue the part to the weaving.
- After gluing, press down the upper part of the body with your finger. To prepare a place for the head. For it, we take the same piece, give it an oval shape, and try it on.
- We roll this piece into a ball, give it an elongated shape and squeeze it with our palms, leaving a thickness of about one centimeter. The height of the head should be the same as the height of the body. We glue this part with glue.
- Let's separate a section of the muzzle. We retreat one centimeter from the edge of the head and outline the outline using a stack.
- Now let's make the ears. Roll up the flagellum. We divide it into two equal parts. We give the preliminary shape of the ear. If the size is appropriate, roll into balls, flatten and stretch slightly. Glue these parts. You also need to draw an internal line on the stacked ears.
- On Cheburashka’s head, press the places for the eyes with your fingers. We roll a small rope and separate two identical pieces from it. Roll two identical pieces and flatten them. We treat the places for the eyes with water and glue the parts.
- We cut a smile on the face. From a small piece we make a nose. Roll it in your palms and pull out the corners to the sides. We fold them in half, sharpen the top, and press them with a stack. We roll a small sausage and apply it to the mouth for the lower lip. We glue everything onto the water.
- In the next stage of the salt dough painting we will sculpt the legs. We make a flagellum and divide it in half. Roll the balls, press them and using the stack, form a semicircle. Glue the legs.
- Let's pause the modeling process. Let's paint what we have made. Mix yellow and ocher, paint over the face and tummy. We paint over the entire Cheburashka with brown paint, except for the eyes, mouth and center of the ears. Add a little black to the brown, paint over the ears and eyes. And for the mouth we use red gouache.
- Let's return to sculpting. Cheburashka will have an orange in her paws. We make a cake, moisten it and glue it to the tummy. We make a hole with the tip of the brush, add folds with a stack, and use toothpicks to put holes all over the orange. We paint it orange. From a small piece there will be a leaf, we give it a relief with a stack, and use water to attach it to the orange. Paint it green. At this stage, add white paint to highlight the eyes.
- Let's make the upper legs. We roll the rope, cut off two identical pieces, form and pull out the droplets. Glue the parts so that they wrap around the orange.
We roll a long sausage from it and form eyebrows and fingers. Add bangs to the head. Paint everything with brown and dark brown. - Cheburashka is ready. Let's decorate the picture with flowers. We roll the rope, divide it into parts, form flat cakes and create cuts using a stack. We give them a pointed shape. Glue the flowers to the panel, add round centers, and paint them yellow.
That's all. You learned how to make crafts from salt dough with your own hands in the form of panels.
We also recommend trying different crafts made from plasticine