Where to begin
To understand how to draw a dress beautifully, you need to understand what it consists of. To do this, it is worth explaining to the child that we are talking about a female type of clothing with floor-length fabric to cover the body and almost the entire part of the legs.
- The dress consists of a bodice and an underskirt based on one or several parts.
- For example, the crop top look is built on a short top and skirt.
- But it is possible to add a corset, partlet, kirtle, petticoat, stomaki, robe.
- Used for everyday purposes and official public appearances.
It all comes down to what the girl wants to draw. Perhaps this is a copy or invention of your own product as an amateur modeling.
In any case, it is necessary to support the child’s impulse and provide the necessary information, pencils and paper.
A good option is to learn to use computer programs for freehand drawing, thanks to the mouse.
Drawing “Let’s color the doll’s dress”
Tatyana Gridina
Drawing “Let’s color the doll’s dress”
NGO Artistic and Aesthetic Development ( Drawing )
Summary of a lesson on decorative drawing in the middle group “ Let's paint a doll's dress ”
Goal: to teach children to make a pattern from familiar elements (stripes, dots, circles)
.
Objectives: to develop creativity, aesthetic perception, imagination. Learn to navigate in space, teach children to make patterns from familiar elements.
Equipment and materials: Dymkovo toy, paper doll , paper dresses with drawings , dresses cut out of paper without drawings , paints , brushes, jars of water, coasters, napkins (for each child)
.
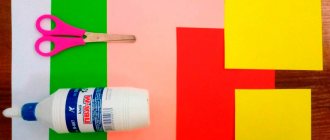
What you will need for a drawing lesson
We will assume that the dress will be drawn by hand, using a pencil. Therefore, let's look at a few step-by-step instructions for children.
In this case, to work you will need:
- A pencil to create clear outlines of the dress and add various details;
- A sheet of paper based on standard A4 format;
- Eraser for erasing unnecessary or erroneous sketches;
- Colored pencils for coloring different sections of the dress;
- To highlight the contours, you may need gel pens of different colors.
This is a simple set of tools to provide a young artist. As skills develop, a larger paper support may be required. It will help you create a more perfect image while standing.
But for a child, the attention and support of an adult with simple tools for work is enough.
Necessary materials
- A simple pencil (for depicting objects with a clear outline);
- Sheet A4 (base);
- Eraser (can erase erroneous details);
- A set of colored pencils (painting the main elements);
- Set of helium colored pens (outline highlighting).
Now, let's move on to the most interesting part - learning step-by-step instructions for drawing princess outfits from fairy tales. We suggest that you familiarize yourself with three detailed lessons for beginning artists.
Making a fluffy dress
Let's look at how to draw a dress step by step on paper. First, you need to analyze and figure out where it is more profitable to place the drawing on paper.
Artists consider the central part to be the best solution, since there will be no movement up or down.
Next step by step:
- A V shape is applied to form the neck of the dress model. To do this, use straight lines connecting at the bottom. In fact, it looks like a “tick”.
- Lines are drawn from the base to the right and left, but from different sides. The straps of the dress are formed. To express elegance, curved lines are drawn down. The bust is adjusted with a few touches.
- To create a beautiful waist, draw 2 straight lines in the vertical and horizontal directions. This creates a rectangle.
- A long stitch is pulled on each side to highlight the scale of the skirt. The lines are randomly connected at the bottom to form the hem of the skirt.
- For realism, folds are added under the chest and long vertical ones in the skirt area.
- The belt is decorated with a bow. Two ribbons extend down from it.
- Fluffiness of the sleeves is allowed. To do this, add corresponding lines.
- It is necessary to remove unnecessary lines. Now you can color the sketch.
Tip: It is more profitable to create a drawing from top to bottom.
We looked at a simple drawing technique for beginners. This option is available for the youngest girl with adult assistance.
Preparation for a drawing lesson on the topic “Girl in a smart dress” in the senior group
When preparing a lesson on drawing a girl in an elegant dress, the teacher faces a number of tasks:
- to develop children’s ability to draw a human figure, convey the shape of a dress, the shape and location of body parts;
- consolidate the techniques of drawing and shading a picture with a pencil;
- develop children's creative abilities - developing a dress pattern (design, shape, and decorations), completing the drawing of accessories, background, etc.
- develop the ability to evaluate your own drawings and the drawings of other children.
The lesson can be aimed either at children’s independent depiction of a girl in a dress, taking into account the proportions, or it can be carried out as part of decorative drawing, when students are offered ready-made dress templates for finishing and decorating.
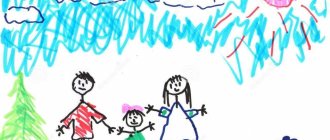
Children 5–6 years old depict the human body initially as a set of geometric shapes:
- head - circle,
- neck - a small rectangle,
- body - rectangle or oval,
- legs and arms - in wide lines,
- fingers - thin lines, strokes.
Children's first drawings of people are geometric sketches
Six-year-olds are confident in their use of drawing tools. They manage to complete the task according to the sample presented. The choice of materials remains with the teacher: for the lesson it is necessary to prepare the basis for drawing and tools.
Drawing the figure of a girl in the older group is complicated by the introduction of new elements: costume, hairstyle, accessories
Drawing materials
To depict a girl in a dress, you will need the following materials:
- Lead pencils.
Important. Older preschoolers learn preliminary sketching. Children use a simple pencil to draw the outline of a person, a portrait, then paint with colored shading or strokes of paint.
- Paints: gouache,
- watercolor.
- medium thickness,
On a note. For painting with gouache, you can prepare colored cardboard or paper tinted with watercolors.
For drawing a girl in a dress, colored pencils and gouache are best suited.
The design of patterns and details of the dress can be done using non-classical materials. Paints with glitter, mother-of-pearl effect, bright markers, and gel pens are used. They should be distributed to children at the end of the practical work, when the drawing is ready and all that remains is to add additions to the character’s outfit.
Drawing techniques and techniques
In the senior group, children master and improve the following drawing techniques and techniques:
- Sketch.
The teacher shows the stages of drawing on the board or explains the drawing diagram on a poster/sample. Preschoolers successively draw the details of the sketch in the air with a pencil and transfer them to paper. A simple diagram demonstrating how to draw a human figure should be in front of your eyes during class - Drawing with colored pencils. The skill of coloring figures inside contours is consolidated and mastery of basic techniques is improved: shading with weak and strong pressure;
- outlining and detailing with intense pressure.
Shading with pencils takes longer than drawing with paints, so give children 1/2 of a landscape sheet as a base.
- Fill the background only with watercolors and a wide brush.
Paintings are bright and festive
Video: how to draw a girl
The video can be viewed at the beginning of the lesson and used as a step-by-step plan for drawing a girl. Please note that it is recommended to draw the human figure from top to bottom, that is, starting from the head.
Video: how to draw a little fairy in an elegant dress
Fairies are also girls, and their dresses are more than elegant! An unusual character will attract guys. The video tutorial is aimed at small artists. The only thing is that drawing a cloak using the proposed method (around the fairy figure) may cause difficulties for children 5–6 years old. We advise you to limit yourself to a dress and head decoration.
The “Girl in a Dress” activity is suitable for introducing children to non-traditional drawing techniques (or improving unusual techniques). Children's works produce original and even fantastic outfits. Many methods are suitable for depicting a dress or amazing patterns on it:
- wax crayons,
- finger paints,
- cotton swabs,
- stamps,
- by poking method,
- spray.
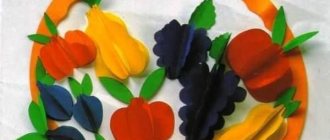
Photo gallery: examples of drawings made using non-traditional techniques
Using stencils and wax crayons, an even ornament is transferred to the dress
Using fingers and cotton swabs, various geometric patterns are drawn: dots, stripes, checkered patterns. Droplets of watercolor are fanned out on the paper in fancy patterns. The dress can be decorated with finger paints, resulting in a polka dot pattern. Beautiful patterns spread out on a damp sheet of paper, like in the batik technique
Original dresses can be made from children's handprints
Combination with other types of visual activities
Drawings on the theme “Girl in a smart dress” are organically complemented by plasticine elements and paper applique:
- as background objects (trees, flowers, clearing, house);
- as a decoration in a girl’s outfit (patterns, frills and ribbons on clothes, a headdress, hairpins).
Origami and plasticineography methods can be used to create a dress, and the girl herself can be drawn using classical techniques.
Folding a dress using the origami technique is a full-fledged task, not just an addition
An elegant dress for a girl can be made with appliqué from natural/waste material:
- scraps of fabric,
- dried flowers and leaves,
- flat multi-colored buttons,
- sequins, rhinestones
The dress can be made in the form of an applique of leaves or other natural materials
How to personalize tasks
An individual-personal approach to fine art classes is implemented by providing children with independence in creativity and adapting the requirements for some students.
Ways to differentiate tasks:
- Give the opportunity to choose a color palette for drawing.
- Determine the purpose of the lesson (draw a girl in an elegant dress) and show embodiment options: a baby in a sundress, a princess getting ready for a ball.
- Prepare a simplified task. For example, trace a girl’s stencil and draw an outfit yourself.
- For creatively gifted children, complicate the task: draw a background object, accessories for a girl, etc.
Creatively gifted children aged 5–6 years create their first narrative drawings
Place of the lesson “Girl in an elegant dress” in the card index of drawing topics
Drawing a girl in a dress is a broad topic. In this version, it is heard during a lesson on practicing the technique of mixing colors and shades: children select a palette for the character’s skin, hair, and clothes.
In narrow interpretations, the theme is repeated and developed throughout the school year:
- “The doll is going to visit” - learning the rules of etiquette.
- “When Mom was little” - making a postcard for March 8th.
- “Cinderella at the Ball” is a repetition of the fairy tale about Cinderella.
- “Girl in a folk dress” is an introduction to national life and costume.
Transforming Cinderella's clothes from rags into a ball gown - one of the options for the drawing “Girl in a beautiful dress”
A collective composition on a topic is compiled on a common basis - a tinted sheet of whatman paper. Children's drawings are placed in accordance with the plan.
Examples of group work:
- "Festive round dance"
- "Masha doll's birthday"
- "Doll Tea Party"
- "Our girls and boys at the matinee"
- "Princesses at the Ball."
Children can cut out their drawings along the contour to attach them to a common sheet of whatman paper
Learn to draw an evening dress
This master class is for beginners, so creating a dress is not particularly difficult.
Let's look at the stages of drawing an evening dress:
- It is worth starting from the image of the stamp for placing the outfit. We are talking about a hanger with a small thickening in the middle part. A pencil is used for the sketch, the contours are drawn with a pen. A hook is created in the middle.
- Straps and an elegant bodice are drawn on both sides for a beautiful figure. The back is indicated by curved lines.
- Create a waist. Two strokes are added, they taper closer to the belt line.
- An oval is drawn in the waist area to create a ballroom skirt in a shape similar to a bell.
- To highlight the beauty of the dress, you need to add a curved line. The inner side is marked and beautiful folds are drawn.
- The sketch is ready. You can paint over an evening outfit for a chic girl. At the final stage, it is allowed to add beads, belts and other decorative elements, depending on the author’s imagination.
Now it’s clear to us how easy it is to draw a chic evening dress with your child. This option will help you have a great time doing an interesting activity.
GCD move:
Lena dressed up the doll :
I made her a new dress,
Lace was attached to the hem and sleeves.
All the toys praise the doll : “What a beautiful outfit!”
Look at the dolls with the children, pay attention to the dresses they are wearing. Consider illustrations of patterns on dresses . Ask the children which dress they liked best and why.
to decorate an outfit for the doll too . Show them a dress ,
explain that it needs to be decorated with a pattern . Remember the elements of the pattern (leaves, rings, dots, lines, cells, flowers, etc., show them at the board, think about how they will decorate the dress .
Examine all the finished drawings and, together with the children, note the most beautiful patterns.
Arrange an exhibition of ready-made dresses .
2. Komarova G. S. Visual activities in kindergarten. – M., Mozaika-Sintez, 2006.
Summary of the final lesson “Let's help the doll Masha” Topic: “Let's help the doll Masha” Goal: Summarizing the knowledge children have acquired over the year Objectives: Educational: To cultivate a desire to help the playmates.
Game physical education activity “Let's decorate a Christmas tree in the forest” Purpose: 1. Strengthen walking skills by stepping over objects. 2. Practice balance, crawling under arches. 3. Learn to jump.
Complex lesson for 3-year-old children “Visiting the doll Gala” Goal: formation of a holistic picture of the world, formation of elementary mathematical concepts. Objectives: continue to form concepts.
Summary of the lesson on FEMP “Let's tie a bow for the doll” Municipal government preschool educational institution of the Khanty-Mansiysk region “Kindergarten “Firefly” in the village of Shapsha” Prepared by:
Summary of continuous educational activities in decorative drawing “Let's decorate a dress for a doll” (middle group) Summary of continuous educational activities in decorative drawing “Let's decorate a dress for a doll” (Based on Dymkovo painting).
Notes on speech development in the first junior group “Let's embroider a dress for a doll” Notes on speech development in the first junior group. Topic: “Embroidering a dress, blouse, skirt for Tanya’s doll.” Compiled by the teacher.
Lesson on artistic and aesthetic development in the younger group. Joint composition “Let's dress a tree in a little white dress” Theme of the week: “Hello, winter-winter” Title: “Let's dress a tree in a little white dress” Age group: 1st junior group Program.
Summary of a drawing lesson in the first junior group “Let's decorate a dress for a tumbler doll” Topic: Let's decorate a dress for a tumbler doll Objectives: 1. Continue teaching children to draw rounded shapes; 2. Consolidate knowledge of color, shape; 3. Develop.
Master class “Lace dress” Today I present to your attention a master class “Lace dress” made from paper, round, openwork napkins. Best to use.
Lesson on speech development for middle-aged children “Let's decorate the Christmas tree with fairy tales” “Let's decorate the Christmas tree with fairy tales” Goal: Development of coherent speech in preschoolers. Objectives: educational: Teach children to describe animals and name them.
Source
Let's learn to draw a dress for a doll
Many girls think about how to draw a dress for a doll with a pencil step by step? Sometimes they like to change the outfits of their artificial girlfriends.
Let's look at the drawing process step by step:
- Thanks to the oval, the upper part of the dress is created. Auxiliary lines are applied without pressure. In this case, it is not necessary to comply with all proportions.
- The use of a fantasy version is allowed.
- Two curved lines are drawn from the oval to create an elegant dress worthy of a princess.
- For the ballroom version, sleeves and harnesses are not needed. Therefore, the place of the chest immediately stands out. Below the neckline, a “tick” is added.
- Extra lines are removed.
- Decorative elements are added at personal discretion. This may be a bow, ribbons, butterflies, flowers.
- You can play with different colors to create a bright or discreet option; it all depends on the author’s imagination.
Now we know how to draw a dress easily based on different model options. The main thing is to prepare the conditions and calmly sort out this matter together with the girl.
Preliminary work with children, discussion of the topic
To color, children need to master form-building movements that differ in nature, pressure, scope and duration. An example of an exercise to develop the ability to draw a dotted line is “Draw rain”, drawing with movements in the air.
Discussing the topic of the lesson, the outfits of the matryoshka doll and the Dymkovo toy are considered, and they are compared with the silhouettes of a doll dress for drawing in kindergarten.
Important. When looking at samples, the teacher demonstrates the ability to perceive what he sees with surprise, excitement and joy. As a result, children will respond to the expressiveness of the image, and they will be motivated to create.
Progress of GCD, techniques for applying images
Children should not sit at tables before work. It is better to conduct the conversation by seating the students on the carpet or placing them around the teacher’s table.
Important. Visual material, supported by the emotional words of the teacher, will help children better master the task.
Drawing is a traditional art technique. In this lesson, it is possible to use non-traditional techniques recommended in the middle group for decorating a dress. A dress template for drawing in kindergarten can be decorated using:
Attention . The teacher helps children in arranging elements on the template using contours and pays attention to the ratio of the sizes of the parts of the pattern.
The decorating process begins with the development of the compositional ability to rhythmically arrange shapes, a sense of color, with the ability to draw large and small shapes, and with the formation of technical drawing skills. The first task is to draw straight lines, between which strokes are applied, arranged rhythmically.
Important. In the middle group, alternation of no more than two elements is used.
Photos of dress drawings
0