When creating a preliminary interior plan or layout, simple paper figures - origami - are often used. In addition, you can use the techniques presented below to create toys for children. Every child wants to have a dollhouse, furnished with the same interior items as the apartment in which he lives. Diagrams, step-by-step instructions, videos will help you make paper furniture for a dollhouse. Moreover, origami furniture is a fairly budget option that does not require large financial and time expenditures.
In order to make products, you do not need special technical skills or enormous effort, you just need to follow the proposed step-by-step instructions. Making furniture for a dollhouse or for constructing models of a future interior is an exciting activity that can bring the whole family together at one table.
Advantages of origami technique
The main advantage of origami is that working in this technique involves limited use of materials. The absence or minimal use of glue and other improvised means in this technique greatly facilitates the work and also guarantees the cleanliness of the workplace. Fans of origami are also attracted by the simplicity of the forms and method of execution.
Tools and materials
The materials used in this technique are as accessible as possible and can be found in every home. If you wish, you can purchase specialized and professional accessories, but this is not important.
To make origami furniture with your own hands, you will need the following materials:
- paper (printer paper 70-90 g/m² and thicker, to create more durable products, specialized - “kami”, “washi”, foil - “sandwich”, textured);
- scissors;
- a simple pencil or pen;
- PVA glue, silicate or any other, designed for working with paper;
- elements for decoration (pieces of fabric, rhinestones, paints, colored tape and others).
Depending on the level of difficulty, other materials may be required. It is also necessary to take papers as a reserve so that in case of failure you can redo the work. Decorative elements can include a wide variety of materials; their range is unlimited.
Bed
A bedroom set is an integral part of a modern home. It usually includes a bed and two paired bedside tables. Let's start with the main piece of furniture. The most popular bed model consists of two parts: the body and the mattress.
Step-by-step instruction:
- For the body we use a 15x15 cm square. We outline the central axes.
- Fold the bottom and top edges 1/3.
- And bend it towards the central axis.
- We fully open all the folds, and then assemble the figure with a zigzag in the direction of the arrow.
- We outline the diagonal folds.
- We open the sides from the inside, as shown in the diagram.
- And flatten it.
- We bend the right edge of the workpiece.
- We place the triangular “legs” at right angles to the base of the bed.
- Raise the left side up. This is the headboard.
- We put the bed on legs.
Mattress:
- We outline the vertical axis of the square.
- We bend the right and left edges towards it.
- Let's turn it over again.
- We open all the folds.
- Fold the left side back along the dotted line.
- We fold the right edge in the same way, but forward.
- Bend the figure in half from top to bottom.
- We outline the horizontal axis.
- Fold the top and bottom 1/3.
- We lower the sides at a right angle.
- The mattress is ready. We place it on the base of the bed.
Origami bedside tables are assembled according to the principle of Japanese “masu” boxes. Place them vertically, with the open side inward.
Model No. 2
The second type of bed is made from one sheet. It comes with a blanket and pillow, which makes the model surprisingly realistic and elegant. For the bed you will need a sheet of paper 15x15 cm, as well as a ruler and pencil.
Detailed instructions are in the video tutorial:
For the blanket we use a square of 8x8 cm. It is advisable to take paper with a beautiful contrasting pattern. We will also make a pillow from it, loosely rolling a strip measuring 4x8cm.
Master classes on furniture making
The recommendations below discuss in detail how to make paper furniture. Based on the instructions, you can make other interior items.
Sofa
A paper sofa will fit perfectly into a doll house; before following the instructions, think about the size of the product, its color, and how it will fit into the concept of the interior as a whole.
To make an origami sofa out of paper, you should:
- Fold the square sheet in half, then open it and fold it again perpendicular to the first fold.
- Next you need to do some additional hemming. Fold the bottom edge to the middle fold line, then fold the same edge in this way again. The result is three folds, excluding the central one.
- Fold the bottom strip over the first fold, then set aside two identical triangles by folding the side pieces diagonally.
- Bend the upper part of the workpiece to the middle line, and fold the lower accordion to the end. Turn the product over.
- Fold the top corners down diagonally, and fold the bottom corners up.
- Turn the workpiece over, bending one corner inward, forming the back.
- It is necessary to form the legs of the sofa by turning the product over.
The sofa will become an original art object or decoration for a toy living room, and if it is made of thick paper, the furniture will easily support the weight of the toy.
Dresser
An origami chest of drawers would also be appropriate in a dollhouse and will serve as an ideal place for storing small items.
In order to create this product, you need:
- Fold the square sheet diagonally twice and unfold it.
- Fold each corner towards the center.
- Bend the top corner and bend it to the other side. Turn over. Bend the side of the resulting triangle to the base of the nearest side of the square.
- Bend the other side of the triangle to the same base of the square. You need to do this so that you get a small triangle.
- Turn over. The folded corner should be at the bottom. Fold the left and right sides towards the center. Open the paper.
- Fold the bottom and top edges to the center line. To uncover.
- Make a diagonal fold in the small bottom left and right corners. Turn over. Make a fold in the small squares above the previous left and right. Turn over.
- Gather the side halves towards the center. Fold the paper along the small folds.
- We lift the remaining valves to the walls. We turn it over, apply the valves, forming a sharp triangle, which we hide in a pocket, and do the same on the other side.
- You need to fix the protruding valves using the paper sticking out at the top - fold it inward. The valve on one side must be bent upward. The result is a box with a handle.
This is one of the parts of the chest of drawers - a drawer. The other part will be the container for this box.
In order to do it, you need:
- Fold the square diagonally and in half again.
- Bend the upper corner of the triangle slightly. Open the paper.
- It turned out to be a square inside. Fold the corners of the larger one to each corner of this small square.
- Fold the bottom and top to the center line. To uncover. The same needs to be done with the sides. To uncover.
- Make a diagonal in the small right and lower left squares. Turn it over.
- We make diagonals in squares higher on the left and right.
- Turn over. Fold the left and right sides towards the center.
- Open the paper.
- Raise the remaining valves to the walls. Turn it over, attach the valves, creating a sharp triangle, which must be hidden in the pocket, and do the same on the other side.
- It is necessary to fix the protruding valves using the part of the sheet that sticks out at the top - fold it inward. The valve on one side must be bent upward. You will get a box.
The number of boxes and boxes for them should be the same, but their number is not limited.
Armchair
Making a comfortable and stylish chair for dolls and other toys will not take much time, but will add color to the interior of the dollhouse.
Following simple instructions, you can easily make an origami chair out of paper, for this you need:
- Fold the square sheet in half twice to form a cross fold.
- Fold all corners towards the center of the sheet, pointing them forward.
- Fold the corners of the resulting square towards the center on the reverse side.
- Once again fold the corners towards the center, but from the front side of the figure, and then turn the craft over.
- Unfold and straighten the folded corners to form rectangles.
- Bend one of the rectangles forward and the other three backwards.
You can decorate the chair with upholstery made of embossed wallpaper, fabric, ribbons, fur.
GCD design “Coffee table” preparatory group
GCD design "Furniture" preparatory group
Target :
development of artistic creativity in children through mastering the design technique using the origami method with appliqué elements.
Software tasks:
Educational objectives:
1.Continue to teach children to work with paper, repeat basic geometric shapes, develop creativity and aesthetic taste.
Technical tasks:
1.Improve skills in working with scissors and paper
Developmental tasks:
1. develop children's artistic taste, creativity and imagination;
2. develop children’s eye, accustom them to precise finger movements;
3. develop spatial imagination.
Educational tasks:
1. cultivate interest in paper design;
2. develop children’s artistic and constructive abilities, aesthetic perception;
3. Arouse positive emotions from the results of your work.
Materials and equipment:
paper of different sizes, templates, glue, brushes, oilcloths, rags, felt-tip pens, pictures with coffee table samples.
Methods and techniques:
verbal, visual, questions, sample, explanation, display of illustrated material.
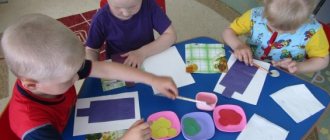
Progress of the lesson:
Educator: Children, guess the riddles:
There are four legs under the roof, and on the roof there is soup and spoons? (Table)
Lisa took out the giraffe, the ball and the gnome. (cabinet)
.
If Vova wants to sleep, he will lie down. (bed)
.
I look a little like a table, I’m in the kitchen, in the hallway, I’m rarely in the bedroom, but what’s my name? (Stool)
Can you sit on it if you are invited to the table to eat? (Chair)
Educator: How to call these items, in one word? (Furniture)
What is furniture made of? (Wood, leather, glass, plastic, iron).
Children look at the samples in the drawings with the teacher and discuss the details. What geometric shapes do you think furniture can be made from? (from a rectangle, square, cylinder, circle).
I suggest you make a coffee table today. Look, I have prepared different pictures for you with coffee tables (we look at them, pay attention to the type of pattern on the tabletops). But before we start making our table, we need to warm up.
Physical training “Furniture”
Let's go to the store in the morning (walking in place)
We will buy furniture there:
Tall cabinet (stand on toes, stretch arms up
)
And a stool, (squat)
Bed - we will sleep on it softly ( put folded palms under the left cheek)
Let's buy a chair (a bent left palm is attached to the straight right palm to make a “chair”)
And the table is big (they spread their arms to the sides)
And we’ll take you home ( turn the steering wheel)
2. Stages:
Educator: Guys, now sit down at the tables, we will make a coffee table according to the scheme.
First, we will make paper blanks. We start by stenciling all the details and cutting them out. We trace a circle according to the template and cut it out, what will it be? (table top). Then we take a rectangular blank, what part of the table do you think we will make from the rectangle? (leg). What geometric figure does the table leg consist of? (cylinder). But in order for us to attach it to the tabletop, we need to make cuts for gluing. Then we make a cylinder from the rectangle and glue it together.
We will paint the tabletop with felt-tip pens, I suggest everyone come up with their own pattern on the tabletop.
And now all we have to do is glue the leg to the tabletop. Let's remember where one leg should be glued? (middle). Carefully position the leg correctly and glue it to the tabletop.
3. Bottom line.
Analysis of children's
work
_
You guys are all great today,
completed the task correctly. Everyone turned out to have very beautiful coffee tables. I mark the most accurate work.
Decoration methods
Decorating finished products is a separate stage in the production of paper furniture.
For finishing you can use:
- self-adhesive paper for furniture (it is easy to cut, and the adhesive layer will help you decorate the surface without any problems);
- acrylic, water-based or gouache paints mixed in a 1:1 ratio with PVA glue;
- fabric imitating the structure of furniture;
- glitter and stickers;
- colored tape;
- templates;
- ribbons, lace.
You shouldn’t limit yourself to just the options listed; to create truly original furniture you need to give free rein to your imagination.
Cabinet
Cabinet furniture made using the origami technique is no different from the real thing. The cabinets or chests of drawers are equipped with convenient drawers, and the closet is equipped with a real barbell. An ideal place to store your collection of origami clothes.
For an original cabinet based on the model of origamist Fumiyaka Shingu, you will need three squares measuring 21x21 cm.
Step-by-step instruction:
- Divide the first square into 3 parts vertically and horizontally.
- Bend the top part back. We fold the bottom one forward.
- We mark the fold lines with dotted lines. Open the sides, flatten and smooth.
- Fold the sides along the dotted lines.
- The first piece of furniture is ready.
For the second one you will also need a square of 21x21 cm.
- We divide the workpiece into three parts and roll it into a strip.
- We make vertical folds - 1/3 on each side.
- We connect both parts together.
All that remains is to put the boxes in place:
Instructions for assembling the box:
- We divide a square of 21x21 cm into 3 parts in both directions.
- Fold the top and bottom edges.
- We make folds along the dotted lines.
- Fold the top and bottom edges again.
- We outline the diagonal folds.
- We open the workpiece from the inside according to the arrows.
- We form a box by stretching the side walls. We glue the product for strength.
- Repeat steps 1 – 7 to make another box.
We make handles so that the cabinet can be easily opened.
Instructions for the pen:
You will need a strip of golden or dark brown paper 1x1.4 cm.
- Let's start from the inside out. We bend the strip in half along the long side.
- Fold the product along the dotted line.
- We repeat the action in the other direction.
- Glue the handles in place.