Types and methods of modeling in kindergarten
“Types, methods and techniques of modeling in kindergarten”
(Methods and techniques for sculpting animals)
Modeling in kindergarten is a type of visual activity during which children depict objects of the reality around them, create a plastic image from soft materials (clay, plasticine, etc.)
Modeling:
- Develops children's powers of observation and sense of touch
- Develops more complete figurative representations
- Strengthens visual memory and small arm muscles
- Develops imagination and creativity
- Meets the age characteristics of children, satisfying their need for activity
The modeling technique is a list of those manual actions that children gradually master
Junior preschool age
- Rolling out
- Rolling up
- Finger pressing
- Topping
- Flattening
- Pulling back
- Accession
Middle preschool age
added:
- Smearing
- Pinching
- Pull
- Smoothing
Senior preschool age
- Improving sculpting techniques
- Familiar sculpting techniques are used
The subjects of modeling are very diverse. Children sculpt almost all the objects around them. Often, when modeling for children, there is one goal - to create an object with which they can play.
Children love to sculpt animals, but they will do it better if adults help them.
Animal sculpting can begin after children have mastered the image of basic shapes (ball, cylinder) and the technique of creating them.
2nd junior group
Children learn to divide a piece of clay into 2-3 unequal parts and assemble an object from individual parts in a constructive way. Gradually, finger work is included in the sculpting process.
Middle group
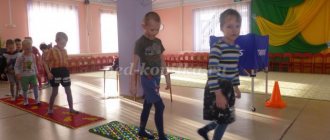
Children depict animals whose body shape is an ovoid (an egg-shaped figure; the term ovoid is not given to children), cones, cylinders, balls. They get acquainted with the solution of some technical problems: vertical installation of the figure, fastening parts, weighting the lower part of the figure, approximate measurement of proportions and parts, of which there are more (up to 5-6). You can introduce children to the image of a running animal. Pay attention to the image of characteristic features.
Senior group
More attention is paid to the image of the form and its clarification. Children are taught to convey texture (animal fur, bird feathers) using voluminous (high) or deep relief. They use the method of sculpting from a whole piece, which makes it possible to give the figure greater dynamism.
Preparatory group for school
Children use various means of expression, visual and technical techniques to create an image. They convey an image of a characteristic shape, proportions, details, an image of movement, and plasticity of form.
The main material for sculpting animals is clay. Clay is a natural material that is easy to prepare, has neutral and easy-to-work colors, and gives the child the opportunity to understand the integrity of the shape of objects.
When sculpting animals from clay, frames (sticks of different lengths and thicknesses) are used to ensure stability and dynamism of the figure.
When sculpting animals, you can use plasticine and salt dough.
Dough is a material accessible to everyone, cheap and easy to master.
Plasticine is an elastic material that requires special preparation before work.
The technique of sculpting animals is rich and varied, but at the same time accessible even to small children.
There are no strict rules in sculpting. The classification of methods is quite arbitrary; transitions from one method to another and the addition of one or more others to the main method when making one craft are possible. Imagination is important, and the method is just a means to realize the plan.
The initial shape of the figure is one, but the animals turn out to be very different. The main thing is to be able to sculpt characteristic details.
Constructive method An object is created from separate parts. Work begins with the main, largest part. When sculpting an animal (horse figurine), first sculpt the body, then the legs (compare them by size and correspondence to the size of the body), head, tail, etc. To sculpt paired parts, you need to prepare identical pieces of clay. Connect all the blanks to the base of the figure sequentially (coat them), then work on the small details.
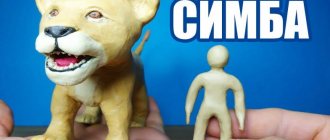
Plastic method Modeling from a whole piece, when all parts are pulled out from one piece of clay.
Methods for sculpting from a whole piece:
1. Modeling “from a reel”
Animals are sculpted in this way: a dog, a bear, a cow, a horse.
Sequence of operations:
- prepare a piece of clay of such a size that it fits in an almost closed palm;
- roll into an egg-shaped ball;
- visually divide the egg into three parts and, grasping the upper part of the egg with two fingers of the right hand (thumb and index), stretch out the head (the head is not sculpted, but is formed by lightly kneading, i.e., with circular movements of the fingers);
- The lower part of the egg is also kneaded;
- if the paws (legs) are spread apart, then the edge of the palm marks a dividing line on the body;
- Then, by pinching and pulling, we continue to sculpt first the head, then the upper and lower paws (legs).
2. Modeling “from the egg”
In this way they sculpt a cockerel, a chicken, a ram.
Sequence of operations:
- prepare a piece of clay of such a size that it fits in an almost closed palm;
- roll into an egg-shaped ball;
- visually divide the egg into three parts and, grasping the upper part of the egg with two fingers of the right hand (thumb and index), shape the head by kneading, i.e. circular movements of the fingers. When making a ram, the first part to be separated (including the horns) must be larger;
- lift the comb by smoothing the clay (sliding movements of your fingers in an upward direction). At the same time, a sufficient amount of clay is “collected” for a comb or horns and ears;
- on the front part of the head, mark the eyes symmetrically by pressing the inner and outer sides of the first phalanx of the index finger;
- shape the breast so that it is convex and wide;
- “pick up” the paws so that the toy’s fulcrum is its tummy and tail (we make it in the form of a short cylinder);
- Then, by pinching and pulling, we continue to sculpt small parts.
3. Proportional division of the egg
This method is used to sculpt a horse, dog, cat, deer, elk, and bear.
Sequence of operations:
- prepare a piece of clay of such a size that it fits in an almost closed palm;
- roll into an egg-shaped ball;
- visually divide the egg into three parts and, grasping the upper part of the egg with two fingers of the right hand (thumb and index), shape the head by kneading, i.e. circular movements of the fingers. When sculpting an elk, a horse or a man's head, it is necessary to take into account that the upper part is separated in size larger than one third of the egg.
- divide the remaining part (two-thirds of the egg) with the edge of the palm or the index finger of the right hand crosswise into 4 parts;
- Then, by pinching and pulling, we continue to sculpt all parts of the toy.
Combined method This method combines modeling from a whole piece and individual parts. The combined method of modeling is used in creating compositional works.
Relief modeling
- by drawing
- by applying the form to the base
- by selecting clay
Molding
Modular molding
Reminiscent of making a three-dimensional mosaic or constructing from a large number of identical parts
Plasticineography - an unconventional modeling technique for preschoolers
Plasticineography as an unconventional modeling technique for preschoolers.
Children draw, sculpt, and assemble figures and buildings from construction sets. In fact, finger training is “fine motor skills of the palms and hands,” which is directly related to the formation of intelligence, the development of speech, memory, attention and thinking.
Scientists have proven that about a third of the area of the cerebral cortex is projected on the hands, and also areas of fine motor movement are very close to the tongue. It is the magnitude of this projection and its proximity to the motor zone that makes it possible to consider the hand as an “organ of speech”, exactly the same as the articular apparatus. In this regard, scientists have put forward the assumption of a significant interaction between fine movements of the hands and fingers on the formation and development of language function in a child.
Motor skills interact with all the higher properties of consciousness: attention, thinking, optical-spatial perception (coordination of movements), observation, visual memory, etc. The development of fine motor skills is also necessary because throughout the rest of one’s life a person will need to use fine, coordinated movements of the hands and fingers that are needed to write and draw, get dressed, and also perform many different household, industrial and educational activities.
Training and motor skills of the fingers primarily occurs with the help of modeling from plasticine, thus, the child’s creative abilities quickly develop, and plasticine also develops fine motor skills of the hands well.
The main thing in working with plasticine is not to overestimate the child’s strength and give him an interesting and exciting task. Then he will feel maximum pleasure from the modeling process and from the results of his work. And this is the key to future success.
In order for a child to really and seriously become interested in modeling from plasticine, and for creativity to bring joy and satisfaction, he should be selected with the necessary and convenient tools for work.
Modeling from plasticine, as already mentioned, is best done on special modeling boards; you can also use a wooden board or a piece of linoleum. The size of the board depends on the size of the product.
Also, the work will require various devices that will allow you to make some details on plasticine figures.
Some plasticine kits already contain a complete set of tools, which, for example, may include a plastic rolling pin. It is convenient to roll out plasticine into even and thin layers.
Types of modeling in kindergarten.
During modeling classes in kindergarten, there are certain tasks for teachers:
- nurturing children's creativity,
- teaching children visual and technical skills,
- developing interest in this type of activity.
Types of modeling in kindergarten: subject; plot; decorative
- Subject modeling: p
Designed for recreating individual objects. Children enthusiastically sculpt figures of people and animals. Only the fastest they master the image of objects of plant and structural form. In connection with this fact, kindergarten teachers are faced with the task of teaching children the ability to depict the key shape of objects in modeling and the most striking features characteristic of them.
- Subject modeling:
is accompanied by a large amount of work, because it is necessary to sculpt each individual object included in the composition, give it the desired position on a stand or without it, and then supplement the sculpting with some details.
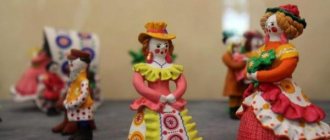
- Decorative modeling.
Introducing children to folk applied art is one of the ways of aesthetic education; in the process of learning its various types, in particular the small decorative plastic arts of folk craftsmen, children can acquire many useful skills. The kids are good and happy to sculpt beads and other decorations for dolls, make decorative vessels: egg stands, salt shakers and vases for small spring flowers, trays and glasses for pens and pencils. In the process of working on a decorative plate, children learn the rules of handling the instrument, various modeling techniques, and, more importantly, beautiful decorative filling of space.
"PLASTILINOGRAPHY"
Plasticineography is an unconventional modeling technique, which is expressed in “drawing” with plasticine more or less convex in volume (bas-relief) images on a horizontal surface.
Material for work: plasticine; colored cardboard; markers; ballpoint pen refills; stack; photo frames
Possible tasks:
- improve visual perception.
- promote cognitive, creative and sensorimotor development:
- develop the perception of shape, texture, color, weight, plasticity of the material;
- develop fine motor skills of the hand, synchronization of actions of both hands;
- develop fantasy, imagination, spatial thinking;
- to form the emotional-volitional sphere of children, to develop skills of self-control over the actions performed.
- to promote the socialization of children: the development of their labor skills in planning work to implement a plan, the ability to foresee the result and achieve it.
Types of plasticineography:
1. Direct plasticineography - an image of a molded picture on a horizontal surface.
Mostly all children, starting from an early age, work in this work technique. For an early age, you can prepare a simpler contour drawing, without small details, and at an older age, children can apply more complex compositions on their own, with small details. The drawing is filled with softer plasticine, such as wax. It spreads well and blends beautifully. This technique must be performed on a sheet of thick cardboard, but in this case it is necessary to first cover the surface with tape. It is best to smear plasticine on cardboard with your hands, since the material under pressure lies in an even layer on the surface, thus achieving the effect of a brush stroke with oil paints.
2. Reverse plasticineography - an image of a stucco painting on the reverse side of a transparent surface or stained glass.
This type of plasticineography is used on glass, the image is obtained from the other side, which is why it is called reverse plasticineography. Since preschool children cannot work on glass, you can use plastic or plexiglass.
Transfer the design to the surface using a marker, and then fill the elements of the design with plasticine. To do this, you need to select a piece of plasticine according to size and knead it well in your hands, and then smear it on the glass. You can smear it with your fingers or a glass, carefully pressing it onto the surface to form a thin layer. The new color must be applied sequentially and separately. Along the contour, the resulting work can be pasted over with stripes to create a neat frame, or inserted into a finished frame.
3. Modular plasticineography - an image of a molded picture using various elements - rollers, balls, disks.
This technique is more complex, since it requires mastery of all sculpting techniques. First, you need to transfer the drawing you like onto a sheet of cardboard and fill each section of the picture with plasticine of the appropriate color, which can be done with small balls, flagella or whole parts, giving the edges the desired shape using a stack.
4. Mosaic plasticineography - an image of a molded picture using plasticine balls.
This technique is the simplest, since the elements are all the same - plasticine balls. You just need to beautifully combine colors and carefully fill the space without going beyond the outline
5. Contour plasticineography - image of an object using flagella.
This technique is more suitable for older people, as it requires perseverance and painstaking work. The contour drawing is filled with flagella, which are pre-rolled by the child himself or prepared in advance by the teacher. To do this, you need to place the plasticine in a syringe, and place the syringe in hot water so that the plasticine melts. After 2-3 minutes, you can squeeze out the plasticine, so you can prepare completely identical flagella, which subsequently fill the space.
6. Multilayer plasticineography - a three-dimensional image of a stucco painting with the sequential application of several layers.
The advantage of this technique is that you can create a very beautiful and bright plot on a plane. This technique is suitable for depicting the sky, mountains, forests and other landscape scenes, when one layer on top is covered by another. Some details of the plasticine painting may have a complex outline. In this case, you need to apply a plasticine cake and remove excess plasticine using a stack.
If the painting contains elements that are difficult to sculpt, then they are repeated with a thin layer of plasticine on paper, cut out with scissors and stuck to the base using thin plasticine rollers, thus achieving a 3-D effect.
7. Textured plasticineography - an image of large areas of a painting on a horizontal surface with a more convex image (bas-relief, high relief, counter-relief)
Bas-relief (French bas-relief - low relief) Bas-relief is a common type of decoration of architectural structures, a type of sculptural convex relief in which the image protrudes above the background plane by no more than half the volume. If more, the relief is called high relief
(high relief
). The picture can be made in relief in different ways - by forming elements using a stack, by sculpting individual parts that will protrude on the surface. Counter-relief (from the Latin contra - against and “relief”) is a type of in-depth relief, which is a “negative” of the bas-relief.
This type of in-depth relief can be achieved using rollers with a printed pattern. It is necessary to roll out the plate, first level it with a rolling pin, and then apply the pattern with a roller or stamp. How to arrange and store plasticine paintings. Flat plasticine paintings are best placed under glass in a frame, mat, or stored under transparent film. Plasticine paintings should not be deformed, exposed to direct sunlight or heat. Author: Khairulina E.V.
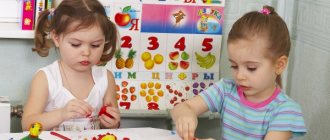
Features of modeling with children 5-6 years old
Modeling from plasticine for children 5-6 years old has received an important place in the educational programs of kindergartens. It is a creative process that accelerates the development of psychophysical skills in preschoolers.
Modeling classes help develop:
- fine motor skills;
- concentration;
- imagination;
- memory;
- perseverance;
- patience;
- speech skills.
Modeling stimulates the parts of the brain responsible for fine motor skills, as well as the speech center. Neural connections are created, and children master speech faster.
While sculpting, children learn to fantasize and think creatively; this will be useful both in school and in adulthood.