Abstract "Fish swim in an aquarium"
Open lesson summary
on artistic and aesthetic development (drawing)
in the middle group
“Fish swim in an aquarium”
Program content.
- Teach children to depict fish swimming in different directions;
- Learn to correctly convey the shape of fish, tail, fins;
- Strengthen the ability to draw with wax crayons;
- Foster independence, creativity, and the ability to mark expressive images.
Materials:
TsOR, letter, Whatman paper, green and red fish, oval and square album sheets, colored wax crayons (for each child).
Preliminary work
: sculpting fish, reading A.S. Pushkin’s “The Tale of the Fisherman and the Fish,” looking at illustrations about fish, memorizing I. Tokmakova’s poem “Fish,” tinting aquariums.
GCD move.
1. Organizational moment.
Children with a teacher enter the group and turn their attention to the envelope. The teacher invites the children to see what's inside. There they find a riddle:
She's always underwater
Silent and modest.
Head, tail, fins,
You know her for sure.
You answer, make a choice,
Children know this is... (fish)
IN.:
Well done guys, the answer is correct, it's a fish.
Have you ever seen real fish ?
Where do they live?
Children's answers.
IN.:
Today I want to invite you to visit the wonderful world of aquariums.
Are you ready to go with me? Children's answers.
2.View the presentation.
IN.:
Guys, who are we watching now?
(fish)
What shape is the fish?
What does she use to move in the water? What were the fish doing when we watched them? Guys, did you like the fish? Children's answers.
V.: My dears, do you want to draw such beautiful, mischievous, different fish? (Yes).
Then I suggest you add fish to your aquariums.
3.
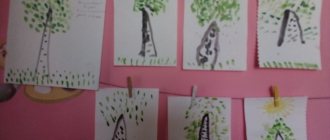
Children take their places at the tables. The teacher shows how to draw a fish, how you can decorate it in different ways (with strokes, dots, stripes), you also need to draw several fish in an aquarium, decorate the aquarium with algae and multi-colored pebbles. The teacher invites the children to draw fish first in the air, then start drawing on sheets of paper.
4. Independent activity of children.
The guys begin to draw fish, pebbles, and algae with colored wax crayons. Then the teacher draws the children’s attention to what beautiful aquariums they have made.
5.Finger gymnastics “Fish”
| The fish swims in the water. The fish have fun playing. Fish, fish, mischief, We want to catch you. The fish bent its back and took a crumb of bread. The fish wagged its tail and quickly swam away. | Two palms together depict swimming movements. Clap your hands. The palms are clenched into a fist one by one. Smooth movement with each palm. Grasping movements with a “pinch”. Smooth converging and diverging movements with both hands. |
6. Reflection.
multiurok.ru
How to draw a fish - learn to draw different fish
liveinternet.ru>
How to draw a catfish
Again, draw an oval with an axis. The shape of the catfish's body is similar to other fish. Only his head is big and wide. Let's finish drawing the fins and tail. The head of the catfish is decorated with unusual mustaches. By them, catfish can be easily recognized among other fish. Let's draw them. There are no scales on the catfish's body. But the fins and tail consist of thin plates, like those of other fish. Shade the fins and tail with thin lines.
Catfish is an inhabitant of fresh water bodies. This fish can be up to 5 meters long and weigh up to 300 kilograms. Favorite treats are small fish and frogs.
Picture of a drawn catfish for coloring
How to draw an angelfish fish
The angelfish has an almost square body. Therefore, the basis for the drawing is a circle, and the axes intersect in the center of the circle. We draw the body of the fish in relation to them. We draw the fins of the angelfish, they look like wings. The tail of the angelfish is also unusual.
Let's complete the details - the eye, the mouth, add volume to the fins
When coloring the fish, pay attention to the unusual shape of the stripes on its body.
The angelfish is a very beautiful and elegant fish. She settled in aquariums almost a hundred years ago. Angelfish are peaceful - they easily get along with other inhabitants of “glass houses”. Scientists believe that angelfish have quite developed intelligence.
Draw an angelfish fish with a pencil step by step
While coloring the picture of this drawn aquarium fish, pay attention to the unusual shape of the stripes on its body. Picture of a drawn aquarium fish angelfish for coloring
Picture of a drawn aquarium fish angelfish for coloring
Pencils, paper and tools
To create a picture you will need:
- a set of pencils with different leads;
- thick white paper;
- compasses and rulers;
- eraser and sharpener.
You can replace the compass with any round object, and use cards or a sheet of paper instead of rulers.
Cartoon fish
To continue your skills in drawing sea creatures, you can continue the lesson and try to draw a funny fish from the cartoon “Finding Nemo.” This work is best done with felt-tip pens. But if your skills are still very small, it is recommended to start with a simple sharpened pencil. You can also use oil pastels in your work.
- The first step: take a sheet of white paper and draw an oval in the center of it, which should be reduced on the left side. The resulting figure should resemble a large chicken egg.
- The next step is to draw the outlines of the tail of this cartoon character. Here we draw two vertical lines.
- We continue to work by separating the head from the body, this is done in the same way as in the instructions for the first drawing.
- We draw vertical stripes along the surface of the entire body. They don't have to be straight; slightly wavy shapes will do.
- A fin emerges from below the head like a drop. At the bottom of this element we make a double line. At the top we denote the dorsal fin with a wavy stroke. We complement it with smooth stripes.
- At the bottom of the head we draw a mouth with two semicircle lines, and above we use circles to denote the eyes. Just like in the first picture, add a few bubbles to the composition.
Add colors to the resulting image using oil pastels.
- It’s better to start with orange chalk. It fills the entire pattern, with the exception of the stripes. Red is applied in places on top of the orange.
- We use black chalk to outline the mouth and enhance the brightness of the stripes.
- To add volume, you need to go over the black stripes in some parts with gray chalk.
- The eyes can be colored brown, and the bubbles can be colored blue with a blue edging.
- Use black or other dark-colored chalk to shade the mouth and go over the stripes. To make them continuous, we paint them gray in some parts.
- We will draw the eyes with brown, and for the bubbles we will use blue.
The work is ready! Now you can start learning to draw an animal that lives in the depths of the sea. For example, it could be a whale or a fur seal.
Rocky bottom
Before you draw the seabed, think about what will fill the lower part of the drawing. And in our first sample, the bottom has a rocky surface overgrown with algae. Therefore, most of the bottom of the sheet of paper is filled with pebbles of different sizes. This is not difficult to do; even younger preschoolers can do it. Then you need to place long algae growing upward in several places. They are not drawn quite straight, but at an angle, with bends, as if they were swaying from the force of an underwater current.
Fill the rest of the sheet space with fish of different sizes that swim from left to right, and at an angle downwards, and vice versa. The circles of air bubbles flying out of the mouths of the fish look interesting, as well as the wavy lines showing that the plot of the picture takes place under water.
How to draw a fish :: goldfish outline :: Drawing
Tip 1: How to draw a fish
A home aquarium is not only a great idea for interior decoration, but also a faithful assistant in the fight against stress that arises as a result of the frantic rhythm of everyday life. In addition, for people who do not have the opportunity to have a cat, dog or parrot at home, aquarium fish are an excellent solution. And those for whom even a home aquarium is a pipe dream can draw a fish themselves.
Instructions
1. First, on a sheet of paper you should draw a small circle - the head of the future fish.
2. Next you need to draw an arc passing through the top of the circle. The right end of the arch should be 3-4 times longer than the left.
3. A curved line should be drawn through the lower part of the circle, the ends of which should be connected to the ends of the upper arc. The body of the fish is ready.
4. Now the fish needs to draw a tail. Outwardly, it resembles a pair of flower petals emanating from one point.
5. Next you should draw the upper lip of the fish. In the figure, it has an elongated teardrop shape and is located at the bottom of the fish’s head.
6. Following the upper lip, the fish must also add a lower lip, which also resembles a small droplet.
7. Next, you need to draw the upper fin of the fish. It can be oval, rectangular, or triangular, depending on the type of fish. Excess pencil lines can be removed using an eraser.
8. Then the fish should complete a pair of lower fins. The first fin usually grows near the fish's head, and the second closer to its tail.
9. Again you need to erase the extra lines with an eraser. Because Fish eyes are located on the sides of the head; only one eye will be visible in the picture. That's what you need to draw.
10. Now on the fins and tail of the fish you should draw bristles in the form of short stripes.
11. Next, using a mesh of straight lines, you need to show the pattern of scales on the body of the fish. In addition, it is necessary to erase with an eraser the upper right part of the circle, which once served as an outline of the fish’s head.
12. Now the fish can be painted with all the colors of the rainbow. The resulting drawing should be hung in the most visible place and admired more often, forgetting about the problems and worries of everyday life.
Tip 2: How to draw a fish
Every parent dreams that their child will be fully developed. The ability to beautifully draw the world around us is an inseparable part of such development. After all, through the prism of a beautiful drawing, every person is introduced to love, mercy and kindness. Taking the first steps in this art with your child is an amazing joy for the child and his parent. Therefore, let’s learn how to draw a fish together with your child.
Instructions
1. Draw a square and triangles. The body will be a square, and the triangles will be the head and tail. Along the way, explaining to the baby what these geometric shapes mean and why they are called that.
2. Draw the fins. Let the fins be rectangles tilted slightly to the side.
3. Draw a circle - this is the eye of the fish.
4. Draw a heart, let it be fish lips.
5. Add stripes. Horizontal on the tail of the fish, vertical wavy across the body.
6. Erase unnecessary lines with an eraser and round off all corner protrusions with a pencil.
7. Color the drawing with different colored pencils.
Video on the topic
note
There is no need to draw a large number of drawings at once; it would be better to alternate them with others, for example, outdoor games. This way you will not discourage young children from learning further.
Now that the beautiful drawing is ready, you can hang it on the wall for everyone to admire. This will bring a lot of joy and pride to your child. Look - you have an unusual aquarium fish. In addition, in the process of drawing, children receive additional lessons in geometry and mathematics. Learning to count the number of figures and remembering their names.
Video on the topic
https://youtube.com/watch?v=zSE_gvs5gxo
note
How to draw a fish with a tail? In this lesson we will draw a beautiful fish with a curly tail. It looks like a goldfish and is quite easy to draw. First of all, let's draw the eye of our fish. The eye will be round with a small pupil.
Helpful advice
The topic of this lesson is how to draw a fish, with the beautiful name Betta. 1. Start your drawing with a simple outline of the fish's body. Drawing any fish is not at all difficult. It is enough to draw an elongated oval-shaped outline, draw a small circle for the eye of the fish and put a line for the tail.
KakProsto.ru>
Bright and beautiful drawing for children
Notes on drawing nodes for children of the senior group “let’s draw a giraffe’s friends”
In one of our lessons we talked about how to draw a mermaid. Now let's find out how to depict a brightly colored fish for kids. The work is very easy, so even the smallest children can handle it, of course, with the help of their parents and our instructions. Before starting the creative process, prepare markers and, of course, a sketchbook. Let's get started:
- Starting from the left side of the sheet, draw an arc, tilt it down. Draw a large check mark to this arc. On the right side of this sketch we show the tail of the fish with an arcuate line.
- Next, from the left side of the picture we draw an identical silhouette. Using an arcuate line we separate the heads from the body. We draw this area with a thicker line. At the top, starting from the head section, draw the upper fin.
- Now, under the bottom of the fish we draw a small lower fin. Below the silhouette of the head we show two more small fins. Use short pieces to refine the details of the fins. Draw round eyes on the head. We detail them and draw a mouth in the front part of the sketch.
- On the body we finish drawing the scales, they are in the form of many arches. We separate the tail from the body and detail it with four segments. We show several bubbles in the front of the fish. It’s clear how to draw a fish step by step, but for even a baby to like it, it needs to be painted in bright colors.
- Use a pink felt-tip pen to color the tail. We make the remaining fins purple. We paint the first row of scales red. We make the second row of fins green, and the third row blue. Use a green felt-tip pen to color the next row of scales. We color the next two rows with red, and the penultimate row with lilac. We color the rest of the tail and the bubbles in front of the fish with blue. Use a white pencil to make the drawing three-dimensional.
The picture is ready. A child can easily cope with this work, the main thing is to follow our instructions.
Basics of art
Kids simply lack the basic skills to draw various characters from their favorite fairy tales, including a goldfish.
Parents should help the baby learn to imitate the fish from the famous fairy tale.
This will allow you to have fun with your beloved child and learn important things in a playful way.
Of course, before starting training, parents need to prepare themselves.
Drawing a goldfish is much easier than it might seem at first. It’s enough to follow the instructions below, so let’s draw:
So, first we create the shape of the fish’s body - the body should have an oval shape. After the oval is drawn, you need to draw the head on the body in the form of an arcuate line. Draw a fin on top; it should look like a large scallop. Next we draw the tail and the lower fin, which should be quite wide and long. Then we sketch out the entire body of the fish, except the head, with small scales
They should be drawn in great detail, and it is important to ensure that they gradually become smaller as they approach the tail.
Bottom dwellers
You already know how to draw the seabed. Let's look separately at samples of images of the main inhabitants of this part of the sea. These are shells of various shapes, starfish and crabs.
Try, looking at the presented samples, to redraw them with a simple pencil on a sheet of paper. If you practice, a good result will not take long to arrive. Shells and a star are easy to draw, but drawing a crab will take some work. First, draw the torso-shell. Then the front legs with claws are added, which consist of three segments. Then they draw the remaining 8 pieces, slightly retreating from the front ones. They are depicted side by side, but in different ways. The first row is turned forward, and the remaining three are turned back. The outermost segments resemble claws and are drawn filled in and curved.
You can fantasize and come up with options for depicting the seabed for a long time, so use the information you have already received and add your own creative ideas.
Source
How to draw an aquarium
This container can hold no more than 1 cubic meter. m, since a large container cannot fit in an apartment. Inhabitants can be crustaceans, reptiles, corals, marine and even freshwater fish, and mollusks. You need to know this before you draw an aquarium. To ensure a quality life for such inhabitants, the containers are equipped with filters, thermometers and thermostats.