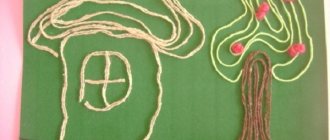
Card file “Non-traditional drawing techniques”
| “Finger painting” Method of obtaining an image: the child dips his finger in the gouache and puts dots and specks on the paper. Each finger is painted with a different color. After work, wipe your fingers with a napkin, then the gouache is easily washed off. |
"Palm drawing"
Method of obtaining an image: the child dips his palm in gouache (the entire brush) or paints it with a brush and makes an imprint on paper. They draw with both the right and left hands, painted in different colors. After work, wipe your hands with napkins, then the gouache is easily washed off.
“Imprint with cork or eraser stamps”
Method of obtaining an image: the child presses the cork to a stamp pad with paint and makes an impression on the paper. To obtain a different color, both the bowl and the stopper are changed.
"Stencil printing"
Method of obtaining an image: the child presses a signet or foam rubber swab onto a stamp pad with paint and applies an impression to the paper using a stencil. To change the color, take another swab and stencil.
"Imprint with crumpled paper"
Method of obtaining an image: the child presses crumpled paper (napkin) to a stamp pad with paint and makes an impression on the paper. To get a different color, both the saucer and the crumpled paper are changed.
"Leaf Prints"
Method of obtaining an image: the child covers a piece of wood with paints of different colors, then applies it with the painted side to the paper to make a print. Each time a new leaf is taken. The petioles of the leaves can be painted on with a brush.
"Foam drawings"
Method of obtaining an image: we make various small figures from foam rubber (you can simply dab it with foam rubber), and then attach them with a thin wire to a stick or pencil (not sharpened). The tool is already ready. Now you can dip it in paint and paint using stamps (all foam rubber, unlike cotton wool, washes well).
“We draw with glue and salt”
Method for obtaining an image: use PVA glue to draw a pattern on cardboard, for example, a flower or a vase. Place it in a baking dish and sprinkle well with salt. The shape is needed so as not to spill salt everywhere. After the glue has dried, shake off any excess grains. Dip the brush into the desired color. Gently touch the salt line and see the color flow along the outline. Use different colors in different parts of the drawing, they will blend very nicely in transitions. Fill in all the taped lines with color and leave to dry. It may take one or two days for it to dry completely.
“Drawing with soap bubbles”
Method of obtaining an image: shampoo or liquid soap is added to the water. Concentration is approximately 1:10. The proportion is not strict, but you shouldn’t go too far to the side. If the bubbles are intended for a small child, it is recommended to use tear-free baby shampoo. To make the bubbles large and not burst for a long time, add a little gelatin or glycerin to the water.
“Drawing with the bottom of a bottle”
Method of obtaining an image: first you need to dilute the gouache in a saucer, then start drawing. We lower the bottom of the bottle into a saucer with paint and apply an imprint to the paper. After drying, you can complete the drawing.
“Drawing with microbeads”
Method of obtaining an image: initially coat the image with PVA glue. Then sprinkle the image with microbeads.
“Drawing with cereals”
Method of obtaining an image: initially coat the image with PVA glue. Then sprinkle the image with any cereal (semolina, buckwheat, millet, rolled oats, rice).
"Stampography"
Method of obtaining an image: any shape (anything) is cut out from any material, for example, soft plastic or sponge. For greater convenience, you can glue the figure to a cork or pencil. First you need to dilute the gouache in a saucer, then we start drawing. We lower the stamp into a saucer of paint and apply an imprint to the paper.
“Draw with the edge of the palm”
Method of obtaining an image: in the middle of the sheet the child draws with the edge of his palm. It is dipped in paint and imprinted on paper as necessary for the design it represents. Then the paint is wiped off with a rag.
"Drawing with a fist"
Method of obtaining an image: the child dips his fist into the gouache or paints it with a brush and makes an imprint on paper. After work, wipe the fist with napkins, then the gouache is easily washed off.
"Drawing on Wet Paper"
There are a number of objects, subjects, images that are best drawn on damp paper. Clarity and vagueness are needed, for example, if a child wants to depict the following themes: “City in the fog,” “I had dreams,” “It’s raining,” “City at night,” “Flowers behind the curtain,” etc. You need to teach your preschooler to make the paper a little damp. If the paper is too wet, the drawing may not work. Therefore, it is recommended to soak a ball of cotton wool in clean water, squeeze it out and rub it either over the entire sheet of paper, or (if required) only over a separate part. And the paper is ready to produce unclear images.
“Poke with a hard semi-dry brush”
Method of obtaining an image: the child dips a brush into the gouache and hits the paper with it, even vertically. When working, the brush does not fall into the water. Thus, the entire sheet, outline or template is filled. The result is an imitation of the texture of a fluffy or prickly surface.
"Drawing with a fork"
Method of obtaining an image: first you need to dilute the gouache in a saucer, then start drawing. Place a fork in a saucer of paint and apply an imprint to the paper. After drying, you can complete the drawing.
"Spray"
Method of obtaining an image: the child picks up paint on a brush and hits the brush on the cardboard, which he holds above the paper. Then he paints the sheet with watercolors in one or more colors. Paint splashes onto the paper.
"Bitmap"
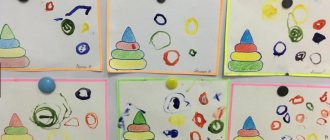
Method of obtaining an image: to implement it, you can take a felt-tip pen, a pencil, place it perpendicular to a white sheet of paper and start drawing. But the best thing to do is dotted drawings with paints. A cotton swab is dipped into thick paint. And then the principle of drawing dots is the same.
"Ordinary blotography"
Method of obtaining an image: the child scoops up gouache with a plastic spoon and pours it onto paper. The result is spots in a random order. Then the sheet is covered with another sheet and pressed (you can bend it in half, drip mascara on one half, and cover it with the other). Next, the top sheet is removed, the image is examined: it is determined what it looks like. The missing details are completed.
"Blotography with a tube"
Method of obtaining an image: the child scoops up paint with a plastic spoon, pours it onto the sheet, making a small spot (droplet). Then blow on the stain from a tube so that its end does not touch either the stain or the paper. If necessary, the procedure is repeated. The missing details are completed.
"Monotype"
Image acquisition method: This is one print. To make it, you need polyethylene or paper as a base for applying watercolor or gouache stains on them, then a clean sheet of paper is placed on top of the drawing, carefully ironed on top with your hand and removed. The result is a print that, just like a blot, can be completed.
"Foam impression"
Methods for obtaining an image: the child presses the foam onto a stamp pad with paint and makes an impression on the paper. To get a different color, change the bowls and foam.
"Wax crayons + watercolor"
Method of obtaining an image: the child draws with wax crayons on white paper. Then he paints the sheet with watercolors in one or more colors. The chalk drawing remains unpainted.
“Drawing with shaving foam”
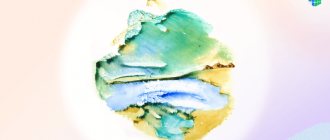
Method for obtaining an image: beat the foam and collect it with a sponge. Now squeeze out the sponge so that the foam ends up in the paint container. Stir and use a brush to apply foam and paint onto the paper. When the drawing is dry, the excess foam can be blown off. To create the effect of using different shades of color, take shaving foam and gouache of the color you need. Mix shaving foam and paint in a bowl and apply it to the drawing with a brush.
TECHNIQUES OF VISUAL ACTIVITIES FOR CHILDREN IN PRESCHOOL AGE
There are many non-traditional drawing techniques; their unusualness lies in the fact that they allow children to quickly achieve the desired result. The use of unconventional drawing methods evokes an abundance of positive emotions in children; makes it possible to use often unexpected objects as visual materials, surprising children with originality and unpredictability. Knowledge, skills, pedagogical tact enable the child to create his own picture of the world, and non-traditional drawing methods make the drawing beautiful, understandable, attract him and interest him. The idea of pedagogical experience is to develop the creative abilities of each child using non-traditional techniques, to help realize themselves, to be able to combine various materials in one drawing to obtain an expressive image.
Factors that allow me to prevent monotony and boredom in children's visual activities, ensuring the vividness and spontaneity of children's perception:
• diversity and variability of work with children;
• novelty of the environment;
• unusual start of work;
• beautiful and varied materials;
• interesting and non-repetitive tasks for children;
• choice.
The teacher’s task is to support children’s initiative, developing their creativity. The main task that confronted me regarding artistic and aesthetic development was not only the implementation of a personality-oriented approach to each child, but also the ability of children to work in pairs and collectively. This develops communicative qualities in children: the ability to negotiate, plan their work, and achieve results through joint efforts.
Working with children of senior preschool age, I noticed: children love to draw, diligently master the skills of working with various tools and visual materials, master individual techniques and methods of drawing, but when creating their own works, children’s visual and expressive skills remain at an average level, many compositions stand out for their scarcity content, stamps. There is no main thing - “our own”, sincere drawings, there is no creative approach, they do not reflect what is significant for the child drawing them. After analyzing the drawings of preschoolers, I came to the conclusion that it is necessary to facilitate drawing skills, because not even every adult will be able to depict any object. This can greatly increase preschoolers’ interest in drawing.
Every time I create a new situation so that children, on the one hand, can apply previously acquired knowledge, skills, abilities, and on the other hand, look for new solutions and creative approaches. This is what evokes in a child positive emotions, joyful surprise, and a desire to work creatively. I try to diversify both the color and texture of the paper, since this also affects the expressiveness of the drawings and confronts children with the need to select materials for drawing, think through the coloring of the future creation, and not wait for a ready-made solution.
An example of a lesson plan on non-traditional drawing in a junior group
Summary of a drawing lesson using non-traditional techniques in the first junior group: “Flowers of unprecedented beauty.” The plan for this outline is drawn up by the teacher. Young artists are introduced to a new technique of unconventional drawing - “Painting with a palm and a sponge”.
An example of a note on drawing using non-traditional techniques
The teacher says that when spring comes, all nature wakes up after winter. During this period, all trees and shrubs begin to turn green. The very first spring holiday is Mothers' and Grandmothers' Day. Next, the children are shown illustrations of flowers. In addition, the teacher teaches how to convey the image of flowers, structure and shape using a sponge.
The project is aimed at developing creative imagination in children of primary preschool age through the use of non-traditional drawing techniques. These techniques allow the child to express with interest his impressions of the world around him in his drawings. An unconventional approach to making images is self-education and the development of children's intellect; it encourages the child's creative activity and teaches him to think outside the box.

