Benefits of classes
Drawing in an unconventional palm technique will allow the child to develop the muscles of his hands, and parents will be able to establish psychological contact with the baby. Such activities not only entertain, but also bring benefits:
- develop motor skills;
- give new knowledge about the shapes of objects;
- teach color recognition;
- develop taste.
Regular finger painting classes allow you to strengthen your hand muscles and develop motor skills, and this has a beneficial effect on speech and abstract thinking. The child will be able to learn about new objects by depicting them, and will also become familiar with geometric shapes, different colors and shades. Such home lessons will help parents prepare their child for the first grade of school.
Small objects help develop coordination of movements. Children will be able to expand their horizons and gain new tactile and visual sensations. The child will receive many pleasant emotions from creative activities, he will develop a taste and a craving for beauty. Children express their experiences through colors. Each drawing reflects the joys and fears of a child. Parents should pay attention to what exactly he depicts.
You can start classes from 10-11 months, but the baby should draw only with the help of his parents. It is better to make the first lessons short - 5-10 minutes. Over time, they can be extended to 20-30 minutes.
You should not force your child to draw; it is better to observe his mood. Creativity requires a good mood and inspiration.
How to make the lesson interesting?
The drawing process is very useful for children. It develops attention, memory, fine motor skills and imagination. You can draw with your fingers and palms at home, in kindergarten, or use drawing techniques to entertain children during a children's party.
To make the creative activity interesting and bring maximum pleasure and benefit, it is recommended to include elements of the game:
- Make a riddle and ask them to draw the answer with their palm. Example: He gets up at dawn, sings in the yard, has a comb on his head. Who is this? (Cockerel).
- Read a fairy tale to the children, and then invite them to portray their favorite character. Example: “The Fox and the Goat”, “How the Fox and the Sheep Punished the Wolf”, “Teremok”.
- Organize group drawing. Children can draw the sun or the underwater kingdom together. To do this, everyone makes a ray imprint or a fish imprint with a pen.
- Conduct an educational lesson on the topic “winter”, “autumn” or another with games, riddles, round dance and songs. At the end of the lesson, consolidate the acquired knowledge by drawing a thematic picture with your palm. For example, a winter forest, a snowflake or an autumn tree.
Hand drawings vary in complexity. When organizing a lesson, you should take into account the child’s age, development and capabilities.
special instructions
During the creative process, keep some guidelines in mind. They will help make work exciting and useful for the child:
- If your baby is getting acquainted with colors for the first time, you should not immediately resort to compositions. Place your baby’s palm on a blank sheet of paper, and then give him the opportunity to show independence and try out a new type of self-expression. Only after this should you start composing your compositions.
- It is a mistake to believe that drawings from prints will be uninteresting to children after 7 years of age. Such crafts are very popular even among schoolchildren.
- Adjust the saturation of the image by applying paint to your hands.
- Combine applique and pattern to make the composition more vibrant.
So, to create bright and beautiful images using children's handprints, you need to take a few simple steps:
- choose a drawing theme.
- Prepare your finger paints.
- create the basis for the picture.
- make impressions.
- complete the missing elements.
Materials and tools
All materials can be found in any store that sells office supplies. Children do not need professional expensive paints. It is better to choose those with a safe composition, because the child can taste them.
Required tools and materials:
- paper;
- finger or any other paints;
- dry and wet wipes;
- cotton swabs and disks;
- old toothbrushes;
- oilcloth or mat for creativity.
You can choose any paper for drawing - A4 or A3 sheets, Whatman paper, coloring books, colored cardboard. You don’t have to buy expensive goods; just buy a standard album or sketchbook. But the paper in them should be thick so as not to get wet from water. Suitable paints include watercolor, gouache, and special materials for fingers. They can be purchased at any art stores. The colors should be bright; there are watercolors and gouache with glitter. Such materials will interest children. You can draw figures not only with your hands - the child can use cotton pads or sticks, toothbrushes.
It is advisable to seat the baby at a comfortable table, and lay a blanket or pillow on the chair to make him comfortable. It is better to cover the workplace with oilcloth or a special rug. In any case, the children will cover it with paints. It is also recommended to dress the child in old clothes that you don’t mind getting dirty. And to cleanse the skin you need to use dry or wet wipes.
Kids won't be able to draw serious pictures yet.
Their first attempts will resemble meaningless scribbles: dashes, sticks, crooked lines, blots. But the more often the child practices, the more interesting his images will become. With age, technique will improve, and the most talented children will begin to create real masterpieces.
About tasty and tasteless colors
The first thing your six-month-old aspiring artist will try to do is put paint in his mouth. This is completely natural for a child at this age. The most common reaction of parents is to limit the movement of their hands and tell the child constant “no”. Unfortunately, such actions exclude the free activity of the baby. In this case, the whole point of the drawing process is lost.
Of course, any paint is an absolutely inedible thing, and you need to remember this! You can stop your child from eating paints in this way: add a solution of Epsom salts or mustard to the paints. The child will understand: if it is “bitter”, it means “impossible”!
It is worth noting that both gouache and finger paints themselves also taste quite unpleasant, and it is unlikely that the child will want to try them again. So don't worry too much if he licks his painted finger or drawing.
Finger paints for kids
Finger paints are great for little ones.
- They can be given to a baby from about six months of age.
- Such paints are specially made for little ones and they do not contain harmful and toxic ingredients, they are made using food coloring, because little children put everything in their mouth and taste it.
- To prevent children from doing this, they usually add salt or another ingredient to the paints, after trying which the child will no longer want to repeat it.
- Finger paints can be easily washed off any surface, washed off from a child’s skin, and washed off from clothes.
Characteristics of finger paints
Child psychologists are sure that the sooner a child starts drawing, the smarter he will grow up. Until the baby has learned to hold brushes and pencils in his hands, finger paints are the best option. In addition, felt-tip pens, colored pencils, watercolors and gouache contain unsafe substances, and it is very difficult to remove traces of them from clothes and furniture.
Precautionary measures
Small children get tired quickly; for the first time it is enough to practice for no more than 5 minutes . Further, the child’s attention will not concentrate on creativity. The first few lessons are an adaptation period. You should not set difficult-to-achieve goals while you need to conduct lessons in the form of a game. While drawing, children, with the help of their parents, will be able to study geometric shapes, names of colors, various animals and types of transport, even body parts.
It is important to properly prepare the workplace and monitor the baby. First you need to deal with the paints. If it is watercolor, then it is diluted with water to a paste-like state. Thick gouache should also be made more liquid. Finger paints are ready to use. You can add glitter to them to make drawing more interesting.
It is better to pour the material into a flat saucer or plate. It is difficult for kids to get paint out of a small jar with their fingers; it is much easier to scoop it out of a large bowl. It is recommended to place a bowl of warm, clean water nearby. The child will wash his hands in it in order to continue using a different color. You also need to place a towel nearby, which can be stained with paint.
It is not advisable to leave your baby alone during classes. A small child can be so inventive that he will paint more than just paper . The role of parents during creativity is to channel the children's energy. The mother or father must communicate with the baby, prompt or help him. But you need to be allowed to make mistakes. Let a child draw crookedly or ugly - this is how he still expresses his “I”.
If the baby is not yet a year old, then it is better to provide him with a floor instead of a table. It is advisable to remove the carpet from it and lay down oilcloth. It is also recommended to remove all items that a child could damage. Wardrobes and beds can also be covered with oilcloth, otherwise they may be painted. If parents are afraid that the baby will freeze, you can put a warm blanket under him.
Organization of the process of painting with finger paints
The drawing process itself is very exciting, so don’t forget about the precautions:
- dress your child in clothes that you don't mind getting dirty
- put on a bib or apron, there are special aprons for creative activities
- use a large sheet of paper, preferably Whatman paper or a piece of wallpaper, so as not to limit the child
- if you will draw on the floor, put oilcloth underneath
- transfer some of the paint you will use to other containers so that the child does not use all the paint at once, which is exactly what he will do if you give him the whole jar; can be transferred into lids or toy dishes
- prepare wet wipes or a wet cloth
It is better to start drawing when the child is in a good mood, so that he associates drawing only with positive emotions.
How to prepare a place for drawing?
- Watercolor paints are pre-diluted with water, creating a paste-like mass.
You cannot take materials with an expired expiration date for children's art lessons. They can cause allergic reactions in a child!
- It is better to pour the paint into saucers. It is difficult for a child to carefully pick up the required amount of coloring composition with his finger. It is much easier for babies to place their palm completely in a flat container.
- It’s good if there is a small vessel with warm water nearby. It allows your child to wash their hands when the color changes.
| The baby should not be left alone while drawing., otherwise he will definitely taste all the colors. The same applies to art lessons using semolina. During classes, you need to make sure that the child does not accidentally inhale semolina . While drawing, infants and one-year-old children enjoy tapping and clapping their palms on the surface to be painted. It is useless to expect a child to be able to engage in creative activities without getting their clothes dirty. Apart from the artist himself, everything within a one-meter radius will be painted, including his parents. Therefore, it is better to immediately allocate a place for studying, which will then be easy to clean . An oilcloth-covered floor is ideal for drawing with children aged 1 to 3 years. |
The first lessons are conducted like this:
- To begin with, you can give your child a few flowers. 3-4 main ones are enough.
- A small album sheet of paper is completely unsuitable for drawing with your palms. Here you will need a large sheet of Whatman paper or a piece of wallpaper.
- The child should be dressed in clothes that you don’t mind, or, if the room is warm enough, stripped down to panties. The young artist will definitely get dirty and try to depict something on himself.
A child’s first steps in art will resemble paintings by abstract artists.
There is no point in asking your child to complete certain tasks. He will not be able to draw accurately, because he does not yet control his own hands well enough. At the age of one to two years, a child can draw with his fingers on semolina scattered on a tray . The material for drawing can be pre-tinted and scattered into different jars. Before class, the cereal is poured out in small slides on different edges of the tray, and the child is asked to mix it like sand with his palms. Then run your fingers along the resulting multi-colored surface, leaving a mark. Invite the child to repeat the action.
With a child over 2 years old, playing with visual aids can be a little more complicated.
At the beginning of the lesson, the plane is covered with unpainted material. Then the mother shows the child how to draw lines with her fingers, and then with a stream of colored semolina. For this purpose, colored cereals are poured into rolled paper bags , in which a small hole is left at the bottom.
You can paint with children using any available means:
- Crumpled paper.
- Toothbrushes.
- Natural material (leaves, twigs, blades of grass).
- Pieces of fur.
- Cotton buds.
- Scraps of fabric.
One-year-old children are not able to draw perfectly even geometric shapes and complex objects. A child's drawing consists of a set of dashes - lines, scribbles and spots.
The more often a child draws, the more complex and interesting his work becomes.
Precautions when finger painting with children from one to three years old
You can only draw with kids who taste everything using paints that are safe for their health.
How to create with your fingers
Fingerprints resemble a brush stroke. Finger and palm typing can be used as a basis for creating various characters. Before starting work, the little ones are shown on a sheet of paper how to put dots and make lines. The baby tries to touch the paint with the tip of his finger.
Note! To change the color of the dye, the child will need to wash his finger in water and wipe it.
Creative work in non-traditional techniques can have any topic. Many finger painting ideas for children can be found in the world around us. You can come up with a variety of ideas for such work. For the youngest children - a yellow round chicken, red berries and so on.
When kids have practiced poking small areas with their fingers and filling them evenly, you can give them a more difficult task:
- draw large objects with your fingers;
- lay the prints along the steep curl.
A difficult task for children is to arrange their fingerprints in a circle from the center (this is how the spots on the tail of a turkey or peacock are located). This method can be used to decorate any round object, starting from the center and moving in a circle to the edges of the circle.
Note ! Older children are interested in more complex drawings.
To get a larger print, they press their finger to the surface of a sheet of paper and roll it over. Next you need to figure out what you can turn this resulting oval silhouette into. Using a felt-tip pen or pencil, they will complete the color masterpiece to whatever their imagination tells them - seasons, flowers, funny animals and many other funny images.
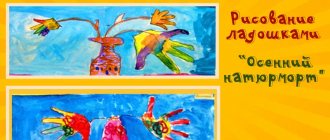
Drawing on the theme “Autumn”
Ideas for finger and palm painting
Children know how to see beauty. Palm printing is one of the favorite lessons of preschoolers, which takes them into the world of bright and amazing images. This exciting process is like a fun game - children are liberated and reveal their creative potential.
Non-traditional drawing lessons help to achieve a high artistic understanding, develop a sense of color and composition, the transition of one shade to another.
The technique of the work process is simple: the child dips his hands in paint or paints them with a brush, and then leaves a print on a piece of paper.
Note ! Different groups of children's institutions use different drawing techniques: techniques for adding details, the level of complexity of compositions, artistic creation of entire multi-color paintings with fingers.
Using the large stroke technique you can create beautiful landscapes. With your fingers it is easy to make not only prints, but also smeared lines (for example, hedgehog needles).
Blurred lines
The branches of the Christmas tree are obtained by drawing your fingers on both sides of the trunk, the fence is obtained by straight lines. Spiral lines create the silhouette of a blooming rose - the theme for a beautiful card for mom on March 8th.
Finger painting for children is a very useful hobby that provides an opportunity to diversify a child’s life. The sooner a child begins to engage in unconventional drawing, the faster he will develop.
Paint Recipes
The technology called “Finger Painting” involves the use of paints. But many parents worry that they may be dangerous for the child. After all, many kids taste them, and they contain many harmful chemicals.
Some mothers prepare their own paints. The ingredients are quite simple:
- 2 tbsp. flour;
- 1.5 tbsp. water;
- 7 tbsp. l. salt;
- 1.5 tbsp. l. vegetable oil;
- glycerol;
- food colorings.
First you need to mix the dry products - flour and salt. Add water to them and stir until thick sour cream forms. Then add vegetable oil. The ingredients can be mixed with a whisk, fork, mixer or blender. Glycerin is added as desired, it gives the paint shine.
The finished mass is poured into different jars; you can use empty containers from gouache or baby puree. Then you need to add dyes. They can be natural - juice of carrots, beets, celery, turmeric. You can also use food colorings that are added to baked goods.
At home, you can prepare three-dimensional paints for finger painting. You will need few ingredients:
- 1 tbsp. flour;
- 1 tbsp. salt;
- 2 tbsp. water.
The products must be thoroughly mixed and placed in different containers. Then dyes are added to them. For additional shine, glitter or glycerin is added to the mixture. Next, the jars are placed in the microwave for 1.5 minutes at 180 degrees. The result will be a voluminous material. While drawing, the paints will lie on the paper so that any image will acquire a 3D effect.
You can also use porridge for cooking:
- 0.5 tbsp. fine-grained cereals;
- water;
- dyes.
Semolina is suitable for creating paints; it is quite small. It is cooked according to the usual recipe; the consistency of the porridge should resemble sour cream. For greater viscosity, you can add PVA glue to the mixture. The mass is also laid out in small jars and mixed with dyes. This material will also allow you to create three-dimensional drawings. But after applying it to paper, you need to handle the painting more carefully - it must dry. You can fix the cereal with regular hairspray.
Description of the technique
Palm painting is a non-traditional technique. Not all children like to work with a brush and pencil. In addition, at a younger age, precise movements are difficult. Drawing with your palms is much easier: apply paint to your hand, apply it to paper - and the drawing is ready!
Necessary materials:
- gouache set,
- tassel,
- glass of water,
- album paper.
Drawing technique:
- The child dips his finger in the gouache and puts dots on the paper.
- To make an imprint of the entire palm, paint is applied to it with a brush, and the hand is pressed against the album sheet.
- It is not necessary to paint your palms the same tone. There can be many colors: multi-colored fingers, rainbow colors, spots and patterns on the palms.
- To get interesting shapes, some fingers can be bent, spread out, or, conversely, gathered together.
- At the end of the creative activity, wipe your palms with a damp cloth or wash them under a tap with soap.
In order for the handprint to “come to life”, it needs to be supplemented with eyes, ears, leaves or other details according to the topic of the lesson. Read on to learn how to use your palm and fingers to create images of different characters in the section that corresponds to your child’s age group.
Tips for parents
Parents should show the little ones exactly how to draw a picture with their fingers. The unusual technique of fine art should interest the child. Use your fingertip to scoop up some paint and make a dot or draw a line on the paper. The baby can repeat this. But you can draw not only with your fingers, but with your entire palm.
Older children enjoy using ready-made templates. You can find them on the Internet and print them or draw them yourself. These are images of fruits, vegetables, animals, transport. They are usually already painted, but have white areas. The child must paint them so that the colors match, or trace the outlines of the drawings .
There are popular pictures that kindergarten teachers use. The finger painting technique is also suitable for depicting natural phenomena. A child can draw the sun, rain, snowfall, and starry night with his hands.
The background is painted over with your fingers, evenly distributing the material over the paper. But you can use colored cardboard. Large images - sun rays, clouds, fish, flowers - are drawn with palms. And small details can be depicted with little fingers, cotton swabs and even toothpicks.
Finger painting will allow you to prepare greeting cards and themed posters for kindergarten. The child will be able to take part in decorating the house for any holiday. And parents will help kids master more complex painting techniques with each new lesson.
Project “Colored Palms”
Municipal preschool educational institution
"Lipitsa combined type kindergarten "Spikelet"
Project “Colored Palms”
(
use of unconventional drawing techniques)
1st junior group 2015-2016
Educator:
Polyakova N.A.
Relevance of the project:
Non-traditional drawing technique as a means of developing creative abilities in preschool children.
The world will be happy only when everyone
man will be the soul of an artist. In other words, when everyone finds joy in their work.”
Rodin
It is impossible to raise a creative person without beauty. Beauty is an eternal source of spirituality, inspiration, and creativity.
How to help a child discover himself most fully? How to create conditions for the dynamics of creative growth and support a child’s inquisitive desire to know the world in all its bright colors and manifestations? It is these questions that visual activity, one of the simplest, most exciting and accessible ways to develop a child, helps to solve.
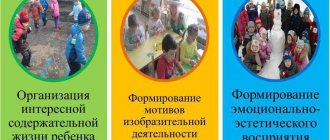
In the field of artistic and aesthetic development of a child, the main objectives of educational activities are to create conditions for:
developing children's interest in the aesthetic side of reality.
introduction to various types of artistic and aesthetic activities,
developing the need for creative self-expression, initiative and independence in the embodiment of artistic ideas.
Using non-traditional drawing techniques helps us solve these problems with children of early preschool age, since at this age children have not yet developed the skills of drawing with a pencil and brush.
Such non-standard approaches to organizing visual activities surprise and delight children, thereby arousing the desire to engage in such an interesting activity. Original drawing reveals the child’s creative capabilities, allows you to feel the colors, their character and mood.
Non-traditional drawing techniques create an atmosphere of ease, openness, promote the development of initiative, independence, and create an emotionally favorable attitude towards activities in children.
That’s why we developed the “Colored Palms” project.
Objective of the project
— formation of artistic and creative abilities in children of early preschool age through non-traditional drawing techniques.
Tasks:
- develop children's imagination and creativity,
- enrich and expand the artistic experience of children,
- develop a desire to experiment,
- encourage and support creative ideas.
— to cultivate a child’s positive attitude towards cooperation with adults, with children, towards his own activities and its results.