Lesson notes for the middle group on modeling and appliqué
Lesson notes for the middle group on cooperation development
Abstract No. 1. Applique (decorative)
"Striped rug for a cat"
Program content: Learn to make a beautiful rug from stripes and squares, alternating in color. Strengthen the ability to cut paper along the fold line. Reinforce the names of colors in children's speech.
Learn to act according to the rules. Encourage children to discuss the plan with their peers, encourage them to distribute actions and material. Cultivate friendliness.
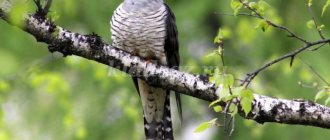
Preliminary work: talking about pets, looking at illustrations, playing with picture cubes.
Materials: 1/2 album sheet, 2 rectangles of different colors (wide, narrow), scissors, glue, brushes, cat toy.
Contents of the lesson. The teacher dramatizes the poem “Kittens” using his hands.
| Here are five kittens, one left and is no longer there | shows palms |
| Well, he’s gone and gone. There are four kittens left. Here are four kittens. | shrugs |
| One night, he climbed up a tree. There were only three kittens left. | "climbs" a tree |
| But somewhere the Mouse squeaked very thinly | covers ears with palms |
| Did the kitten hear? Two kittens left, one of them with a ball | hands to ears |
| Disappeared at the door without a trace, And the smartest one is the one | shows one finger |
| The last one left He approached the bowl | points to forehead |
| And as a pussy should, I began to lap up milk from a bowl for five. | strokes hands shows tongue movement from palms |
The teacher takes out a kitten’s toy. “The kitten ate and wanted to sleep, but couldn’t find a rug anywhere.” I decided to ask you for help so that you could make him a sleeping mat. Do you agree to help the cat? - Let's make a beautiful rug for him from stripes and squares.
The teacher suggests looking at the sequence of work. “I take a wide rectangle (specify the color), fold it lengthwise, it will be folded in half.
— I cut along the fold with scissors. I do the same with the second rectangle. It turned out 4 identical rectangles.
— I take a narrow rectangle (specify the color), fold it in half, and in half again (2 times). I straighten and cut along the fold lines. It turned out to be 4 squares. I do the same with the other rectangle.
— Then I smear the strip with glue and glue it to the edge of the album sheet, stepping back a little from the border.
“I take it, smear the squares and glue them evenly, neatly, leaving space between them under the strip. So, I alternate stripes and squares. Finish the pattern with a stripe. You will get a beautiful rug. Work carefully and carefully.
- Children, in order to complete the work quickly, you need to find a partner (friend) with him, and together you will make a rug.
- Choose a friend with whom you want to make a rug. Hold hands, look into his eyes and ask if he will work with you.
- Agree which of you will cut out and paste the strips, and which of you will cut out the squares. Ask your friend what he will do.
Children pair up and go to the tables. The teacher suggests checking the presence of all necessary materials on the table.
The teacher asks the pairs how they distributed the actions among themselves, reminds them of the sequence of work. - What will you do? - Have you agreed who will cut and glue the strips, and who the squares? - Who will be the first to start gluing the parts? Who's second? What will you glue? - You need to alternate stripes and squares and work carefully, together, quickly. The guys are doing the appliqué. The teacher observes and invites the children to help each other. - Look and ask if help is needed? At the end of the work, the teacher conducts an analysis. - What did you cut and glue? Why did it happen so quickly? How did you work? Who did you work with? How did it happen?
- You worked together, together, amicably - so it turned out quickly, it turned out beautifully. Take the rugs and show them to the cat. Come together.
The cat thanks the children and says that he liked the rugs. They are very beautiful and neat. The children worked together, amicably, so it turned out quickly.
Note No. 2. Painting “Trailer”
Program content. Teach children to convey in a drawing the rectangular shape of the carriage and the square shape of the windows; draw objects large, in accordance with the size of the sheet of paper; choose the color for drawing and painting the carriage yourself; Encourage creativity when making additions to the drawing. Encourage children to distribute actions, support the desire to act together.
Preliminary work: examination of illustrations of “transport”, game “train”, children’s trips by transport.
Material: picture depicting a steam locomotive and a carriage; game character Chanterelle; album sheets, scissors, paints, brushes, toys.
Lesson content: There is a picture of a steam locomotive and a carriage on the board. The little fox (toy) says that the animals and dolls wanted to go to the winter forest, look at and choose a New Year tree. You can get to the forest by train, but the animals and dolls have only a steam locomotive and one carriage, all of which cannot fit into it. What to do?
- Children, do you agree to help the toys? How can you help? Let's ???? we will cut and attach and attach the carriages to the locomotive. Then the toys will go into the forest to get a Christmas tree. The teacher gives a work plan. - What shapes are the carriages (windows)? The teacher shows on the easel a technique for drawing a rectangular shape of a carriage with square windows.
Also interesting work for the middle group: Lesson summary for the middle group on the Tumbler applique
Draws attention to the sequence of the image: · First, draw the outline of the car · Paint over · While the paint dries, draw the wheels in a different color · Suggests using additions to the drawing · When the paint dries, you need to cut out the car along the contour.
— The fox and the animals want to have time to choose a Christmas tree before the New Year, so we need to hurry up with the work. — How to quickly help the guests? — Find yourself a friend and ask if he wants to work together? Agree on which toy you will help, who will draw the carriage, and who will cut it out.
Children pair up and go to the tables. The teacher offers to check readiness for the lesson and asks about the distribution of roles and the sequence of work. - Have you agreed who will draw (cut)? Who will be first
work?
— What will you do? — Have you forgotten that we first draw the outline and then paint it? — Cut out the car after the paint has dried. — Ask a friend if you need help? — We work, carefully, together. Children’s work. At the end, the guys carry the carriages to the toys and make up the train. The teacher evaluates the work and makes an analysis. - How did you work? Who showed creativity? - You worked together, amicably, together, so you got beautiful cars. The toys are happy and grateful to you.
Abstract No. 3. Modeling
Fishes in an aquarium
Program content: Learn to fill in the silhouettes of fish, improve the technique of sculpting round shapes using circular movements of your palms, and flatten the shape with your fingers. Learn to work in a general rhythm, continue to learn to act according to the rule. Develop the habit of waiting; support the desire to act together. Cultivate goodwill.
Preliminary work: observing fish in an aquarium; sculpting a fish, sculpting round shapes.
Material: Silhouettes of fish in three colors, plasticine in three colors, a large blue sheet, a sample of a fish.
Contents of the lesson: The teacher shows an “aquarium” (sheet of paper) with one fish and asks the children: - Do you think it’s fun for one fish to live in a large aquarium? - What needs to be done to make the fish feel better? The fish will be very grateful to you if you make her friends and let her into the aquarium.
The teacher explains the sequence of work and sculpting techniques: · Select a silhouette, plasticine (the same color). · Pinch off a small piece of plasticine, roll out the ball. · Flatten the ball and press it to the silhouette of the fish. · Fill the entire surface with “scales” (place all round shapes close each other) · In order to make a fish faster, you need to team up with friends (three of each).
Children unite in threes, distributing actions among themselves and choosing plasticine.
- Agree which of you will sculpt rounded shapes (2 people), and who will fill the silhouette with scales (1 person). Ask your friends what they will do? Do they agree? The guys are invited to go to the table and choose a material to work with (plasticine in accordance with the color scheme of the fish silhouettes).
The teacher clarifies with the children how they distributed the roles, the sequence of actions, and the material.
- What will you do? - Who will make the balls? How will you sculpt?—Who fills the silhouette?—How will you fill the silhouette?—What kind of plasticine did you use?—All parts should fit tightly together, the balls should be even. Work together, negotiate. Ask if you need help?
Children's work.
At the end of the lesson, children carry fish and attach them to the “aquarium”. The teacher analyzes and gives an assessment on behalf of the fish (they worked harmoniously, rhythmically, together, waited for each other, helped; It was easy to work: it turned out quickly, beautifully, they worked together). He says thank you.
Abstract No. 4. Application. “Doll house”
Program content. Teach children to independently depict a building from squares, rectangles, triangles; arrange symmetrically identical parts of the building; establish methods for cutting strips into pieces; attach the parts tightly to each other. Encourage discussion of the plan with a peer, develop the habit of waiting, coordinating actions, resolving conflicts, and cultivating friendliness.
Materials: doll, two samples of a house, album sheets for 1/2 groups, strips of colored paper, colored rectangles.
Lesson content: A doll appears and says that she went to visit her friend. A friend lives in a beautiful house by the lake. The doll really wanted to live in a beautiful house, but she alone cannot build it. She asks the children to help her.
— Do you agree to help the doll? How will you help the doll?
The teacher tells the doll that the children don’t have building materials now (they are doing applique work), maybe she will agree to accept paper structures (samples of houses) from the children, and then she and her friends will build a house using them.
The teacher discusses with the children the sequence of children’s work, based on the diagram.
- You need to fold a colored narrow strip in half and cut along the fold line - you will get 2 squares - windows (if necessary, do the same with the second strip).
— Fold another wide strip in half, cut it, you get two rectangles (doors)
— Cut off the corners of the longest strip diagonally (P)
— Spread glue on a large rectangle and stick it on a landscape sheet. Glue all the details onto it (windows, doors, roof).
— Glue the parts tightly to each other (roof), position the windows symmetrically. Children are given tokens of two colors. The teacher invites the children to unite and choose one of the options at home: blue or red, so that the work goes faster.
- Anyone who wants to make a blue house, find a friend and ask if he wants to make a blue house. Offer to do it together. Ask if he agrees. (Similar to red)
— Agree on who will cut out the details of the house and who will glue it on. One cuts it out, the other sticks it on.
Children pair up and go to the tables. The teacher clarifies with the children the distribution of actions (order of work). - What will you do? - Pay attention to the scheme of work. - Have you agreed who will cut and who will glue? - You need to glue smoothly, carefully. - Ask a friend if it is necessary help?
Children's work. Upon completion, evaluation of the work (bring in a doll).
- Who did? How did you do? Why did it happen quickly?
The doll thanks the children (beautifully, neatly, because they worked together, waited patiently for each other, worked together, in agreement, according to the plan).
Abstract No. 5. Paper construction Bus.
Program tasks: Strengthen children's ability to glue rectangles onto a reference line; develop memory, eye, clarity of hand movements; teach to act according to the rule, coordinate your actions with the actions of others, encourage joint planning; show friendliness.
Materials: sheets of thick paper (0.5 sheets), strips of colored paper, 4 cardboard circles, sample bus, toys, scissors, glue, brushes, assembly model.
Preliminary work: playing with cars, observing transport.
Lesson content: Children sit next to each other, opposite each other. Toys came to visit the children with a request to make a bus for them so that they could go on a tour of the city. The teacher asks the children if they will help the toys. Do you agree to make a bus for the excursion?
The teacher offers to make a bus out of cardboard, shows a sample and talks about the manufacturing sequence (use an assembly model).
Asks questions about where windows and doors are located, whether they are located equally on two opposite sides.
Draws attention to the outlined line for the windows (glue the windows exactly along it).
You need to coat half of the wheel with glue and glue it under the wall of the bus so that the other half of the wheel is outward (shows how to glue circles - wheels).
The toys are eagerly waiting for the bus and therefore the children need to quickly do everything by choosing a friend (who is sitting opposite him) to work with.
The guys are invited to ask each other who they want to make a bus together and agree on who will glue the parts on one side and who on the other (one at a time).
Children pair up, choose material and take their seats.
The teacher clarifies with the children the order of work (who starts first, who continues), the sequence, and the technology for gluing windows and wheels. Offers to coordinate your actions with the model (on the board) of the assembly.
Children's work. At the end of the work, the children bring their toy products and demonstrate them.
Toys evaluate the work of children (they worked together, amicably, according to the rules, according to the scheme, the result depends on attention, distribution of material, coordination of actions, diligence and accuracy).
Title: Lesson notes for the middle group in modeling and appliqué Author: Lyudmila Aleksandrovna Ipatova Position: teacher Place of work: MADOU “Kindergarten No. 187” Location: Perm
portal2011.com
Summary of GCD for the application “Striped rug for a kitten” for the middle group
Alena Kozlovskaya
Summary of the GCD for the application “Striped rug for a kitten” for the middle group of GCD
“
Striped rug for a kitten ” .
Application
Middle group
Topic: Striped rug for a cat .
Goal: to develop children’s ability to make a beautiful rug from stripes alternating in color.
Develop the ability to cut paper along the fold line.
Practice working step by step by folding the colored square in half lengthwise, unfolding it, cutting along the fold line with scissors, laying it out on rectangular cardboard alternating colors, and gluing it.
Progress:
Before class, I place a toy cat on the windowsill.
Making a riddle: “At night he doesn’t sleep at all, he guards the house from mice, he drinks milk from a bowl, but of course it’s ( a cat)
.
Guys, you saw a kitten run into the group , but where is it, help me find it. (Children search for a kitten in a group ; the child who finds it brings it).
A cat sharpens its claws while sitting on the window. Oh, how sharp they are on a cat. Oh, what small paws she has. In these paws the tsap - scratches - are dozing for the time being.
Our kitten played and wanted to sleep , but there was no rug . Let's help guys, make him a sleeping mat . Do you agree to help Kitten ? (Yes)
.
What can we make a rug ? (Children make their suggestions)
.
That's right, a rug can be made from wool, fabric, plasticine. But today let's make a beautiful rug from strips of paper . You know how to cut paper into strips . But for the rug we will need strips of the same width , so we will try to cut the paper in a new way, and I will tell you which one when we move to the table.
Make your own rugs .
Children are seated at tables on which blanks for the rug are located .
Bye from work. Take a square and bend it in half and smooth the fold with your fingers, smooth out the fold lines in both directions, then unfold the sheet and take scissors exactly along the fold line - you get two strips , then take the base for the rug and lay stripes on it alternating them by color , then take the glue and smear the strip on the back side one , then take the strip with both hands and apply it to the base for the rug , gently pressing and smoothing it, and so on all the strips one by one . (We work carefully and carefully, the backs are straight)
.
Let's get to work. (Children work independently; the teacher prompts and helps the children if necessary).
The rugs turned out wonderful.
Our kitten says that he really liked our rugs , they turned out very beautiful and neat. The kitten will take them and he will have a lot of beautiful striped rugs . Thanks guys.
the rug for ?
• how did we make the rug ?
• did you like making the rug ?
Well done guys, I also liked your striped rugs .
Research creative project “Mustachioed - Striped” in the middle group “We are responsible for those we have tamed” Antoine de Saint-Exupéry. Relevance of the project: Fostering a caring and caring attitude towards animals. Summary of an open GCD on the decorative appliqué “Beautiful rug for mom” in the middle group Goal: making beautiful rugs from strips and squares. Objectives: Educational: teach children to create a harmonious composition from paper. Abstract of the educational activity on artistic and aesthetic development for children of the junior group “Traces of the kitten Murzik”] Goal: Creating a positive emotional background, developing the creative abilities of children. Program content: - Continue formation.
GCD summary for drawing in the first junior group “Rug for a kitten” GCD summary for drawing in the first junior group. Topic: “Rug for a kitten” Purpose: To teach children to draw horizontal lines. Pin.